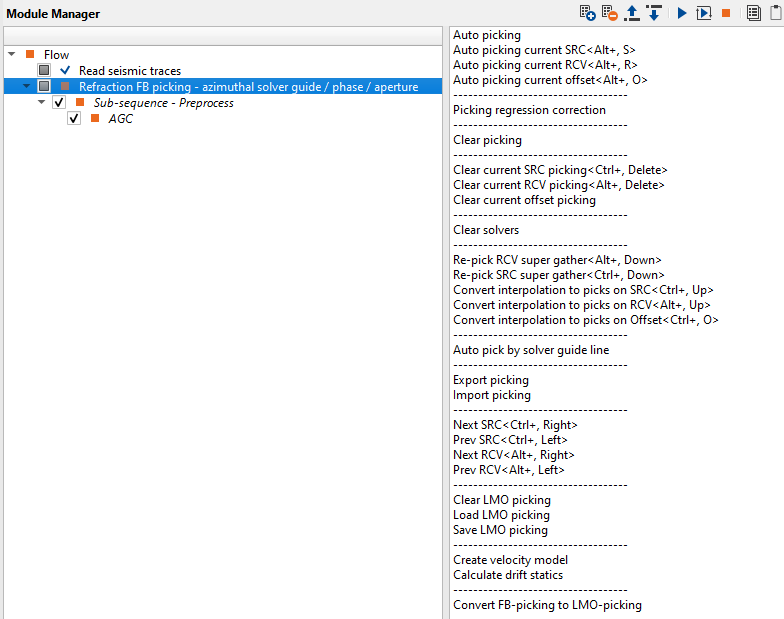
As we discussed earlier, for computing the refraction statics we should pick the first breaks. In the following section we are going to demonstrate how to pick the first breaks in g-Platform processing suite. The module we are going to use it for the first break picking is "Refraction FB picking - Azimuthal solver guide/phase/aperture".
A typical workflow for picking the first break is pretty simple and it should be like this.
In this module, the user can to do automatic & manual first break picking. Also the user has the flexibility to choose a particular offset and pick only on that offsets. If we look more into the parameters of this module, can get more information.
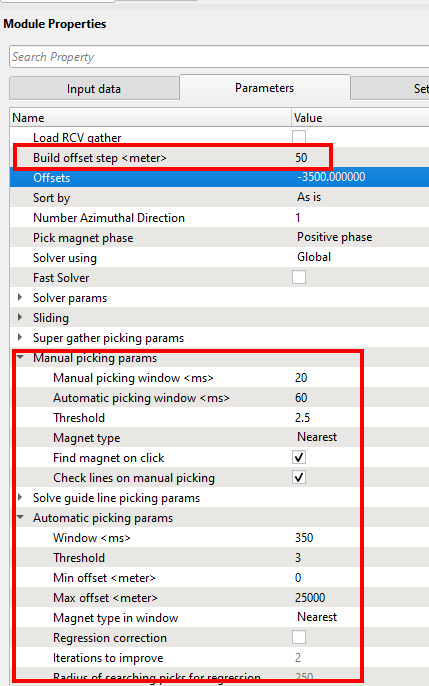
In the above image, the user can define the Build offset step(meter) so it will create the offset planes. The user can to sort the data as per their requirements.
If we look at the Manual picking params & Automatic picking params, the user should adjust the parameters according to the data and start picking FB.
To do the picking, the user should generate the vista items by right clicking on "Refraction FB picking -azimuthal solver guide/phase/aperture" module and select Vista Groups--> All Groups--> In new window. These displays will be appear and they are concatenated under View Manager tab which is on the far left hand side of the g-Navigator window.
Once we launch all the vista items, we see many vista items. Each one got it's own significance. We first look for the Map sources and receiver location map. Here we should able to select any source/receiver/bin. To make any selection there are two ways to do it. Either simply click inside the Map sources and receiver location or click on the control item (4th icon from the right within the Map sources and receivers location). It should look like this.
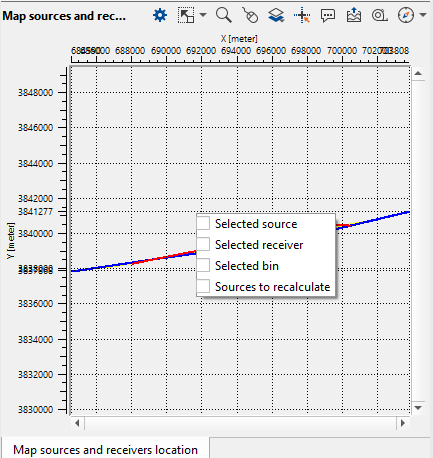
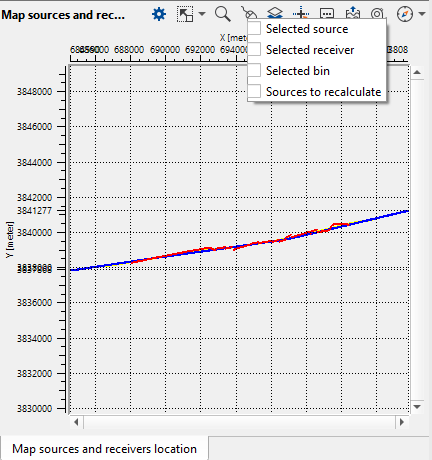
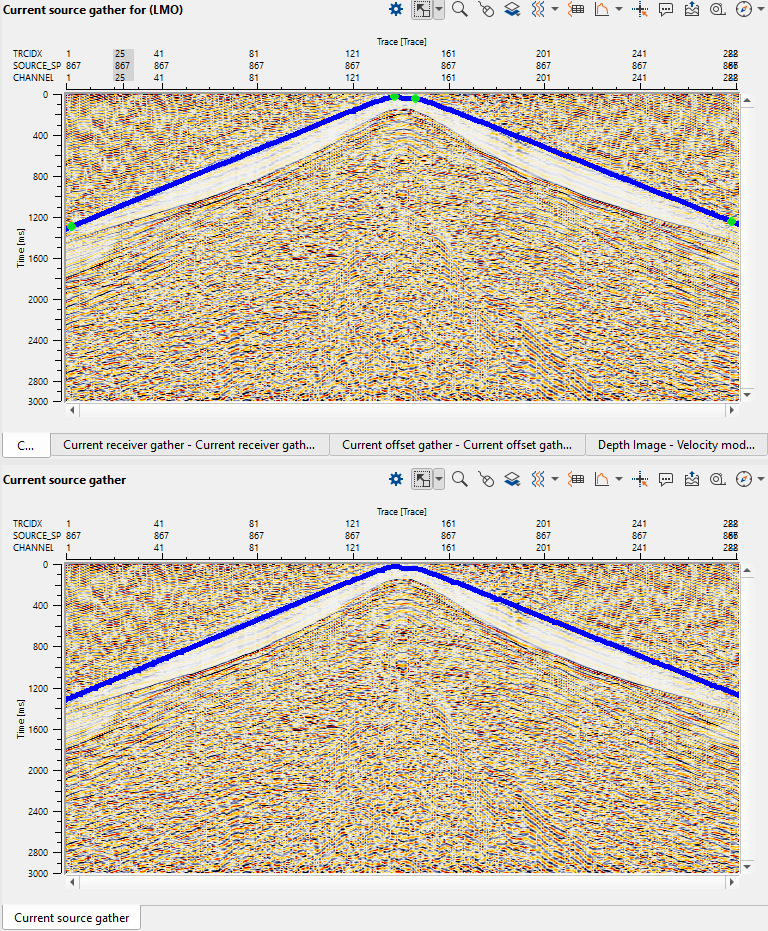
Now the user can select the desired gather from the available options. Here we are going to select "Selected source". Once we make the selection and select randomly on the "Map sources and receivers location" it will display the chosen Source gather. If we observe, it will display not one but two source gathers in "Current source gather" & "Current source gather for (LMO)" windows.
Go to Current source gather for (LMO) and pick the LMO trend. To pick LMO, just click inside the window above the first arrivals. The same LMO trend will be displayed on the Current source gather as well.
Note: The user can pick as many LMO trends as they want through out the line/volume. If the user thinks that one LMO trend is sufficient that is absolutely fine. The picked LMO trend location points are displayed on "Map sources and receiver location" as a green dot (by default color).
The next step is first break picking. Let's do the automatic first break picking.
Automatic first break picking:
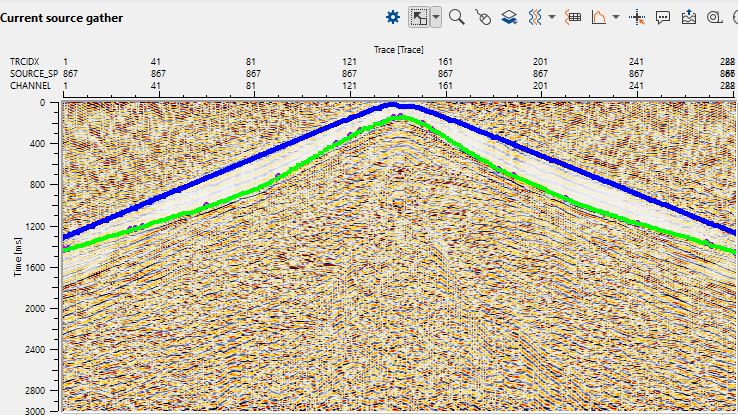
In the parameters tab, adjust the parameters and click on the action item "Auto picking current SRC (Alt+S)". It will display the automatic first break picks on the Current source gather.
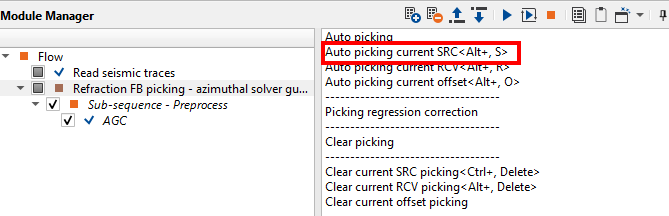
In the above image, we can see excellent automatic first break picks however we can also see some of the picks are outliers. To make it better, either the user can adjust the automatic picking parameters and re-pick it or do the manual picking and adjust the picks. Similarly the user can pick for different source gathers along the line by selecting from the Map sources and receiver location and fine tune the automatic picking parameters. Once the user happy with the LMO trend and automatic picking parameters, they can click "Auto picking" option from the action menu to pick for all the source gathers.
Manual picking:
The ideal case for first break picking is automatic picking unless the data is not easy to pick. In that case, the user can pick the first breaks by manual method. In this case, either the user can adjust the already picked first breaks or start a fresh one.
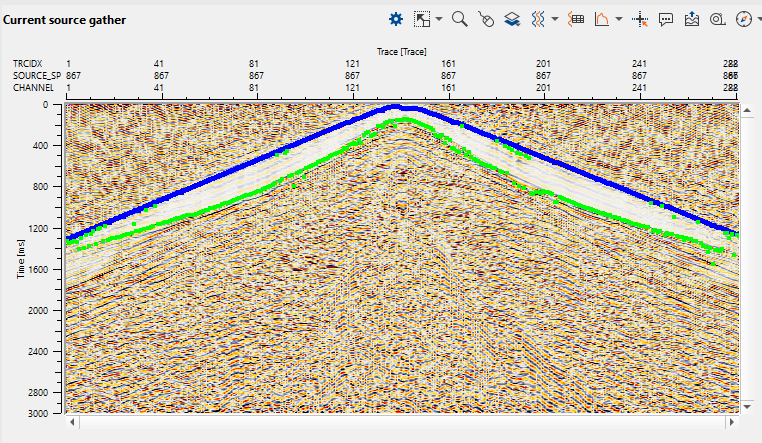
To do manual picking, the user should go to the Current source/receiver/bin gather select the appropriate option. In this case, we are working on Current source gather and select "SRC manual control" option from the Control item ![]() of Current source gather window.
of Current source gather window.
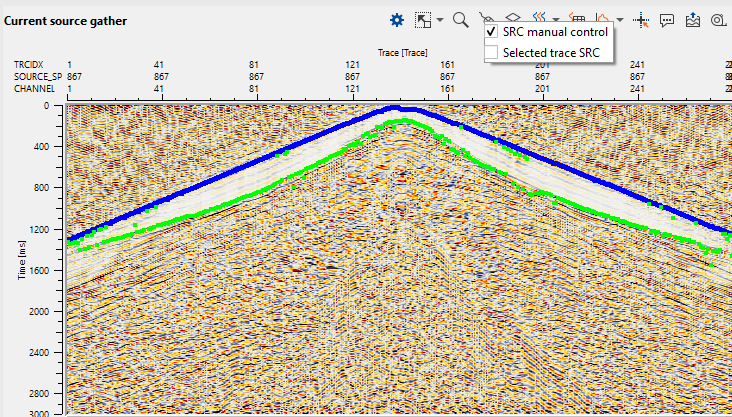
Once we make the selection, now the user can adjust/pick the first breaks by using MB1/LMB. To edit/remove the picks, hold MB3/RMB and drag the mouse up/or down until the user sees a rectangle/square. Whatever the picks falling inside this polygon will be removed.
If we observe, the dots appear on the first arrivals are the manual first break picks.
Similarly, the user can to pick first breaks on source gather, receiver gather, bin gather or offset gather. They can pick on the receiver gather and adjust/edit the picks on the source gather & vice versa. To do that the user should select "Selected trace SRC" in case of the source gather. This source gather will appear on the receiver gather with a green dot and the receiver will appear as a red line on the source gather as shown below.
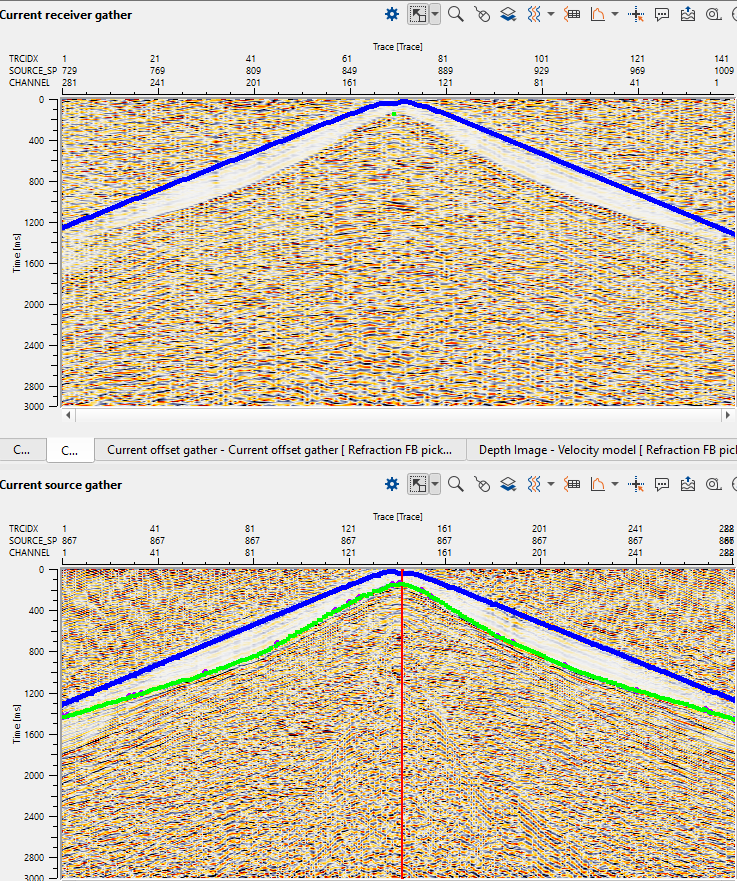
To activate the "Selected trace RCV" the user should click on Control item and choose "Selected trace RCV" from the Current receiver gather. This way the user can go back & forth to QC the source and receiver picks and adjust them accordingly.
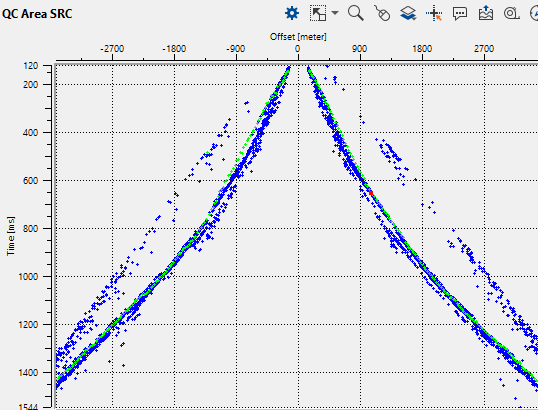
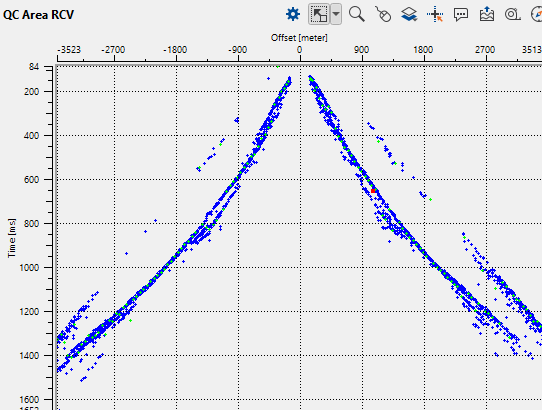
QCíng first break picking:
After all the source/receiver gathers are picked, it's time to QC the picks. For each and every source/receiver gather, we have QC area SRC & QC area RCV maps. These maps displays the first break picks of their respective gathers. During the parameter testing, when the user picks a single source gather, QC area SRC map displays only that particular source gather picks similarly the QC area RCV map for the selected receiver gather only.
To QC the entire line/volume the user should adjust the QC window parameters inside the Parameters tab. There are two parameters in this QC window.
QC delete line width (ms) Provide the line width to delete the outliers inside or outside the user drawn line pattern.
QC windows aperture (meter) Provide the at what aperture the QC window should display the source/receiver gathers. In simple sense, if the source gather is 25m interval and the user defined this value as 500 meters then the QC area SRC map will display 500/25 = 20 shot gather's first break picks in a single display. If the aperture increases it will display more shot gathers and it's first break picks. The display will be more dense. Similarly to the QC area RCV.
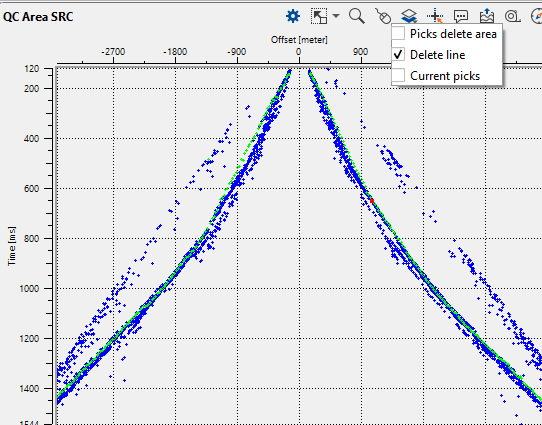
To remove any picks:
•Click on Control item of either QC area SRC or QC area RCV and choose "Delete line".
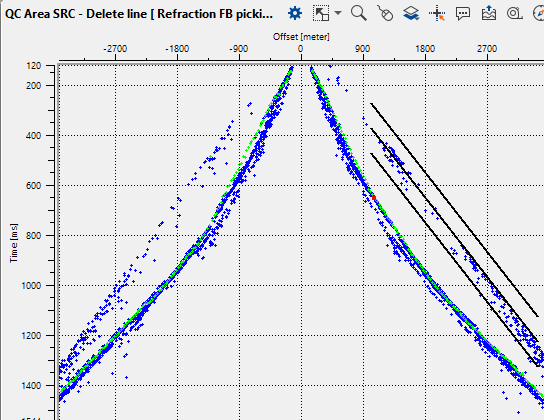
•To draw line, hold RMB/MB3 and drag the mouse either up or down until you see 3 parallel lines.
•Once the user release the mouse button, it will come up with three options (Remove inside, Remove outside, Cancel)
•Chose the desired option. In this case we are choosing Remove inside since we would like to remove the outliers inside the delete line.
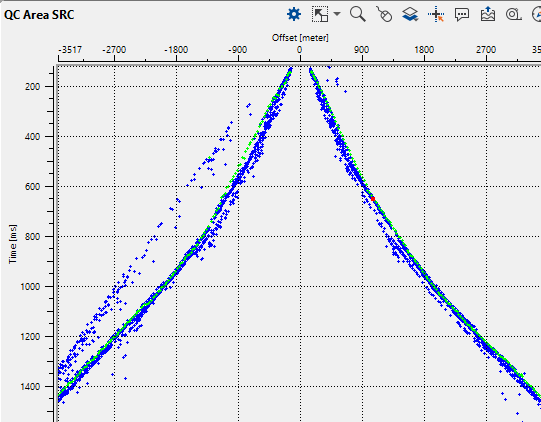
As soon as we select the option, all the picks inside the delete line will be removed from the map as well as from the respective source and receiver gathers.

Likewise, the user can QC the entire line by going through different source/receiver gathers with an appropriate QC window aperture size to make it faster and more efficient.