Picking/Applying Mute
![]()
![]()
Mute is applied on seismic data to remove the unwanted data like the data above first arrivals, far offset stretch due to NMO etc. Mute operations improves the signal to noise ratio. There are different ways to pick the mute. Front end mute, Top mute, Inner mute, Surgical mute etc. Mute is applied automatically or manually by picking the mute points.
![]()
![]()
Input DataItem
Input gather - connect/reference to the gather. On this gather, the user picks a mute.
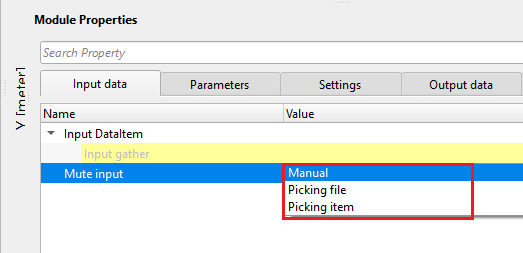
Mute input { Manual, Picking file, Picking item } - select the input mute type from the drop down menu. If Input mute is Manual, the user should pick the mute manually. If not, then the user should provide the input mute file or mute item as shown below.
MuteInputType - Manul -
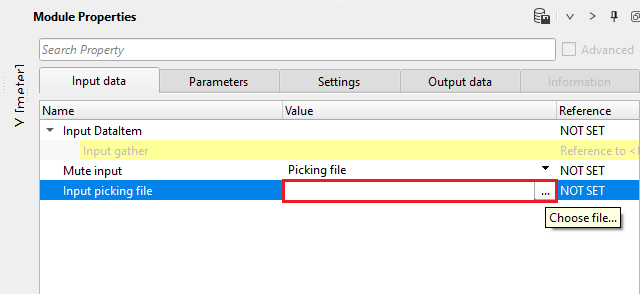
MuteInputType - Picking file
Input picking file - pick the offset and time pairs to define the mute line on the Input gather Vista
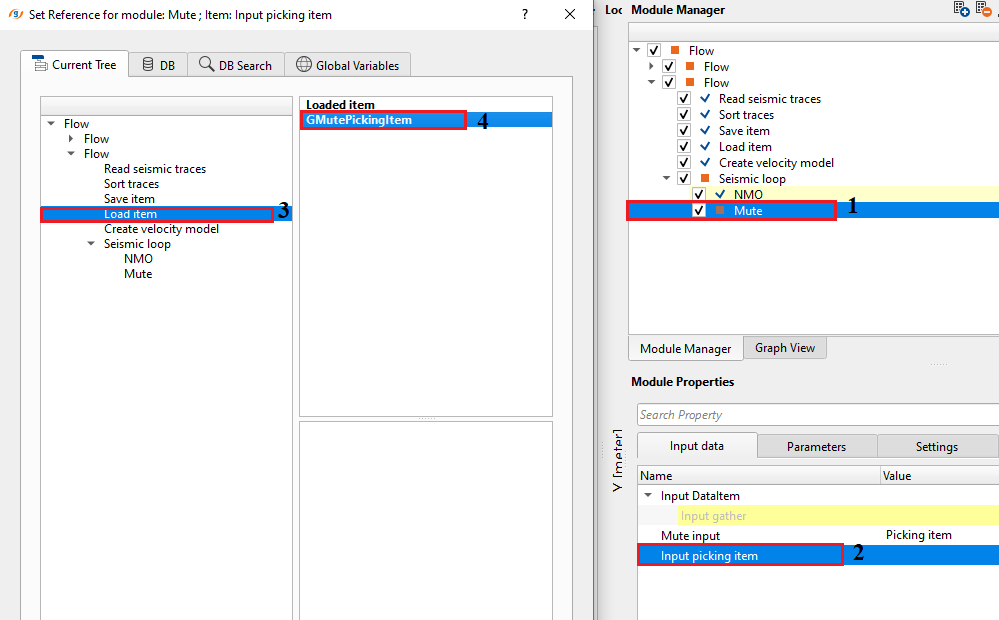
MuteInputType - Picking item
Input picking item - link to mute picking that can be taken from another mute module in the workflow. More details about how to save and load mute item is explained in the Examples section.
![]()
![]()
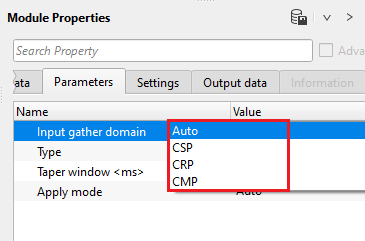
Input gather domain { Auto, CSP, CRP, CMP } - select the type of input data from the drop down menu.
Auto - it automatically detects the input data
CSP - choose the input data domain if it is Common Shot Point
CRP - choose the input data domain if it is Common Receiver Point
CMP - choose the input data domain if it is Common Mid Point
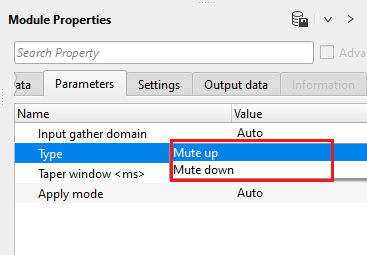
Type { Mute up, Mute down } - specify the type of mute to be picked from the drop down menu.
Mute up - all of the data above the picked mute line will be zeroed
Mute down - all of the data below the picked mute line will be zeroed
Taper window - length in milliseconds of the mute taper Default: 0
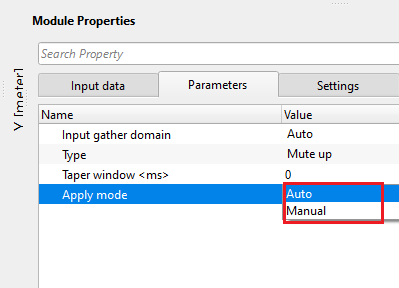
Apply mode { Auto, Manual } -
ApplyMode - Auto - Automatically applies the mute
ApplyMode - Manual - Manual, by default. User should pick the mute manually and choose the options from the drop down menu.
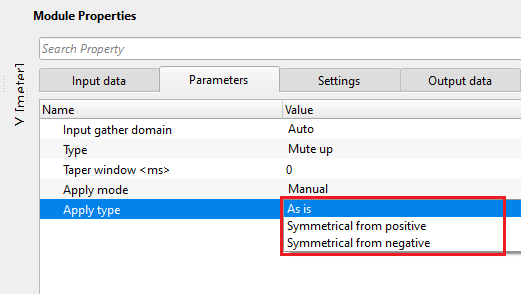
Apply type { As is, Symmetrical from positive, Symmetrical from negative } -
As is - as per the user defined
Symmetrical from positive - applies the mute in symmetry from the positive offset
Symmetrical from negative - applies the mute in symmetry from the negative offset
Explained more in detail in the Examples section
![]()
![]()
Auto-connection - By default, TRUE(Checked).It will automatically connects to the next module. To avoid auto-connect, the user should uncheck this option.
Bad data values option { Fix, Notify, Continue } - This is applicable whenever there is a bad value or NaN (Not a Number) in the data. By default, Notify. While testing, it is good to opt as Notify option. Once we understand the root cause of it, the user can either choose the option Fix or Continue. In this way, the job won't stop/fail during the production.
Notify - It will notify the issue if there are any bad values or NaN. This is halt the workflow execution.
Fix - It will fix the bad values and continue executing the workflow.
Continue - This option will continue the execution of the workflow however if there are any bad values or NaN, it won't fix it.
Calculate difference - This option creates the difference display gather between input and output gathers. By default Unchecked. To create a difference, check the option.
Number of threads - One less than total no of nodes/threads to execute a job in multi-thread mode. Limit number of threads on main machine.
Skip - By default, FALSE(Unchecked). This option helps to bypass the module from the workflow.
![]()
![]()
Output DataItem
Output gather - generates the output gather with user picked mute applied.
Gather of difference - generates the difference gather between the input gather vs output muted gather
Output picking item - generates the mute picking as an item. The user can save this as an item by "Save item" module. Later this mute can be used by adding ""Load item" module.
Mute table - generates the Time, Offset, X, Y, Inline, Crossline (CDP for 2D) information in the mute table. The user can export this mute table by using "Export table" module.
There is no information available for this module so the user can ignore it.
![]()
![]()
In this example workflow, manual mute picking is described.
How to pick Mute?
•Launch Vista items of Mute module. Input, Output, Difference, Mute table & Location map vista items should appear.
•Go to Input Gather and select Control item![]() . Check "Manual" is ticked.
. Check "Manual" is ticked.
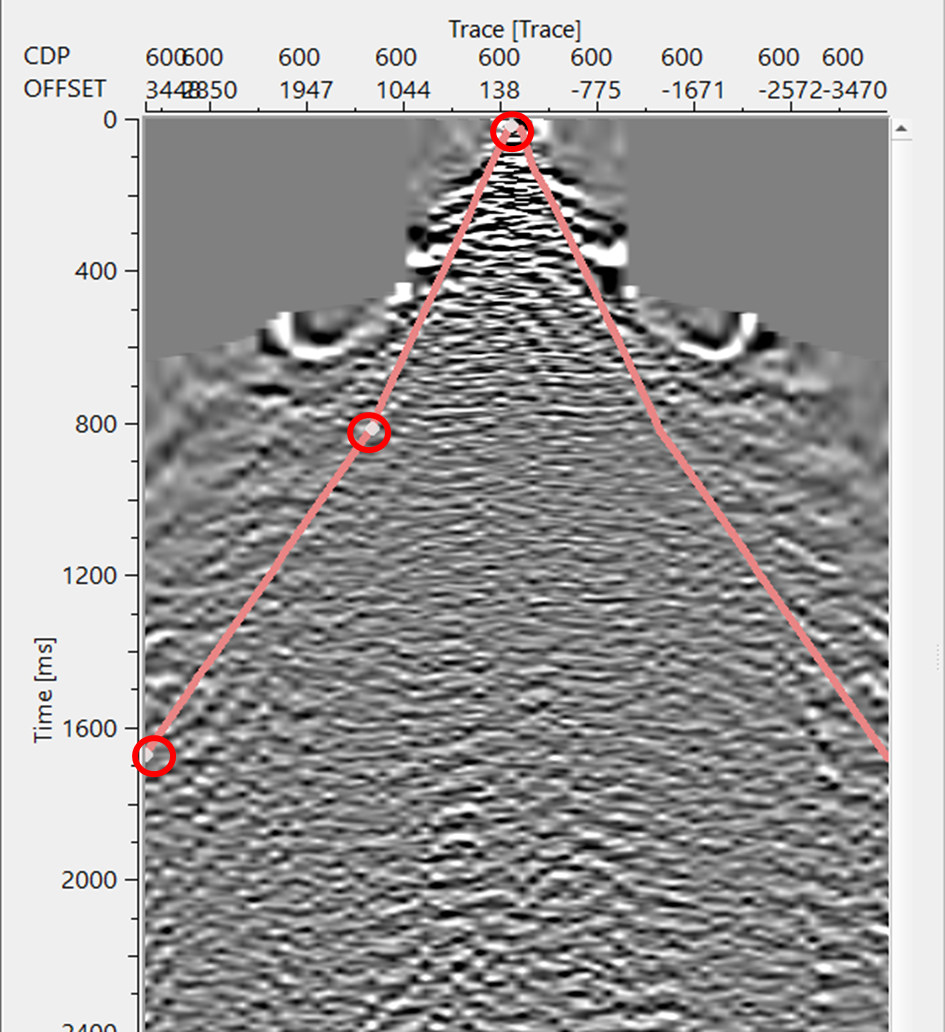
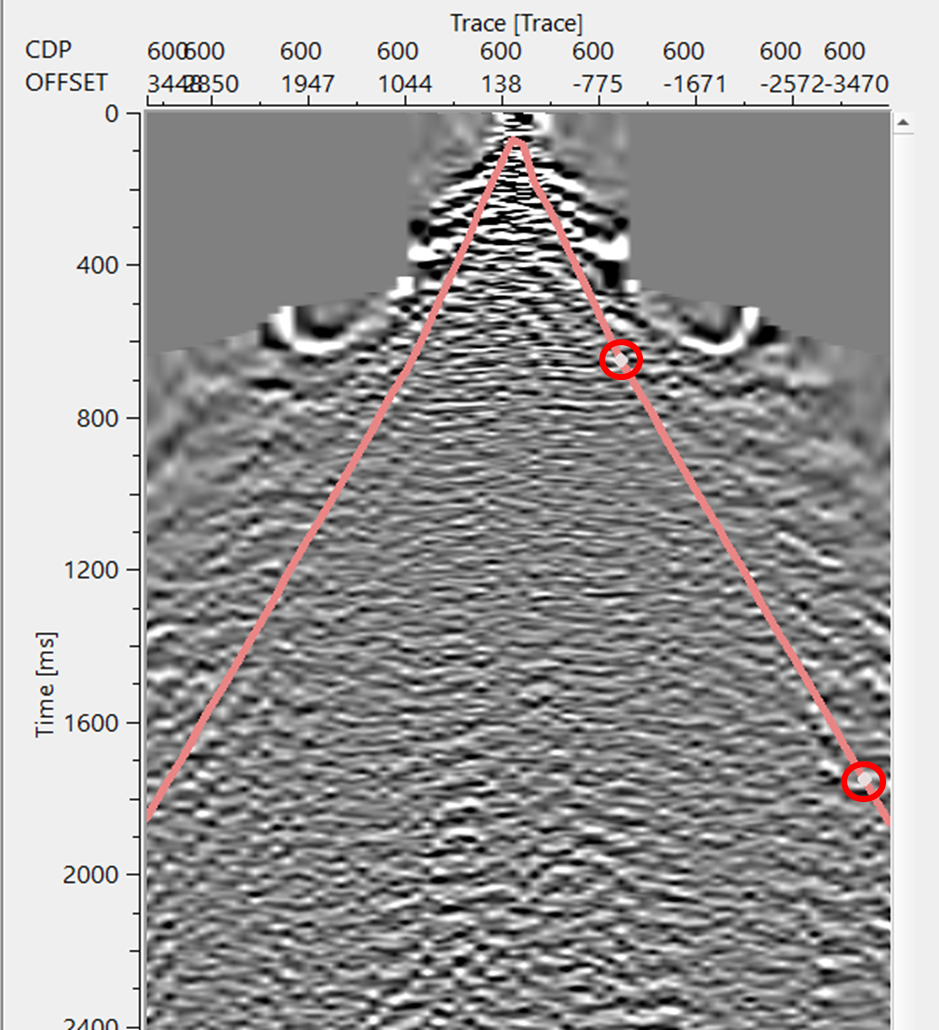
•With MB1 or LMB, click on Input Gather and starting picking the mute. White/Grey dot (circled in the image) appears along with a line.
•Pick the mute on both positive and negative offsets.
•All the picked mute points will appear on the Mute table. Also, mute picked point(s) appear on the Location map (Green dot circled). If the user picks a single mute function, there will be a single mute pick on the location map however if the user picks multiple mute functions at different places along the sail line, there will be more mute picks on the location map. The mute picks will be interpolated between the points.
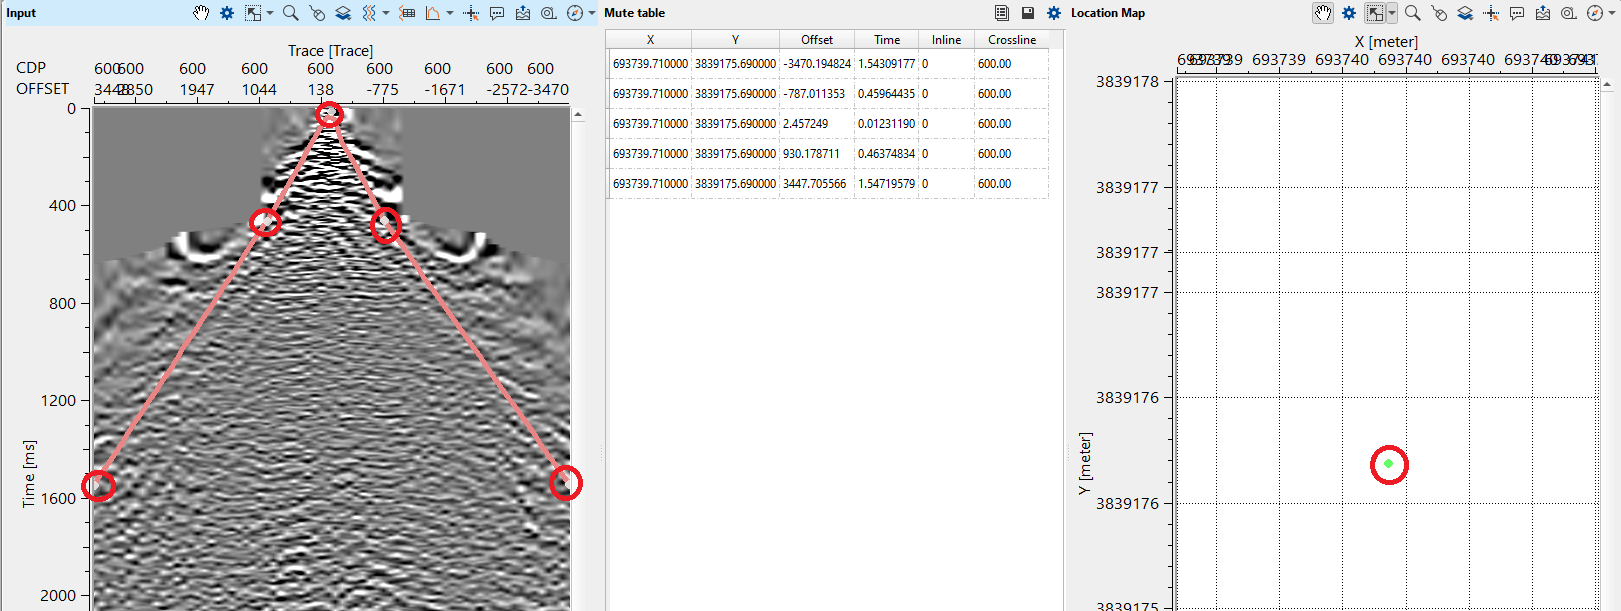
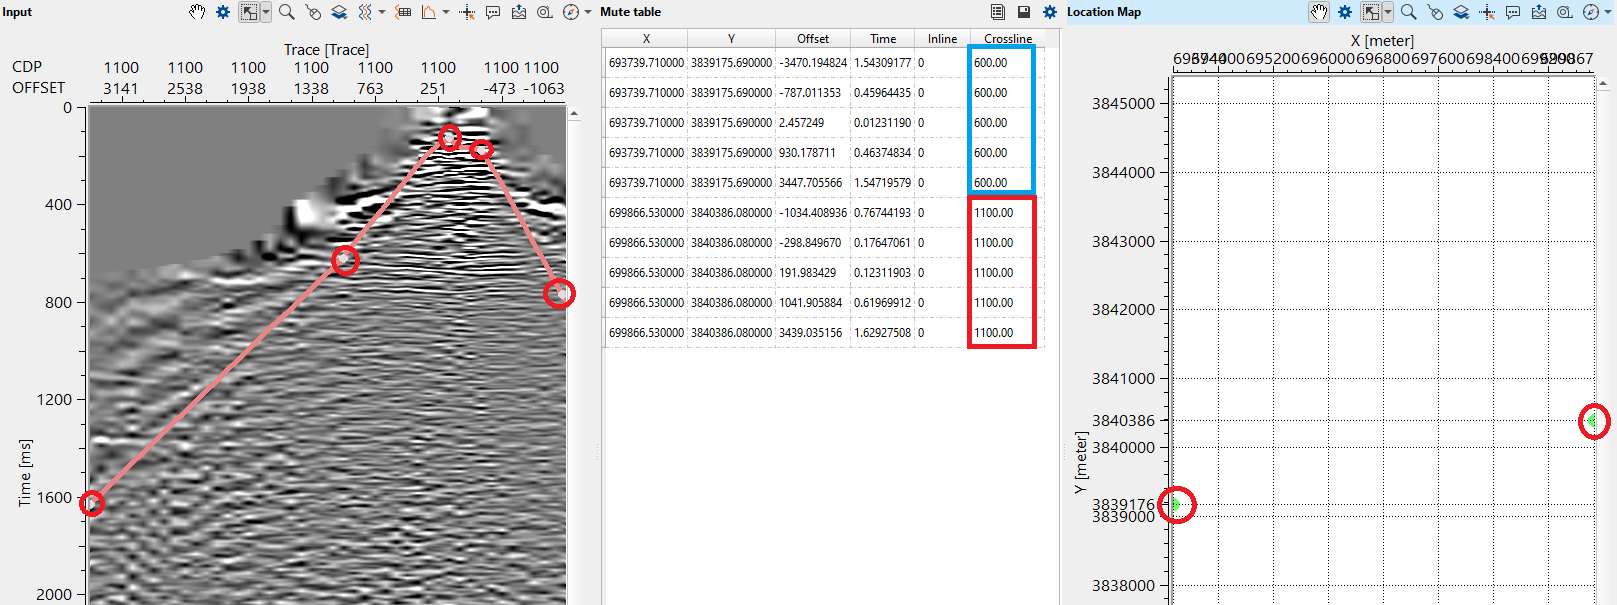
In the Mute table, we can see X, Y, Offset, Time, Inline and Cross line (CDP for 2D). In this example, we picked the mute at CDP 600. If the user wants to pick the mute at different CDP, go to the desired CDP and start picking the mute. Keep in mind that the existing mute will appear at the new CDP. If the user wants to adjust the existing mute function, it can be done also otherwise starting picking the mute. Now, we observe two green dots in the location map. These are the two mute functions picked. Likewise, the user can pick additional mute functions as per the requirement of the input data.
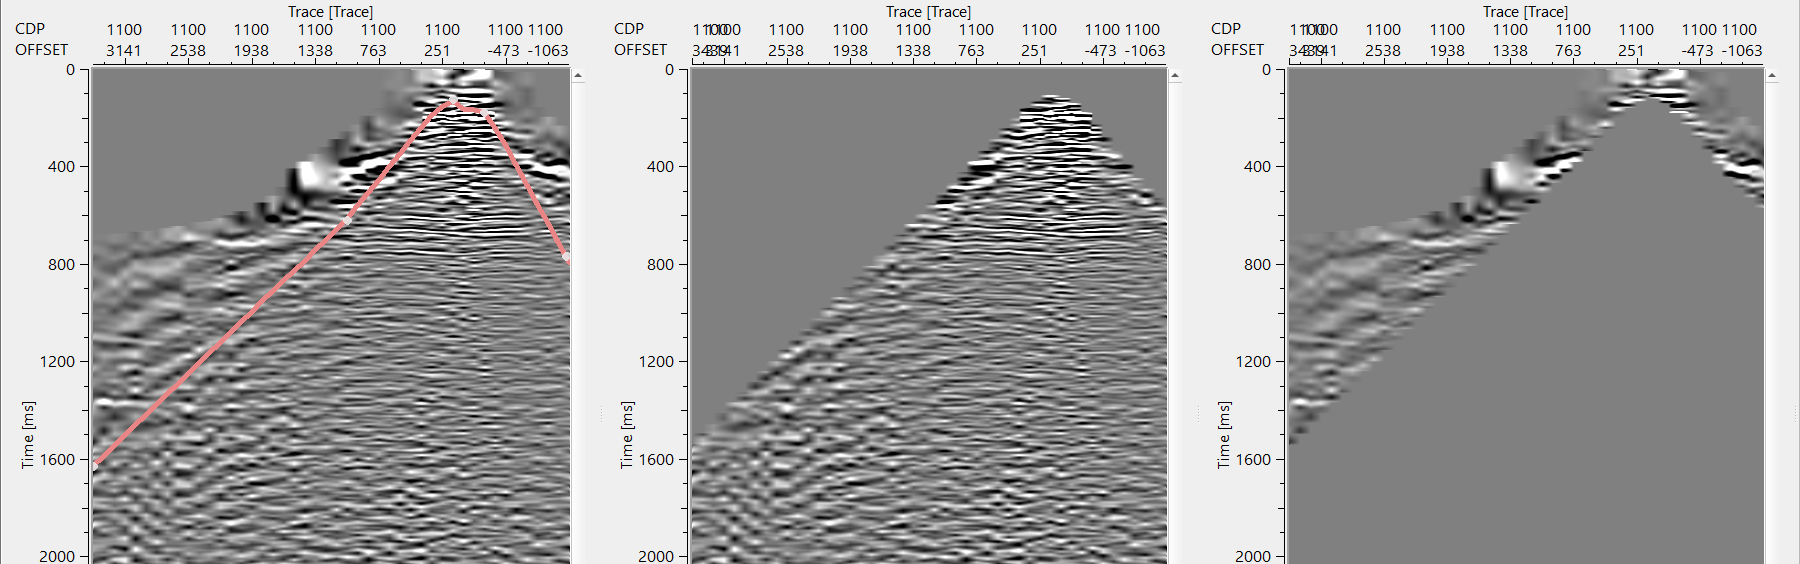
Execute the module to get the output gather after the picked mute function.
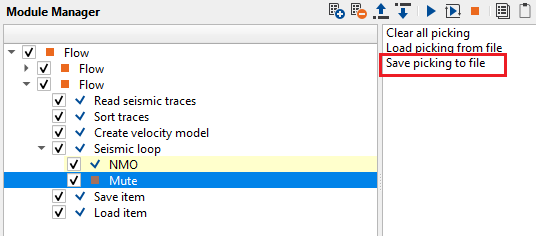
How to save the picked mute function?
Go to Action items, select "Save picking to file" option. Provide a file name. It is saved with an extension of ".corr"
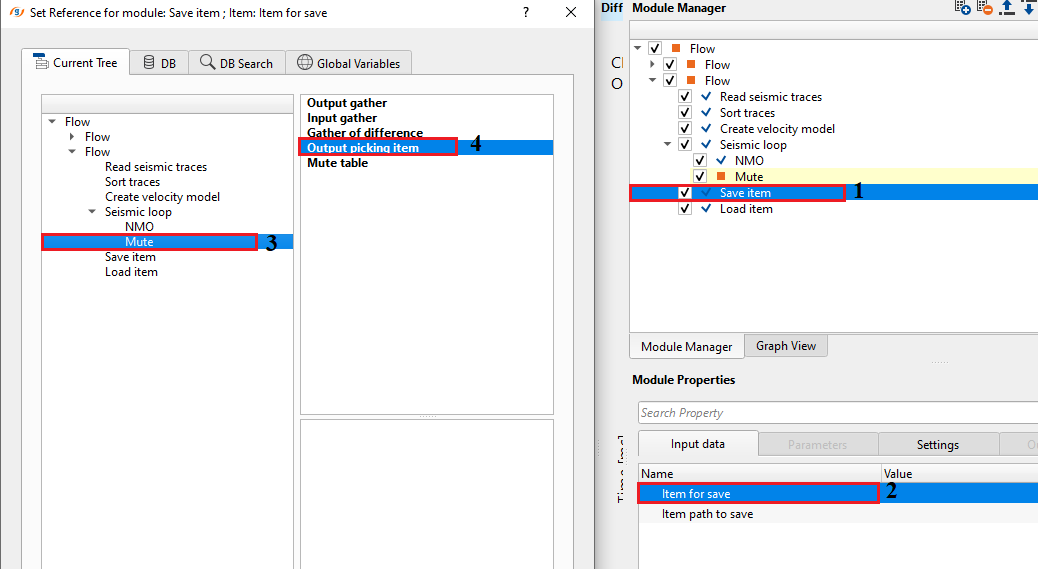
Save mute function as an Item : For this option, the user should add a module "Save item".
Connect Item for save to "Mute picking item" of the Mute module
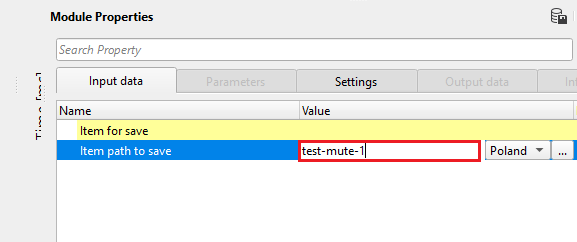
Give a name against "Item path to save"
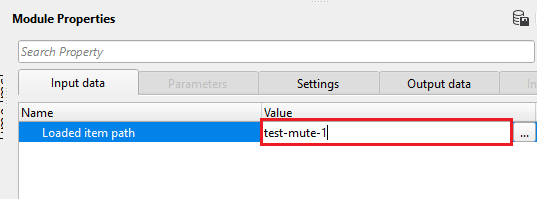
Load mute function as an Item: For this option, the user should add a module "Load item"
Go to Loaded item path in the Input data tab and select the previously saved mute item from the database.
What is Mute Apply type As is, Symmetrical from Positive & Symmetrical from Negative ?
When the mute Apply mode is Manual & Apply type is As is, it mutes the data as per the user picked mute.

Apply type as "Symmetrical from positive", it applies the mute symmetrically from the positive offsets. As we can see, the mute points (circled) are on the positive offset side.
Apply type as "Symmetrical from negative", it applies the mute symmetrically from the negative offsets. As we can see, the mute points (circled) are on the negative offset side.
![]()
![]()
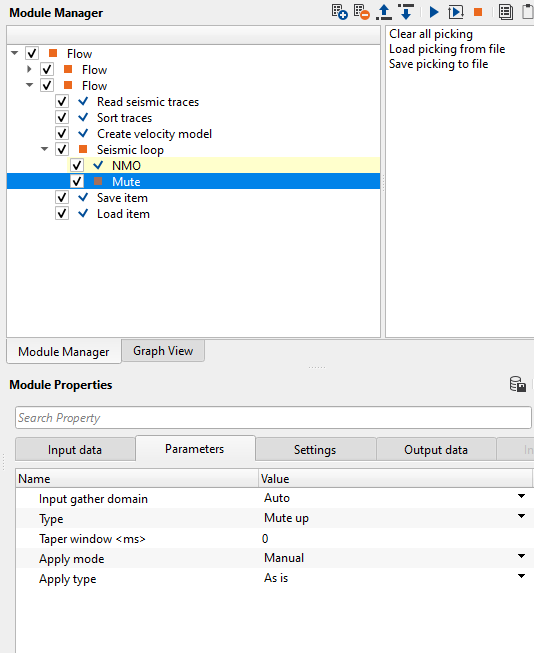
Clear all picking - clears the user picked mutes.
Load picking from file - allows the user to import the previous mute picks file.
Save picking to file - allows the user to save the picked mutes as a file.
![]()
![]()
YouTube video lesson, click here to open [VIDEO IN PROCESS...]
![]()
![]()
Yilmaz. O., 1987, Seismic data processing: Society of Exploration Geophysicist
 * * * If you have any questions, please send an e-mail to: support@geomage.com * * *
![]()