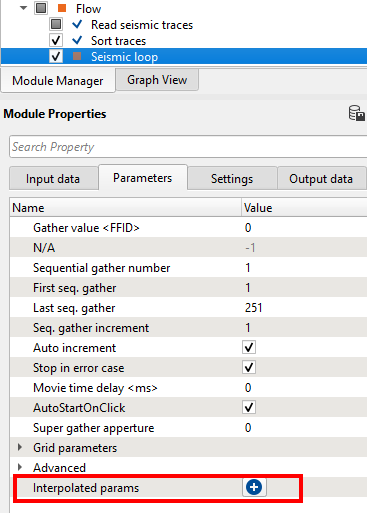
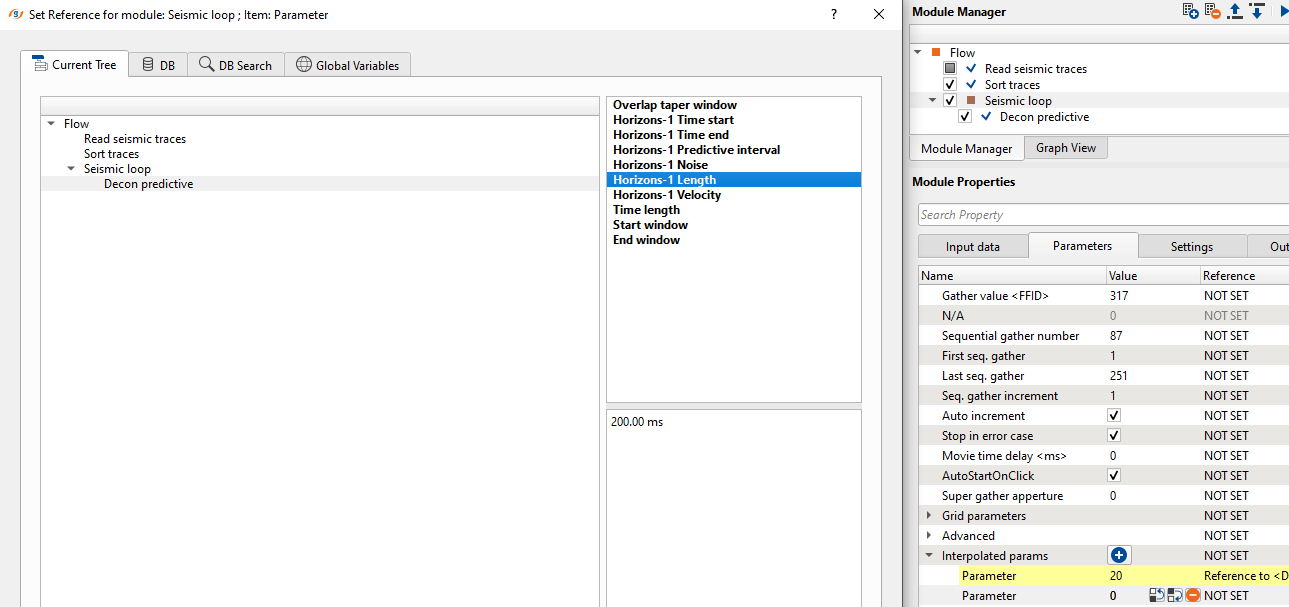
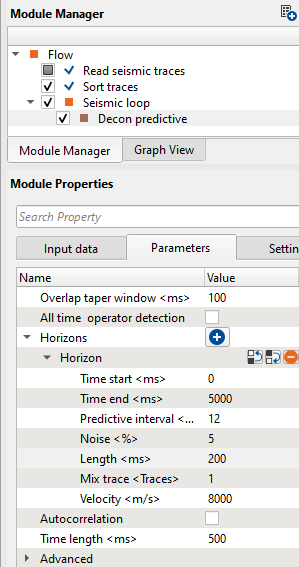
There is another important option available in Seismic Loop i.e. Interpolated params. As shown in the image we can see the Interpolated params at eh bottom of the Parameters tab. Whenever user wants to apply specific process like band pass filter/deconvolution etc to a particular FFID/Shot/CMP range then they can use this option to interpolate the respective parameters. Let us explain how it works.
Within the seismic loop, let’s say user wants to apply deconvolution only to certain part of the line. In this case, they have to select the starting and ending points of the line and accordingly provide the parameters as shown below. To select these points, user should add vista items of the seismic loop. In addition to that we need to add an additional vista item i.e. Table Fixed points. Initially it will be blank and nothing visible. As the user added the Decon predictive module inside the seismic loop and go to Seismic loop parameters tab and click on the ![]() button. It will add a row named “Parameter”. Here user has to select the first location on the location map. Now double click on Parameter of Interpolated params and it will open the reference window and assign the appropriate item. In this case, we selected the as parameter.
button. It will add a row named “Parameter”. Here user has to select the first location on the location map. Now double click on Parameter of Interpolated params and it will open the reference window and assign the appropriate item. In this case, we selected the as parameter.
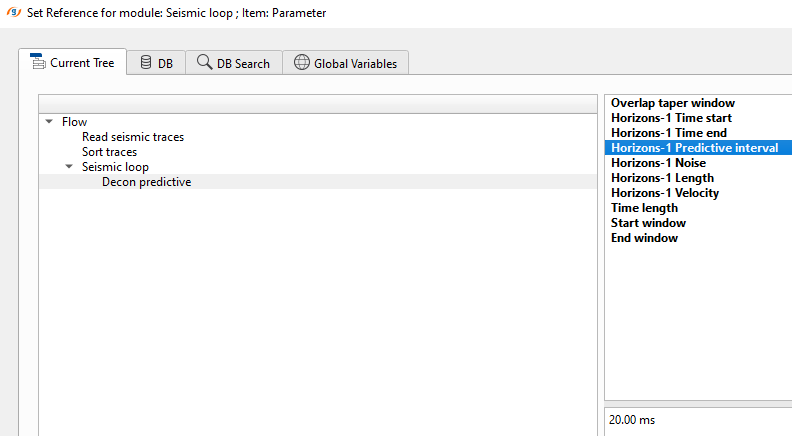
Once we click OK, then it will make the reference connection and display the first interpolation point on the Table Fixed Points as shown below.
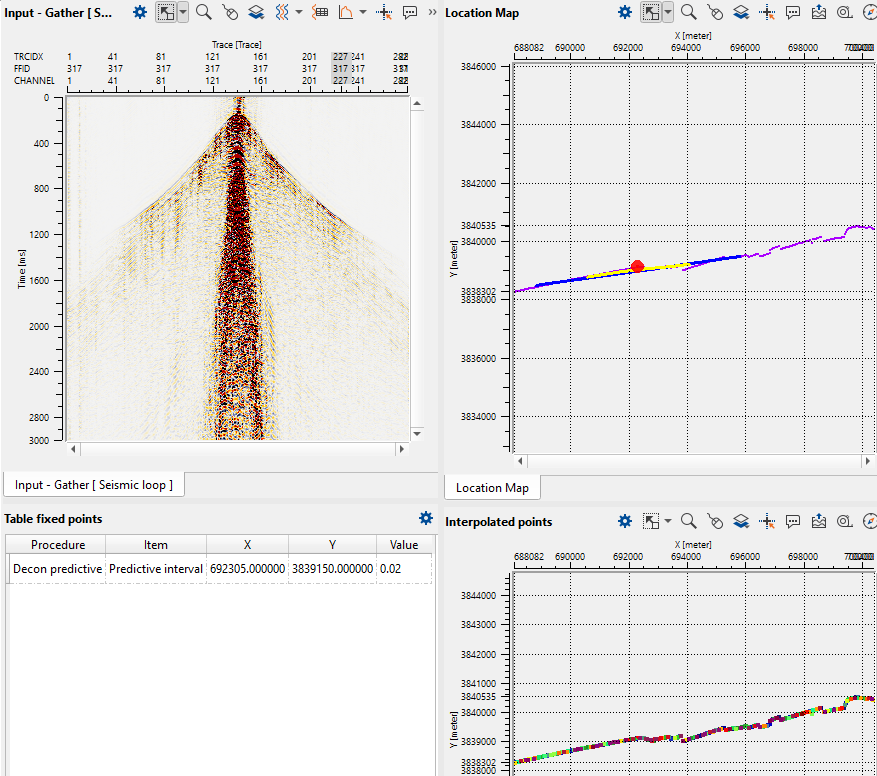
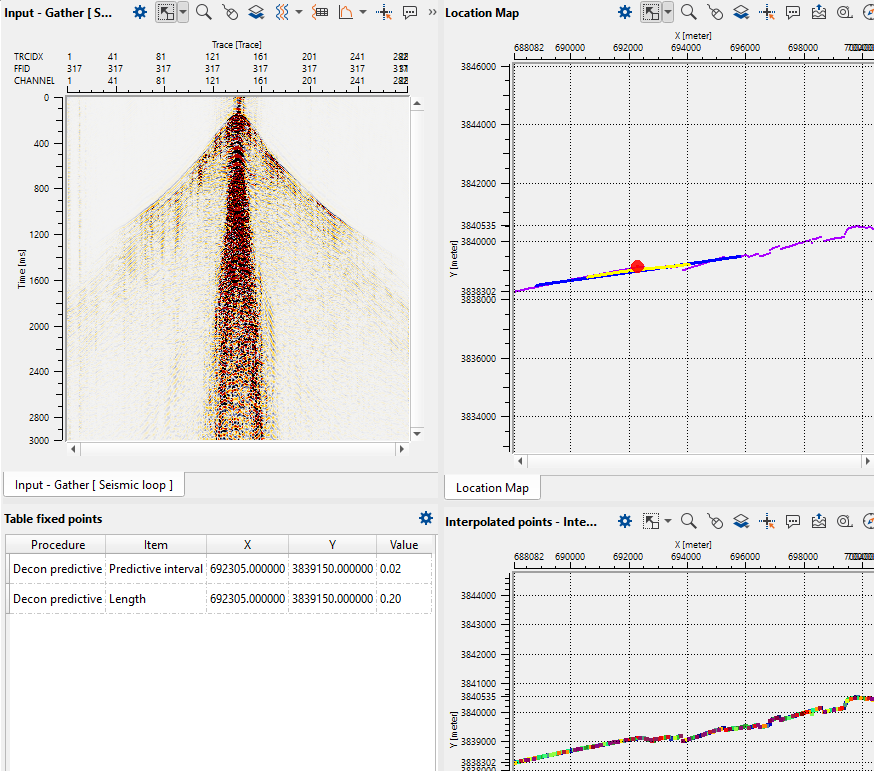
Now we can see that the interpolated points map is displaying the interpolation points on the middle of the image. On the location map where we select a point (red dot). On the far left hand side down, we have the Fixed points table where it added the information like procedure, item (predictive interval), x, y and value fields. Likewise, we have to add predictive length also. For that, we have to click the + button again on the Interpolated params and add another Parameter row to the existing one.
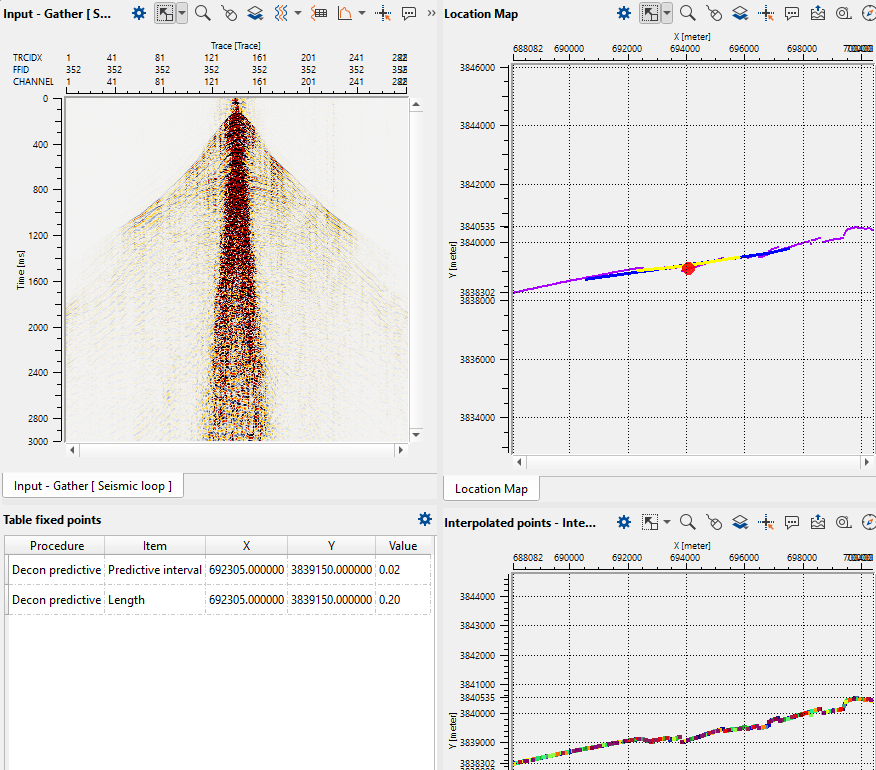
After this, we've to choose the other location point to do the interpolation between these two selected points as shown below.
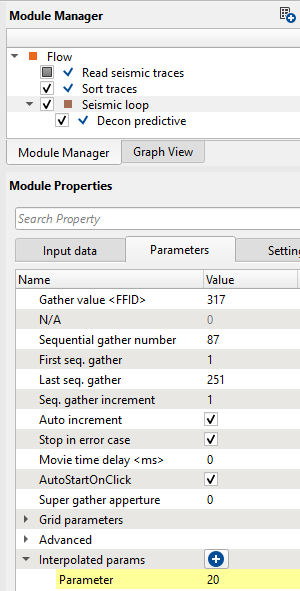
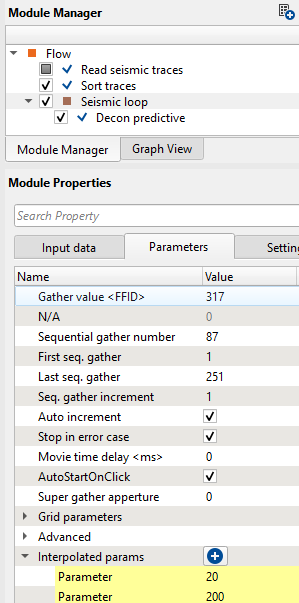
To do the interpolation, we need to change the Decon predictive parameters to new values at this new location.
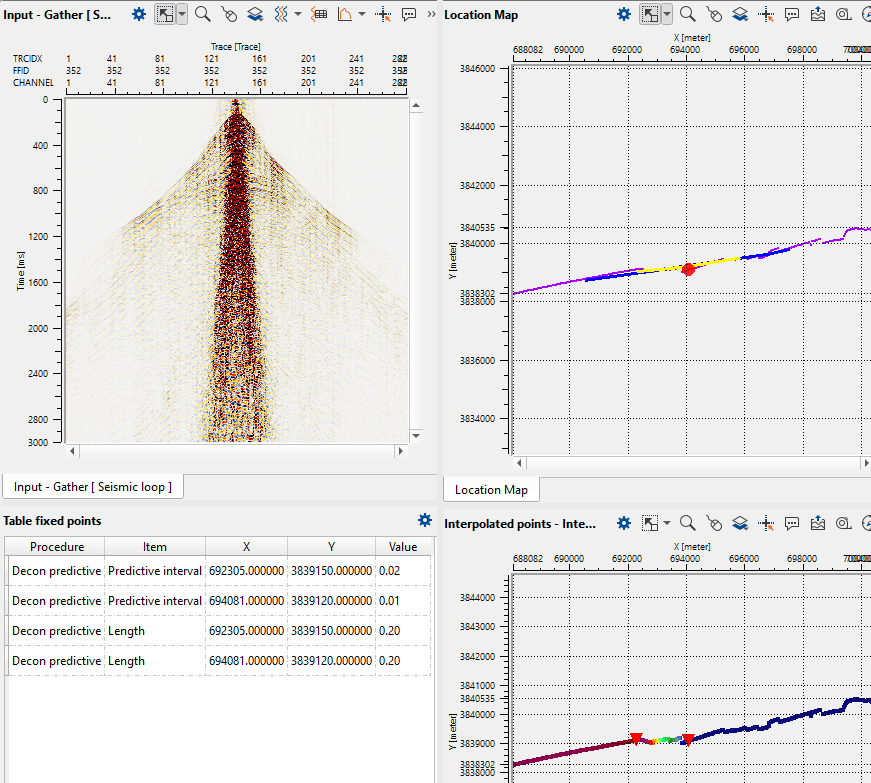
If we observe the above interpolation map, it will interpolate the Predictive interval values of 20 & 12 between these two triangles only. This way we can to interpolate any parameters using Seismic Loop.