Amplitude Correction by reference (etalon/standard/model) seismic
![]()
![]()
Seismic data distortions happen during the seismic data acquisition. This is due to the source energy dissipation, source & receiver variations, geometrical spreading, near surface effects etc. Due to this, seismic amplitudes vary in degree as the shallow data may have higher amplitudes and the deeper events/data has less amplitude. The variation in amplitudes is quite contrast. Higher frequencies attenuate faster than the lower frequencies due to seismic resolution get impacted and the it is very difficult to interpret the data. To compensate the loss of energy, we often perform amplitude correction methods.
This module performs amplitude correction for input seismic data using another seismic data as etalon (reference/standard).Output seismic traces will have amplitudes similar to etalon. Input seismic data and etalon should have the same number of traces and samples. One input data with amplitude distortions and another seismic data (model/etalon/reference) with correct amplitudes are taken and do the correction by adjusting the user defined time window and trace parameters to minimize the mismatch between input and model gather. This module calculates the amplitude factors by comparing the input with model gather and these amplitude factors are applied on the input data to look similar to the model/reference/etalon gather.
![]()
![]()
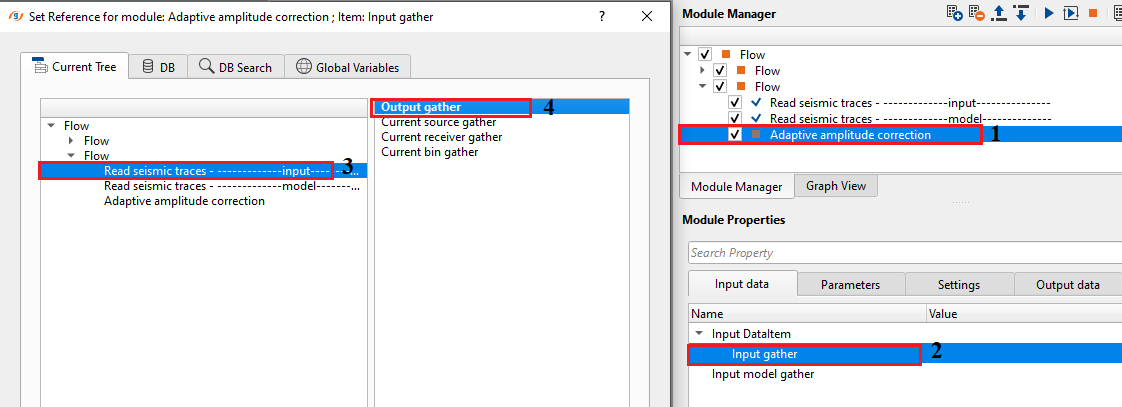
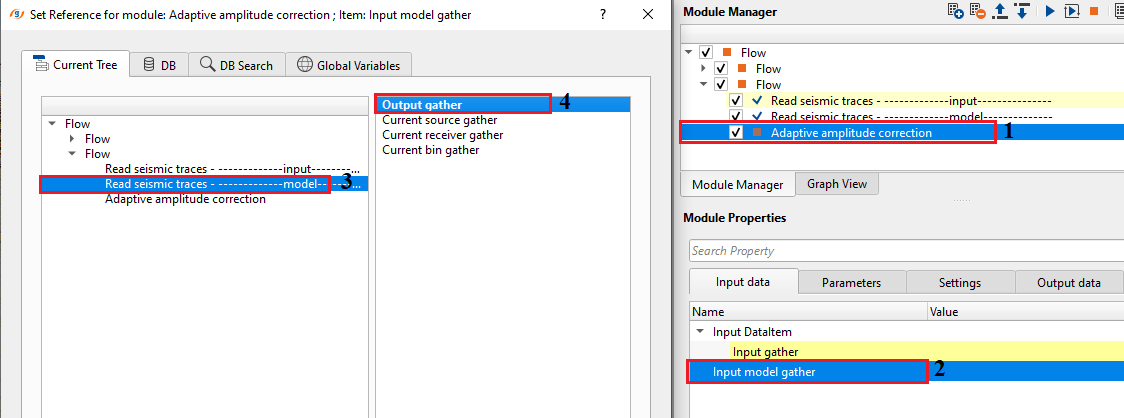
Input DataItem
Input gather - it should be the gather which needs to amplitude corrected/compensated. Connect/reference to the Output gather.
Input model gather - this is the reference/model/etalon gather which has correct amplitudes. Connect/reference to the Output gather.
![]()
![]()
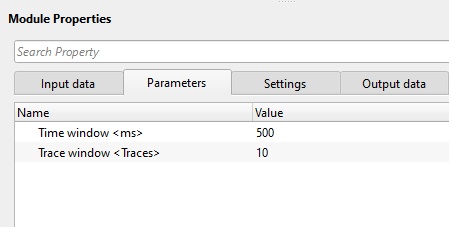
Time window - etalon time window for amplitude estimation. This time window estimated amplitudes used for input seismic data amplitudes correction
Trace window - etalon trace window for amplitude estimation. This trace window estimated amplitudes used for input seismic data amplitudes correction
![]()
![]()
Auto-connection - By default, TRUE(Checked).It will automatically connects to the next module. To avoid auto-connect, the user should uncheck this option.
Bad data values option { Fix, Notify, Continue } - This is applicable whenever there is a bad value or NaN (Not a Number) in the data.By default, Notify. While testing, it is good to opt as Notify option. Once we understand the root cause of it,the user can either choose the option Fix or Continue. In this way, the job won't stop/fail during the production.
Notify - It will notify the issue if there are any bad values or NaN. This is halt the workflow execution.
Fix - It will fix the bad values and continue executing the workflow.
Continue - This option will continue the execution of the workflow however if there are any bad values or NaN, it won't fix it.
Calculate difference - This option creates the difference display gather between input and output gathers. By default Unchecked. To create a difference, check the option.
Number of threads - One less than total no of nodes/threads to execute a job in multi-thread mode. Limit number of threads on main machine.
Skip - By default, FALSE(Unchecked). This option helps to bypass the module from the workflow.
![]()
![]()
Output DataItem
Output gather - generates the output gather with corrected amplitudes as a vector. This can be used as a reference/connect to any other module or can be saved using Save seismic by gather or any module.
Gather of difference - generates the difference gather between input and model gather.
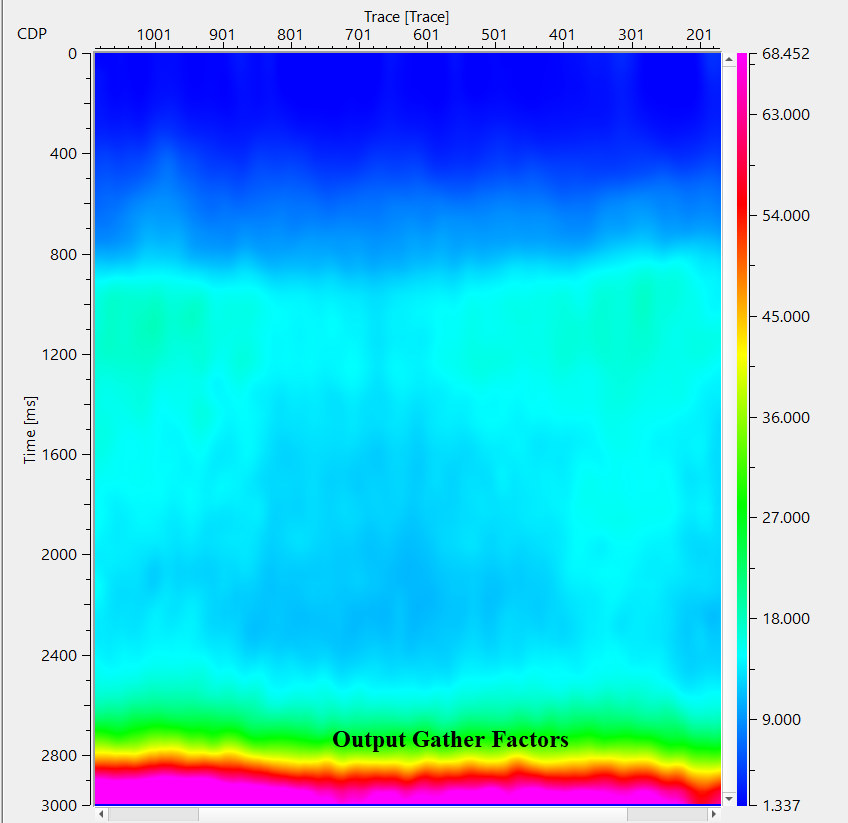
Output gather factor - generates the amplitude factors which are calculated using the model gather against the input gather. These amplitude factors are applied to the input gather to compensate the energy loss/amplitude distortions.
There is no information available for this module so the user can ignore it.
![]()
![]()
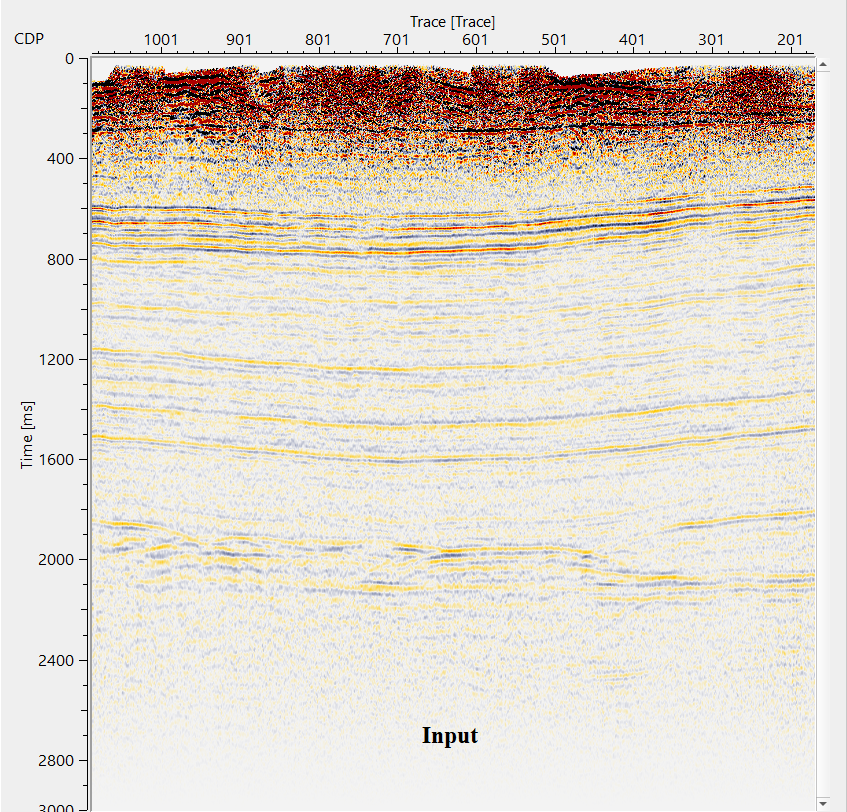
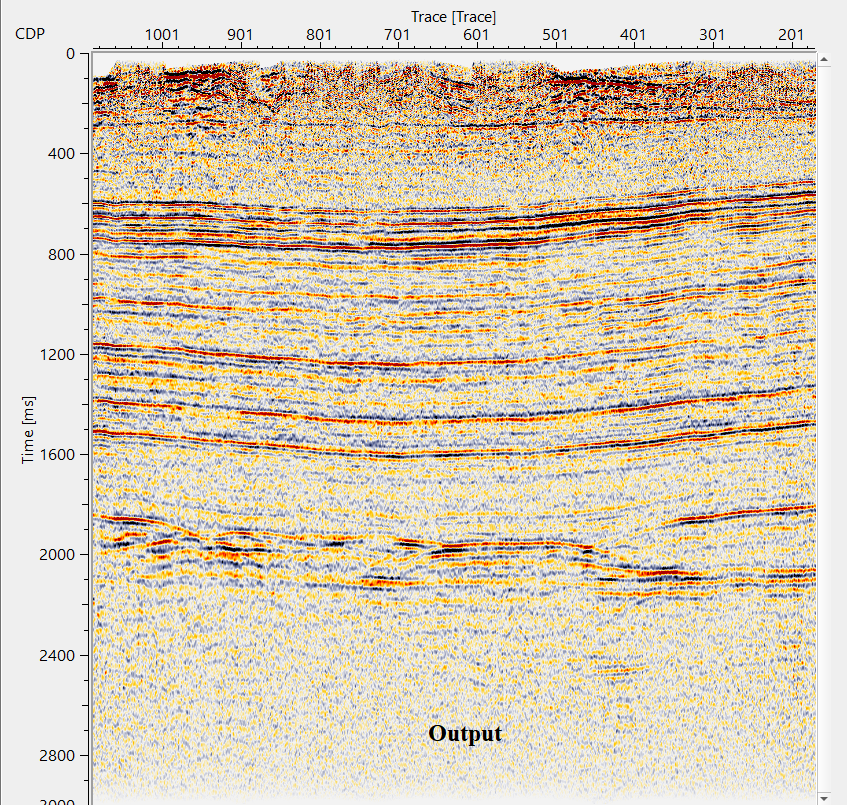
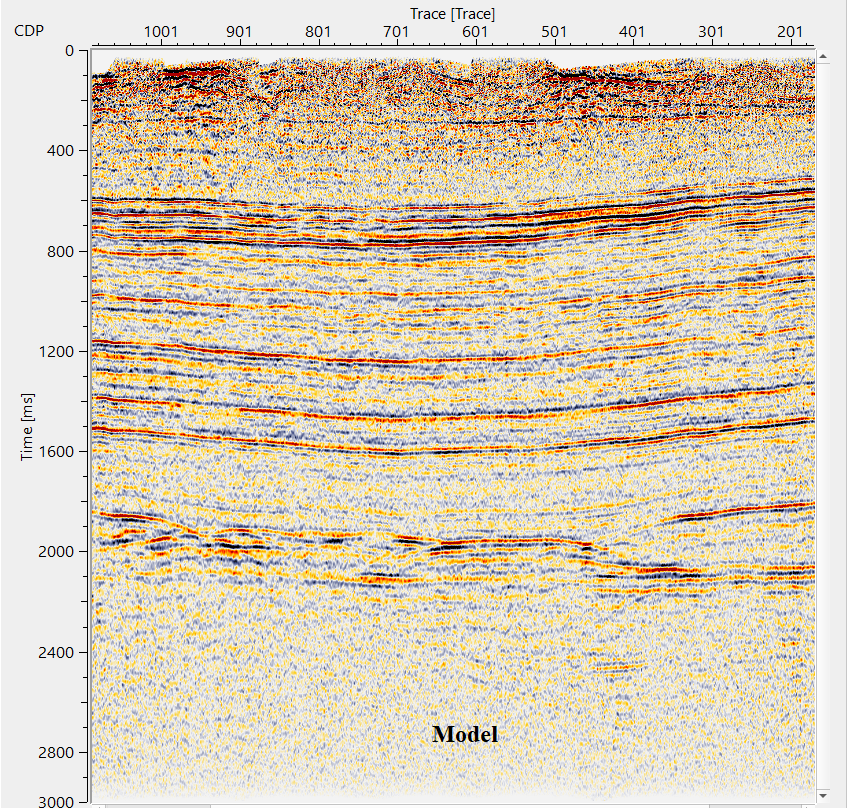
In this example workflow, we are testing Adaptive amplitude correction module on two stack sections. Stack 1 is having amplitude distortions and Stack 2 is amplitudes compensated. Stack 1 acts as Input gather and Stack 2 acts as Etalon/Reference/Model gather. We compute the amplitude factors with the help of Stack 2 and apply these amplitude factors to Stack to compensate the amplitude loss and make both the stacks similar.
Adjust the parameters and launch the Vista items. It displays input, output, input model, difference & amplitude factors.
![]()
![]()
There are no action items available for this module so the user can ignore it.
![]()
![]()
YouTube video lesson, click here to open [VIDEO IN PROCESS...]
![]()
![]()
Yilmaz. O., 1987, Seismic data processing: Society of Exploration Geophysicist
 * * * If you have any questions, please send an e-mail to: support@geomage.com * * *