Smooth 2D
Procedure performs 2D smoothing of velocity field
Theory
Velocity smoothing is essential to ensure laterally and vertically consistent velocity models, enabling stable NMO correction, coherent stacking, and accurate seismic migration while suppressing non-geological velocity noise.
Why velocity smoothing is necessary
- Raw velocity picks contain noise due to:
What happens if velocities are not smooth
- NMO correction becomes unstable.
- Residual moveout remains after NMO.
- Events are over-corrected or under-corrected.
- Stack quality degrades due to poor trace alignment.
- Migration produces artifacts such as smiles and frowns.
- Structural positions become inaccurate.
Role of velocity smoothing in NMO correction
- Ensures gradual lateral velocity variation between CMPs.
- Improves flattening of reflection events.
- Reduces NMO stretch at far offsets.
- Minimizes residual moveout.
- Enhances stack coherency and signal-to-noise ratio.
Role of velocity smoothing in stacking
- Aligns reflection events across offsets.
- Prevents destructive interference during summation.
- Produces stronger and clearer stacked reflections.
Role of velocity smoothing in migration
- Stabilizes the migration operator.
- Ensures correct focusing of seismic energy.
- Improves reflector continuity and fault imaging.
- Prevents migration artefacts caused by abrupt velocity changes.
Effect of poor velocity smoothing in 3D seismic
- Inline and crossline striping appears.
- Velocity footprint contaminates the migrated volume.
- Lateral inconsistencies dominate the image.
What velocity smoothing removes vs preserves
Removes
- Random velocity noise
- Picking artefacts
- Non-physical velocity jumps
Preserves
- Long-wavelength velocity trends
- Geological velocity variations
- Structural and stratigraphic velocity effects
Input data
Input DataItem
Input gather
provide the input velocity model/gather that needs to be smoothed. Connect/reference to Output gather.
Input matrix
in case the smoothing type is FAST, we need to provide the input matrix.
Parameters
Gather domain { TIME, DEPTH, FREQUENCY }
it automatically detects the input gather domain. By default, TIME. In case the user wants to select the appropriate domain, choose the gather domain from the drop down menu.
Type of smooth { Fast, Gaussian }
there are two types of smoothing options are available. Depending on the requirements of the operation, the user can choose the smoothing type.
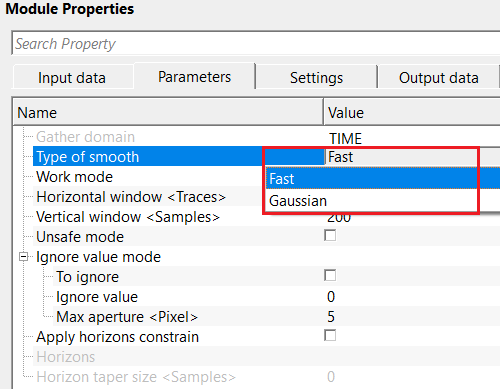
Type of smooth - Fast
this is a simple averaging of velocities in a fixed window. Each velocity value is replaced by the mean of nearby samples.
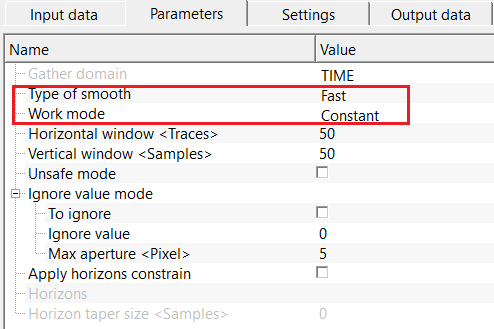
Type of smooth - Gaussian
this is a weighted smoothed method by using Gaussian bell shaped function. In this method, nearby samples contribute more than the far samples.
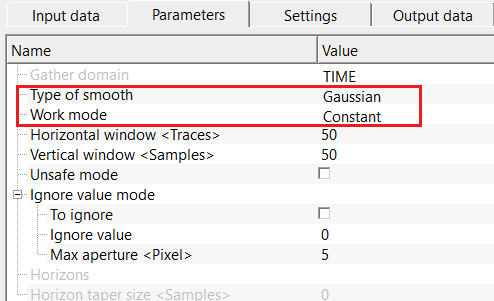
Work mode { Constant, Variant }
select the work mode from the drop down menu.
Work mode - Constant
in this mode, it will be constant values of the horizontal and vertical windows.
Horizontal window
specify the number of traces to be considered in the horizontal direction
Vertical window
specify the number of samples to be considered in the vertical direction
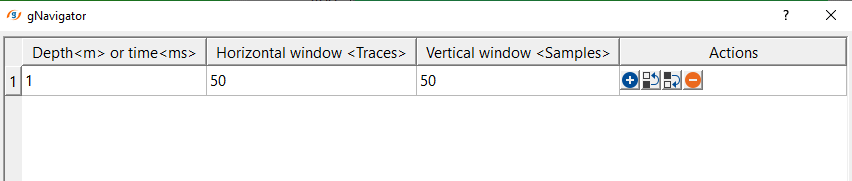
Work mode - Variant
this mode works with variable values of both horizontal and vertical windows.
Variant values table
specify different horizontal and vertical window values. Define a particular time/depth and the corresponding horizontal and vertical window values.
Unsafe mode
Ignore value mode
in this section, the user has the option to ignore some of the velocity values.
To ignore
by default, FALSE (Unchecked). If TRUE (Checked), replace the sample with smoothed value.
Ignore value
specify the value that should be ignored. Value that will not participate in smoothing algorithm, this value remains as is without changes.
Max aperture
by default, 5. Maximal number of iterations to find a value that differs from the ignored value.
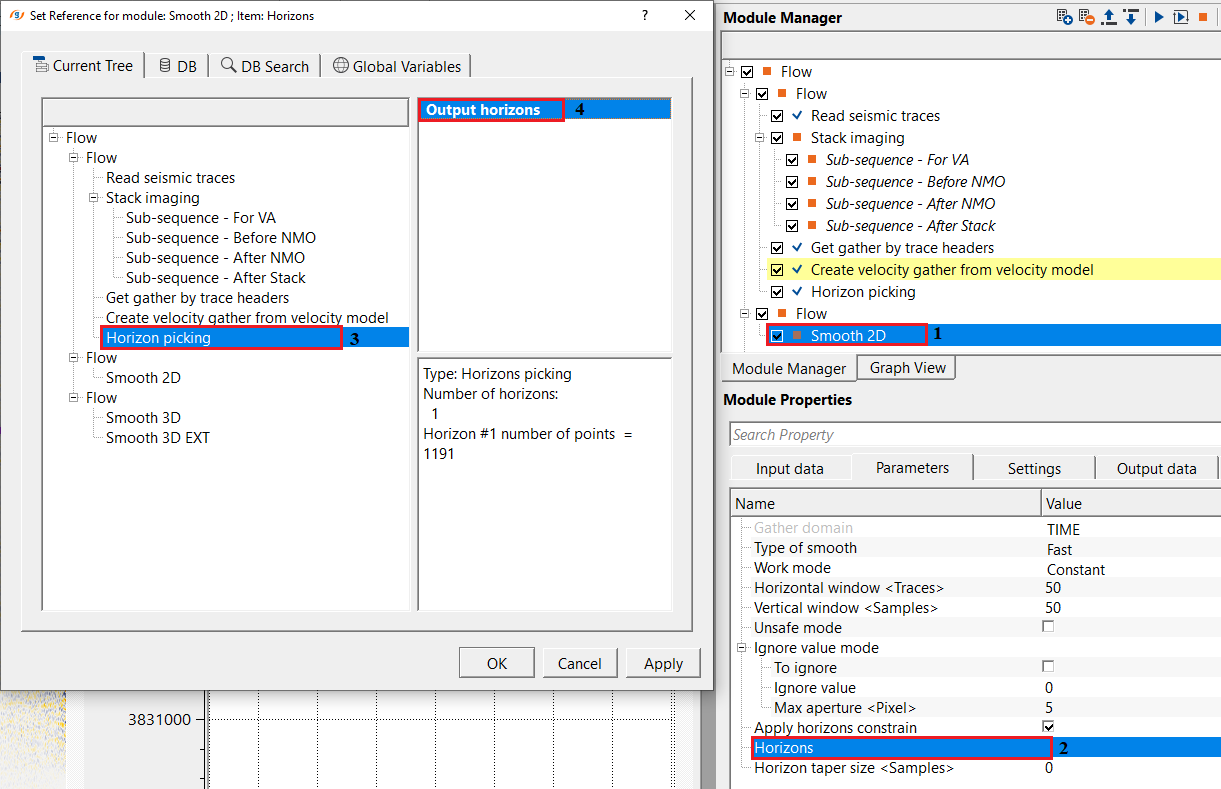
Apply horizons constrain
by default, FALSE (Unchecked). This will give more control to the user to smooth the velocity model based on the horizon.
Apply horizons constrain - true
If the horizon constraint is TRUE, the user should provide the horizon.
Horizons
connect/reference to the input horizon to control the velocity smoothing.
Horizon taper size
this controls the velocity smoothing. Based on the user specified taper value, it will apply the velocity smoothing below or above the horizon.
Settings
Auto-connection
By default, TRUE(Checked).It will automatically connects to the next module. To avoid auto-connect, the user should uncheck this option.
Number of threads
One less than total no of nodes/threads to execute a job in multi-thread mode. Limit number of threads on main machine.
Skip
By default, FALSE(Unchecked). This option helps to bypass the module from the workflow.
Output data
Output DataItem
Output gather
generates the smoothed output velocity gather.
Output matrix
generates the smoothed velocity matrix.
Information
There is no information available for this module so the user can ignore it.
Examples
In this example workflow, we are smoothing a 2D RMS velocity model by horizon as a constraint.
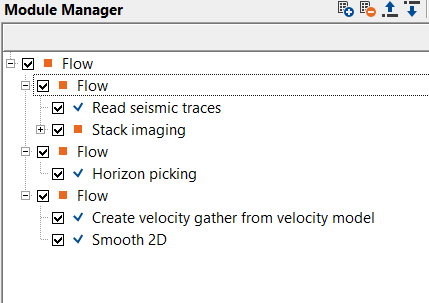
To get the Input gather for Smooth 2D module, we have used create velocity gather from velocity model module to create the velocity module. The user can directly use the Velocity inline from Stack Imaging as a input gather for Smooth 2D as well however, we want to show different methodologies to work on with.
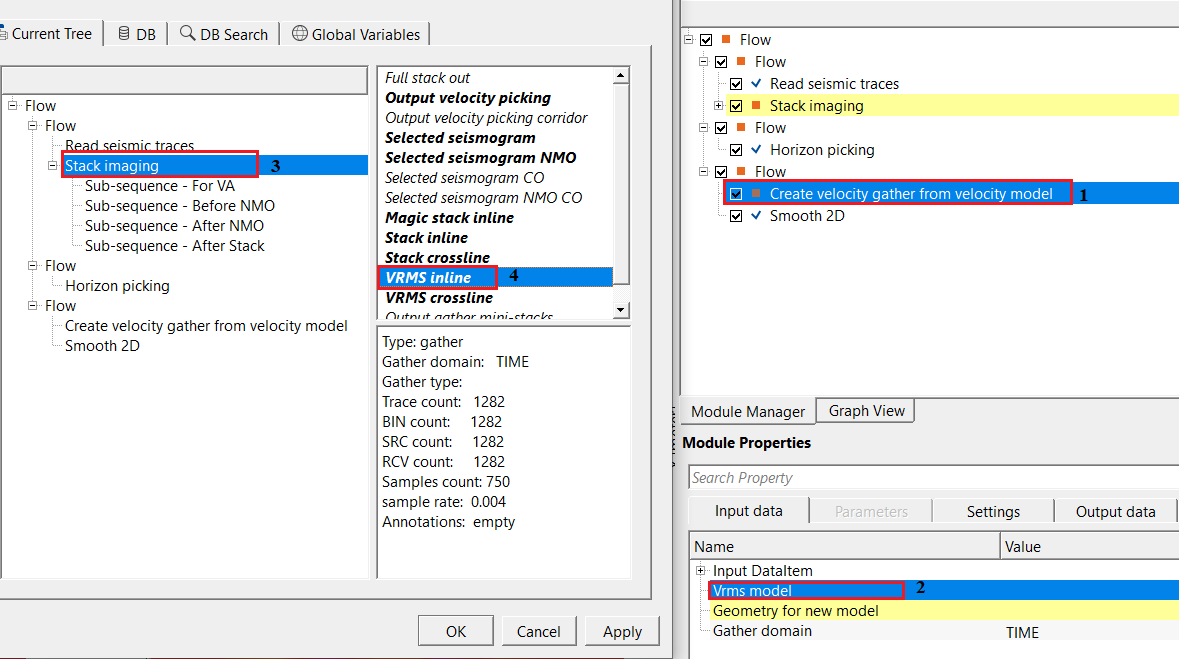
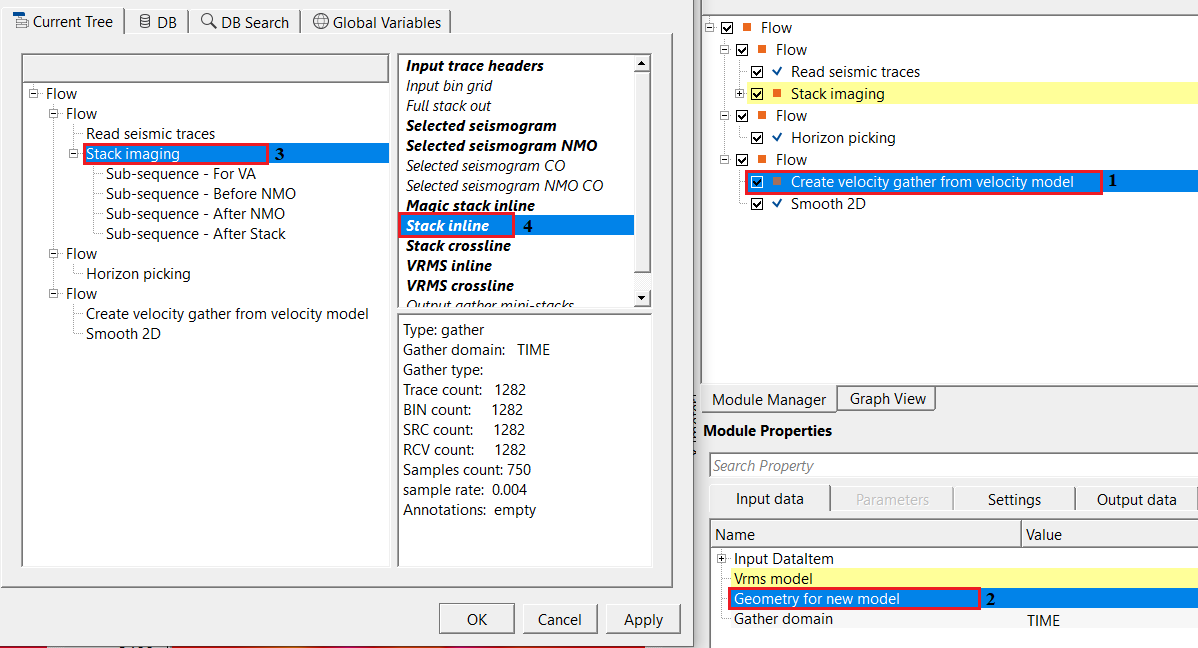
We are using horizon as a constraint, so we need to reference/connect the output horizons
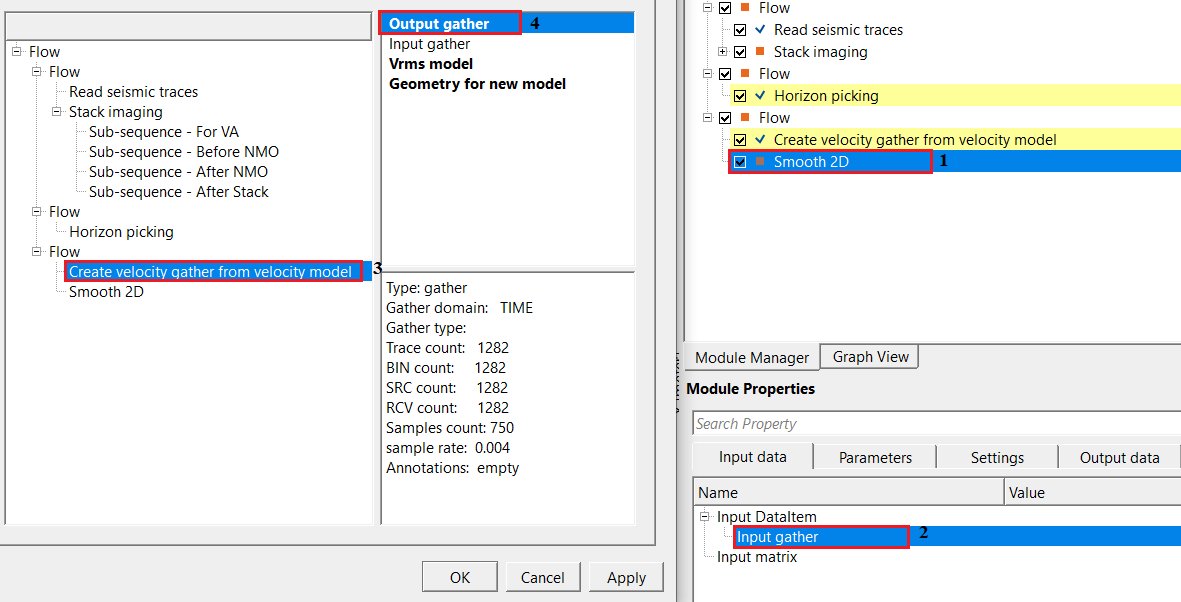
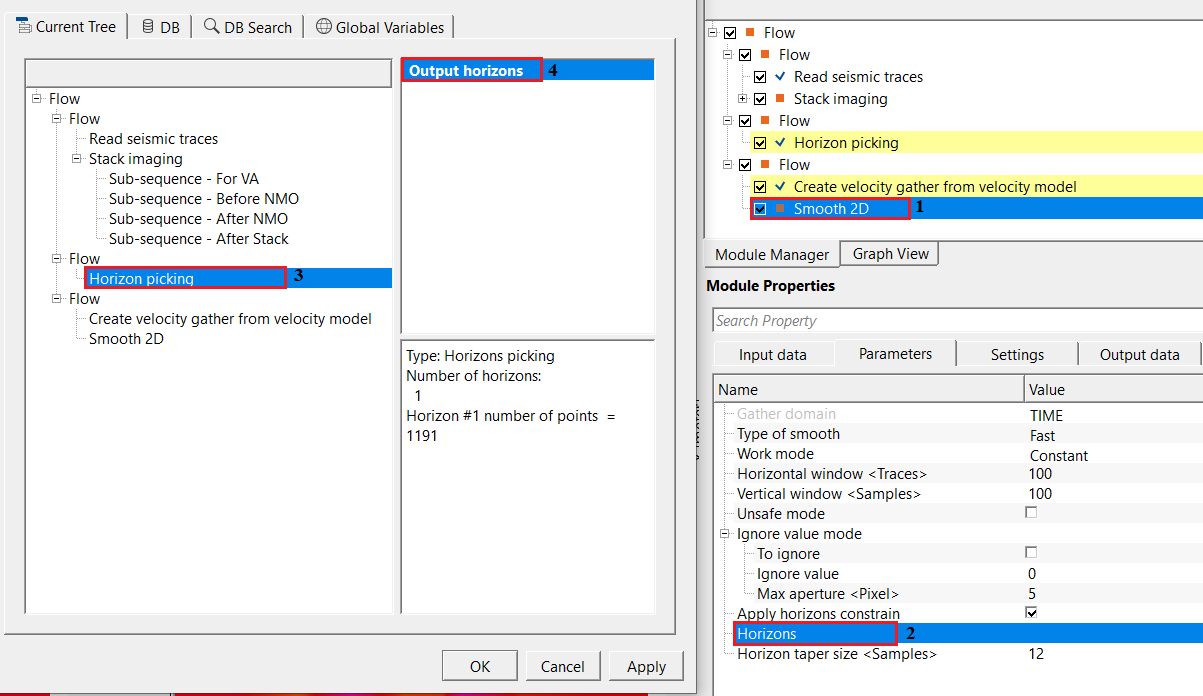
Once the input gather and horizons, parameters are set, the user can execute the module. The output gather will have smoothed velocities based on the horizon.
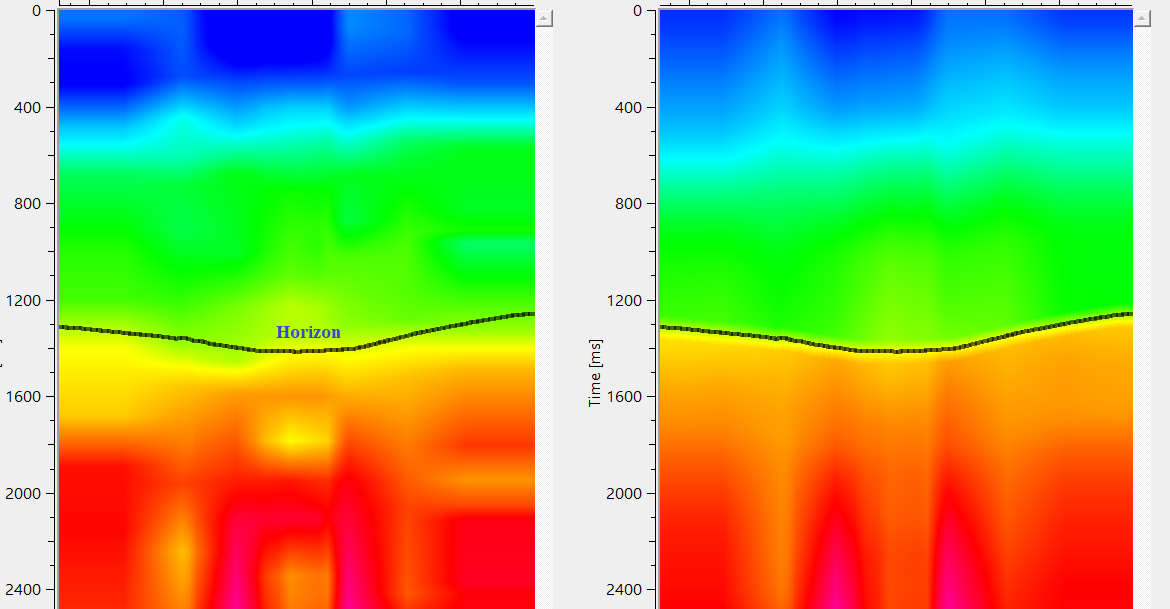
In the above image, one the left side, we've input gather before smoothing. Also, we can see a dotted black line which is our horizon. On the right hand side, we see the output gather with smoothed velocities.
Actions
There are no action items available for this module
Video lesson
YouTube video lesson, click here to open [VIDEO IN PROCESS...]
Related articles
Yilmaz. O., 1987, Seismic data processing: Society of Exploration Geophysicist
 * * * If you have any questions, please send an e-mail to: support@geomage.com * * *