 | BATCH EXECUTION |
| | BATCH EXECUTION |
|
<< Click to Display Table of Contents >> Navigation: Tutorials >
|
The g-Platform offers a batch processing procedure to run hundreds if not thousands of jobs (lines) with ease and comfort by the following simple steps as described below.
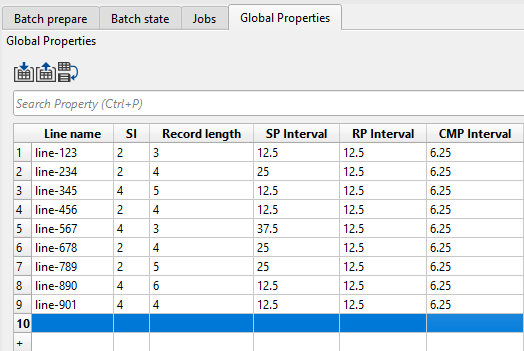
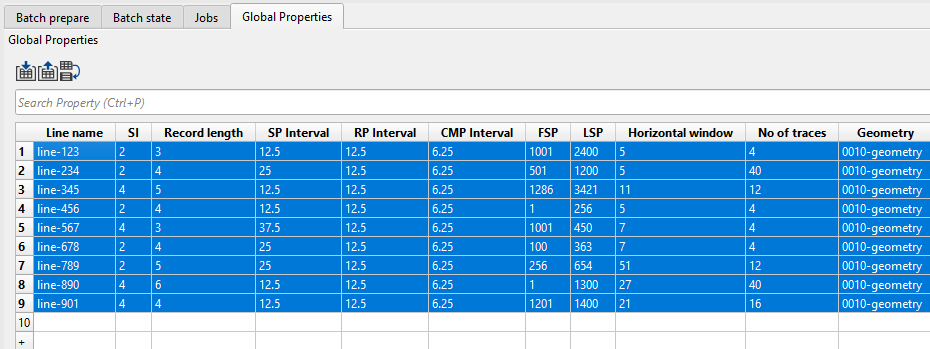
In order to submit the jobs in batch mode, first of all we should create a .csv or a text file to make a tabular form of all the lines and the corresponding information as shown below. The table of information is either prepared inside the Global Properties tab of the g-Platform main window or MS Excel document.
There are three main windows for batch processing:
•Global Properties - table with parameters;
•Bach prepare - workflow building;
•Batch state - workflow managing.
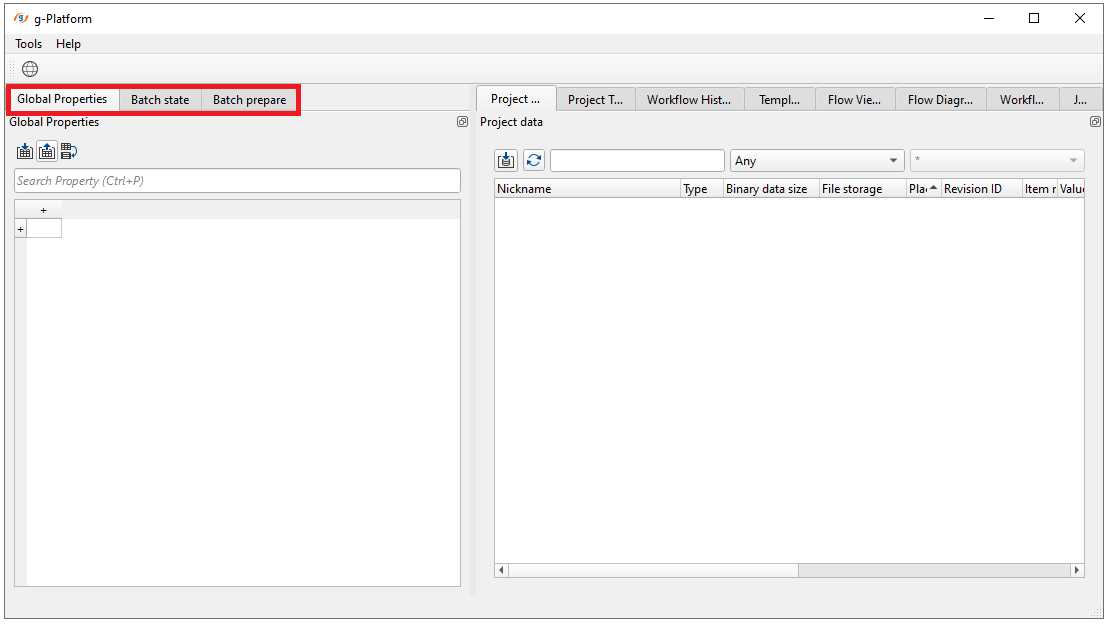
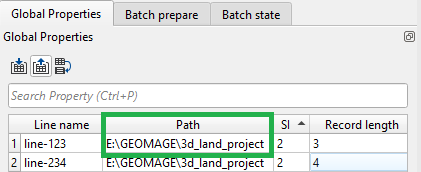
1. CREATE A TABLE WITH PARAMETERS - GLOBAL PROPERTIES:
Open Global Properties tab:
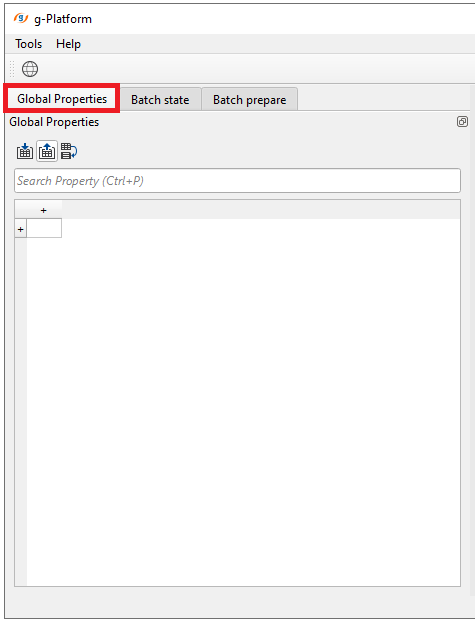
There are 3 icons in the Global properties tab. The 1st icon ![]() is to import lines information from external source (it should be in .CSV format). The 2nd icon
is to import lines information from external source (it should be in .CSV format). The 2nd icon ![]() is to export the line information. Finally, the 3rd icon
is to export the line information. Finally, the 3rd icon ![]() is to Open create the batch flow window.
is to Open create the batch flow window.
------------------------------------------------------------------------------------------------------------------
![]() Make sure that the number of rows and columns that were copied from the external source are match the number of rows and columns in the Global properties table. Otherwise, some information may be lost.
Make sure that the number of rows and columns that were copied from the external source are match the number of rows and columns in the Global properties table. Otherwise, some information may be lost.
------------------------------------------------------------------------------------------------------------------
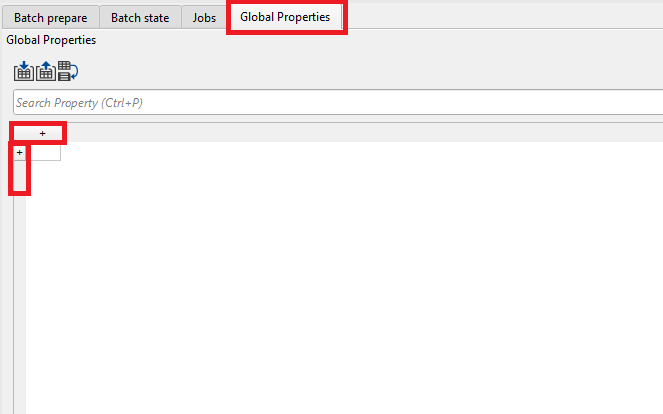
To add rows and columns click on the + symbol on both horizontal and vertical scale of the Global properties tab.
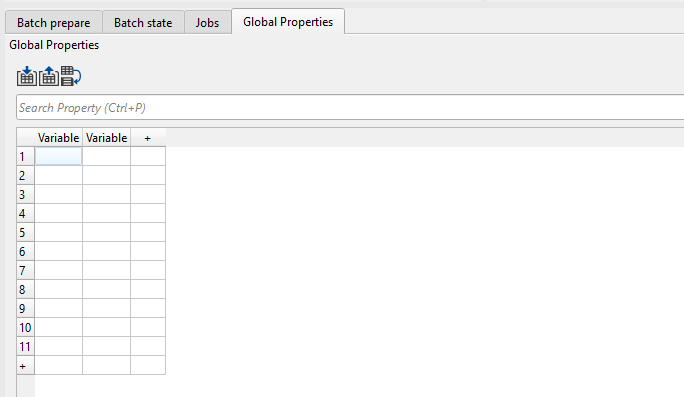
As we added some rows and columns by clicking on the + icon, now we can fill the Variable column. It can be done in two ways: manually entering each column and row or export all information (columns and rows) from the external source.
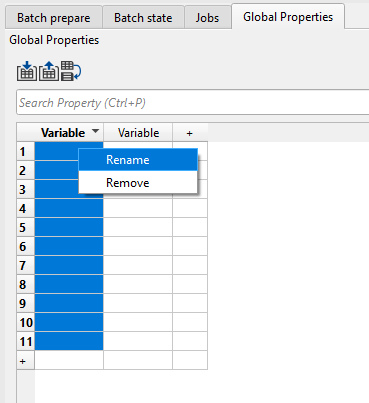
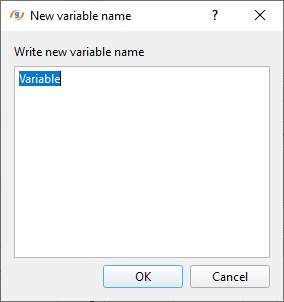
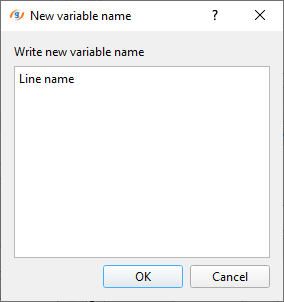
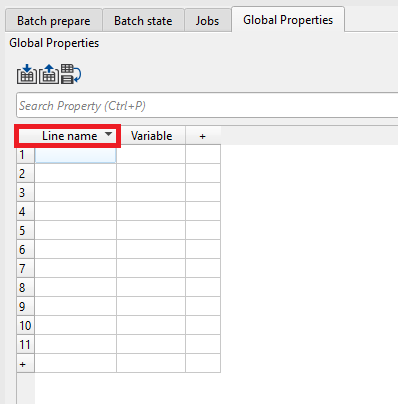
To edit any column name from Variable to something else: use right mouse button and click on the Variable name to make it editable. As soon as we right click on the Variable, a pop-up window opens and the we can edit the text inside the box as shown below. Enter a new name and click OK.
Similarly we can edit the other columns also. Now we are ready to enter the values inside these rows and columns. As we mentioned earlier, choose any one of the option to fill in the details either by manually entering them or import information from an external source. In this exercise, we are importing the information from a CSV file. To import the CSV file, click on the import icon ![]() . It will open a file explorer window as shown below:
. It will open a file explorer window as shown below:
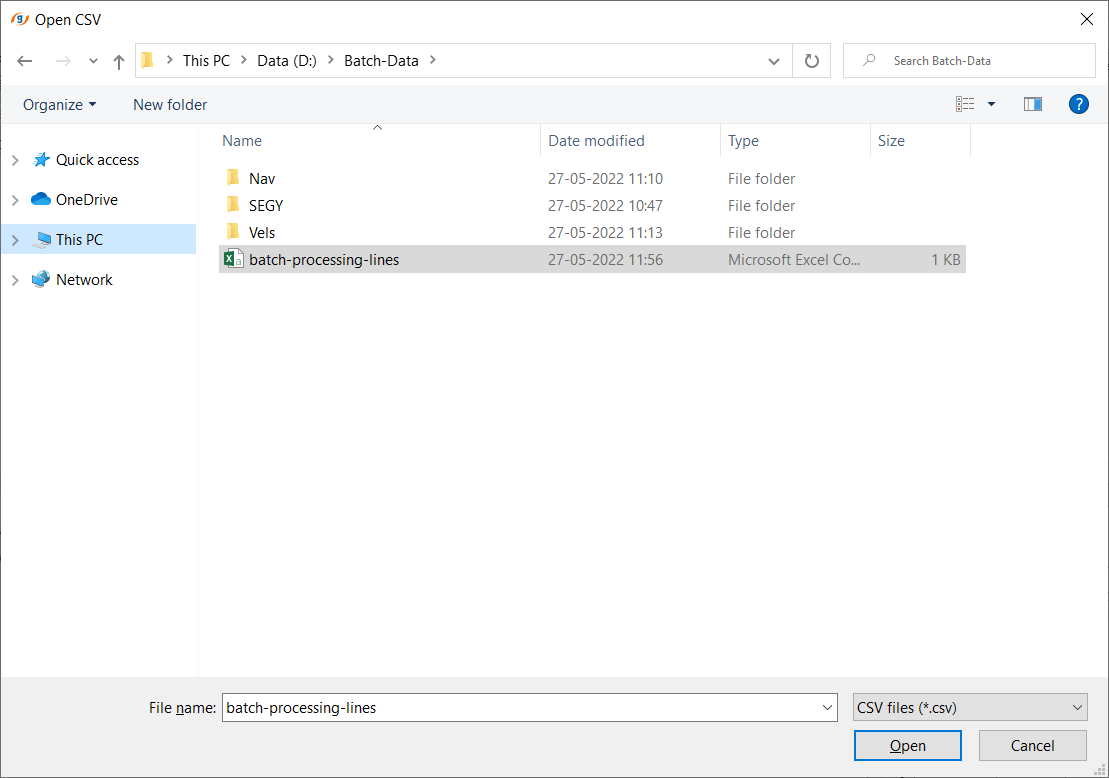
Select the CSV file and click Open. After clicking the Open, it will come up a pop - up window as shown below:
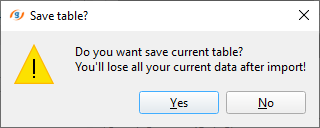
Click No and continue. Now the global properties table should looks like this (as per your imported csv file):
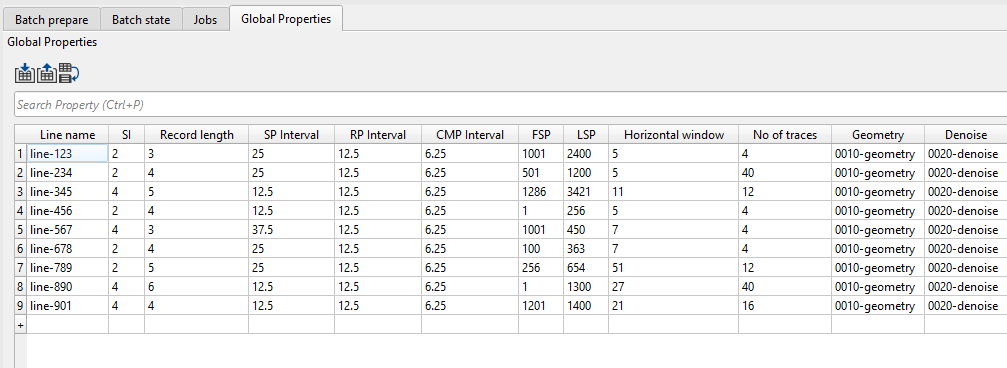
We can edit values bi double clicking inside any field and make the changes as shown below.


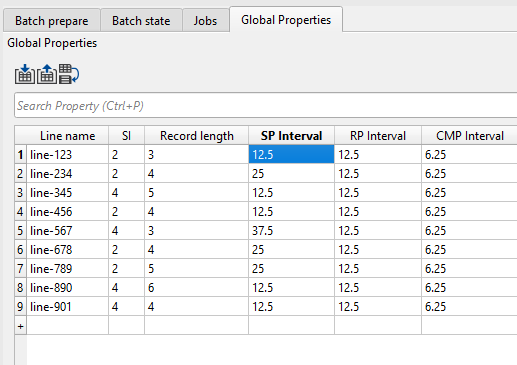
Likewise the we can add as many rows & columns to the Global properties tab as we want and prepare the table and also edit the values if necessary.
For example, if we want to copy a particular row from an external source (excel or text editor) and paste it in the global properties table then we should select the entire row and paste it like as shown below.

Please note that the number of columns and rows selected in the external source should match with the number of rows and columns selected in the global properties. Otherwise only partial field will be filled.
2. CREATE WORKFLOWS - GLOBAL PROPERTIES:
After completing the global properties table, we should create a skeleton file (workflow) as a template to create the same workflow for all the lines.
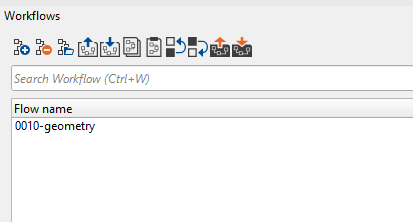
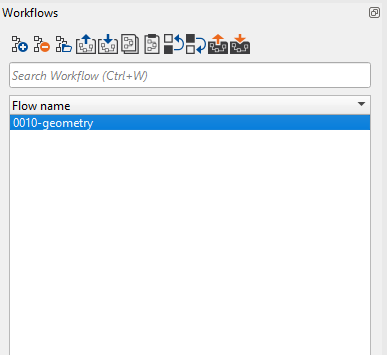
We should create a workflow and use few modules to set up the skeleton workflow. We will discuss each one of them briefly. Double click on 0010-geometry (example workflow) to open the workflow. It will open in a separate window (g-Navigator).
When we double click to open the 0010-geometry workflow, it will be empty. We need to start building the skeleton workflow. First add Generate string module inside the Module Manager.
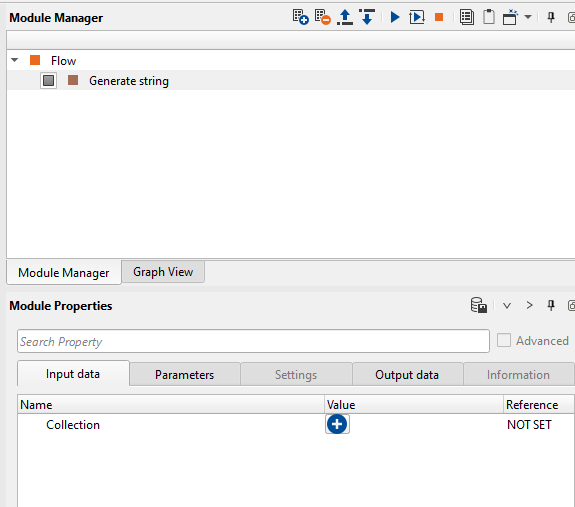
Now click on the ![]() button to add a string.
button to add a string.
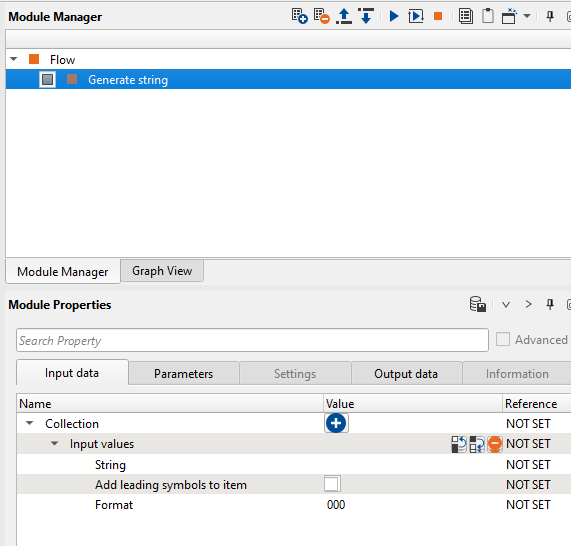
Now double click on the String and it will open a new reference window. Go to Global variables tab and select the line name as shown below and click OK.
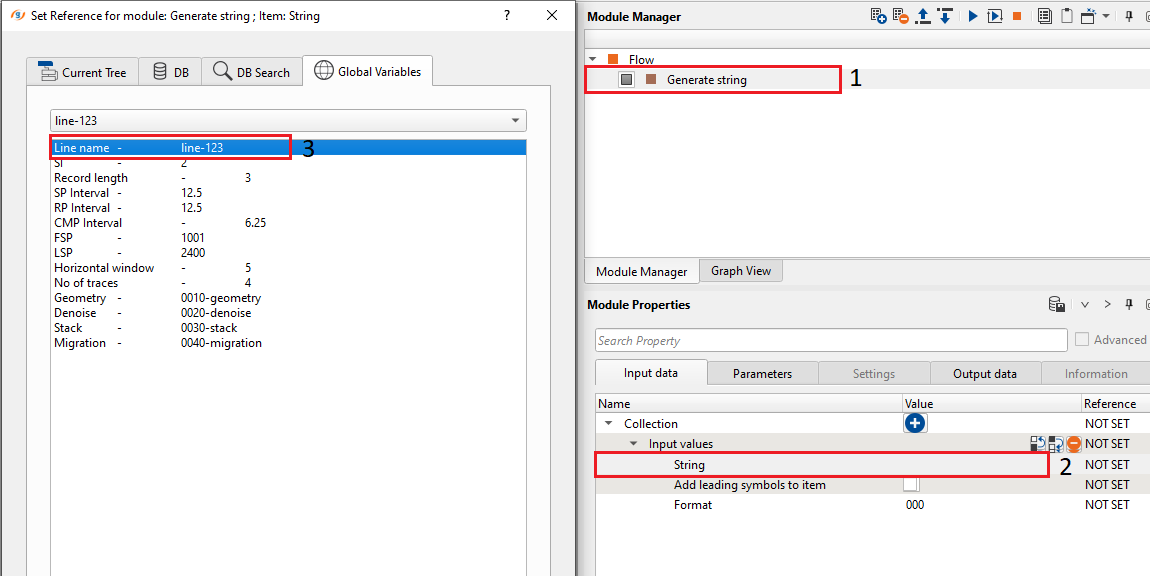
If we look at the String after the reference connection, it looks like this
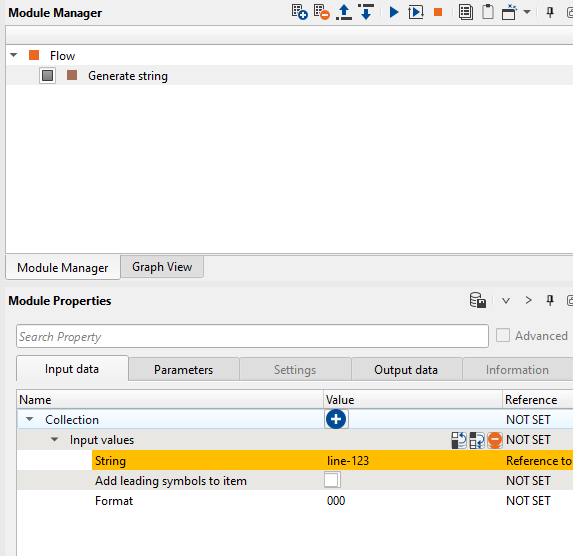
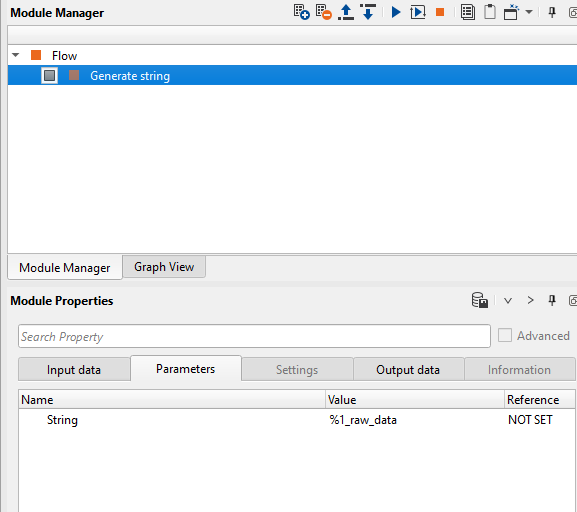
Now go to Parameters tab of the Module properties and enter appropriate name as per your file name. In this instance we are going to use this file name as an input file name so we are making the string as %1_raw_data where %1 is replaced by the String value which is line-123 and _raw_data is our actual file name without the line name since we want to make this as a global variable so the string automatically picks up the line name as %1 from the Global properties table every time when it creates a new workflow.
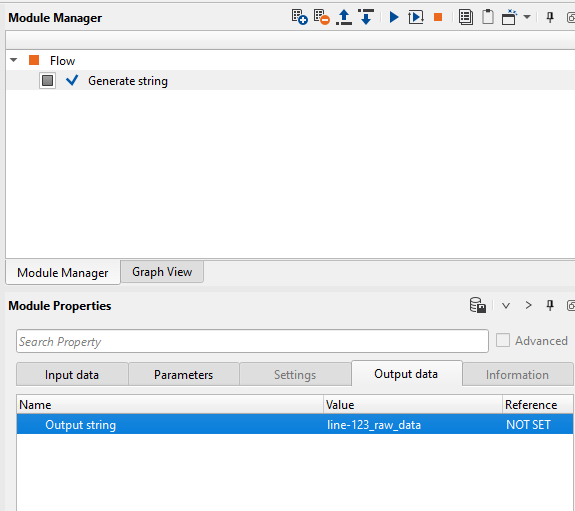
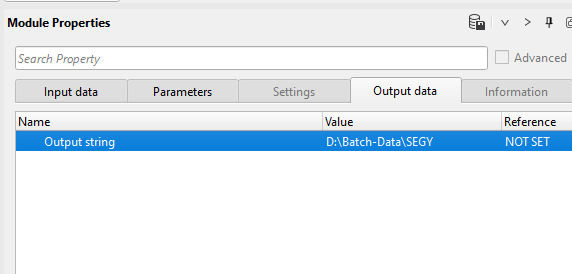
Now run/execute Generate string module by double clicking on it or press the ![]() button and look at the Output data tab of the Generate string module in the Module properties window. It should look like this:
button and look at the Output data tab of the Generate string module in the Module properties window. It should look like this:
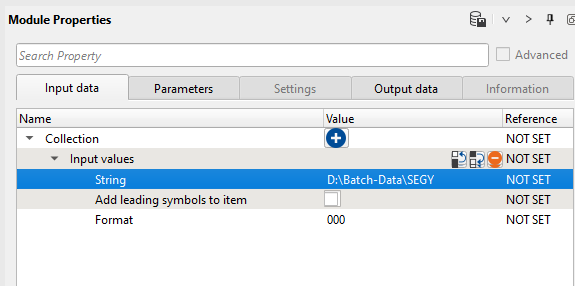
In case your input file name is a SEGY and you need to read it from a particular path then follow the procedure as shown below. Add Generate string module and in the place of String, simply paste the input data path and do the same at the parameters tab also and execute/run the module:
Similarly add a module Generate file name to the existing workflow and look at the parameters tab of this module.
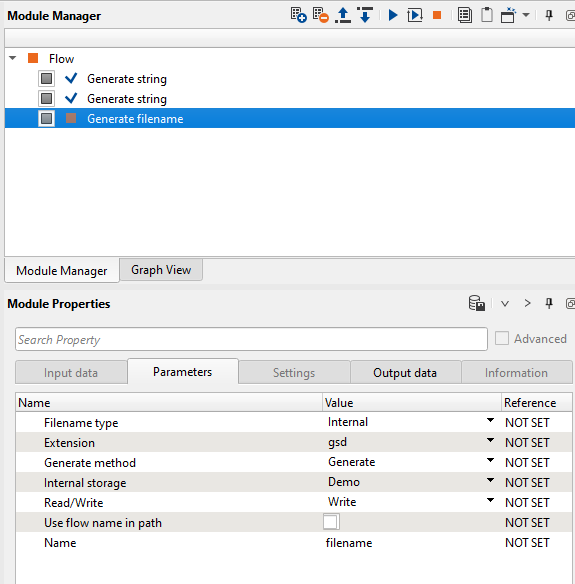
If we look at the Filename type in the Parameters tab, we see Internal and External. Depending on the file type, we can select internal or external file type and accordingly the options will change. For instance, if we select Filename type as External then the module properties will look like this:
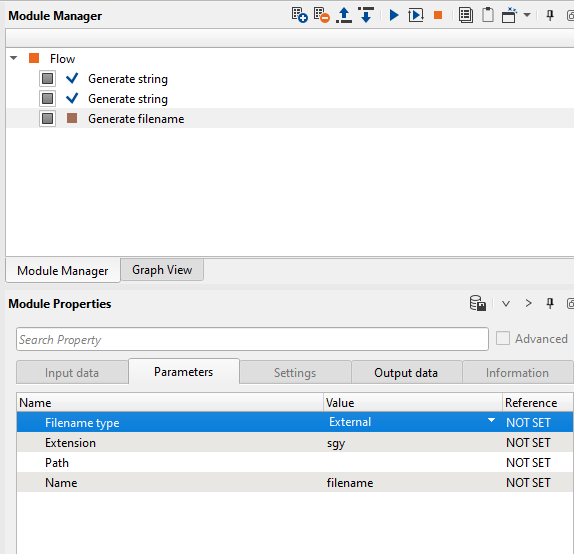
Now the filename type is selected as External. Depending on the external data, we can put the Extension type as sgy/txt/csv/corr, etc. Here we are going to read a SEGY file so we should use sgy extension.
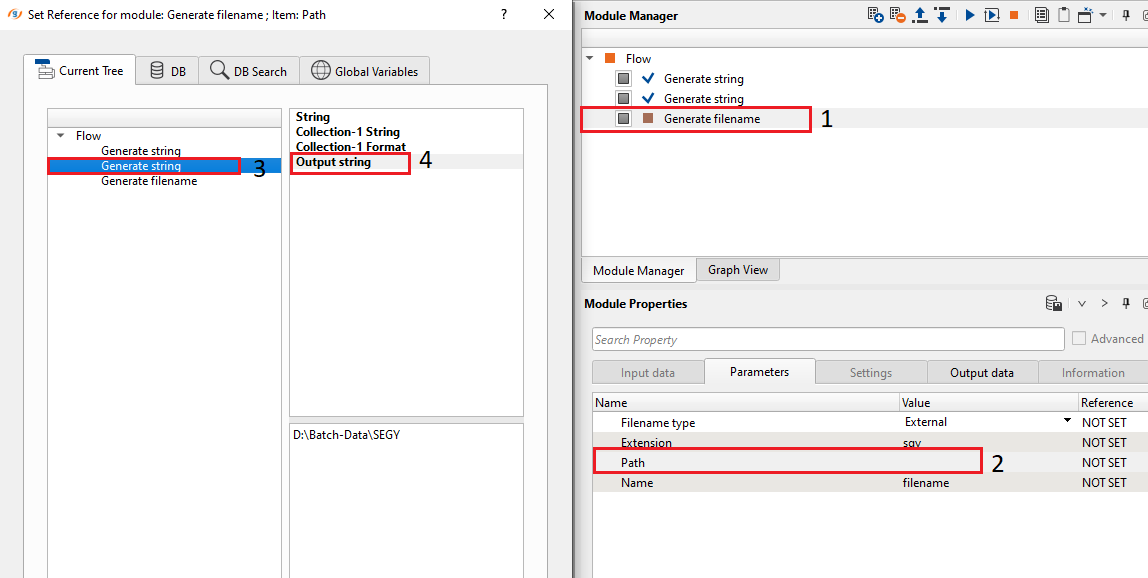
Connect Path to Generate string (where we have the input file name) by double clicking on the Path.
Similarly connect Name to filename from the Generate string module as shown below.
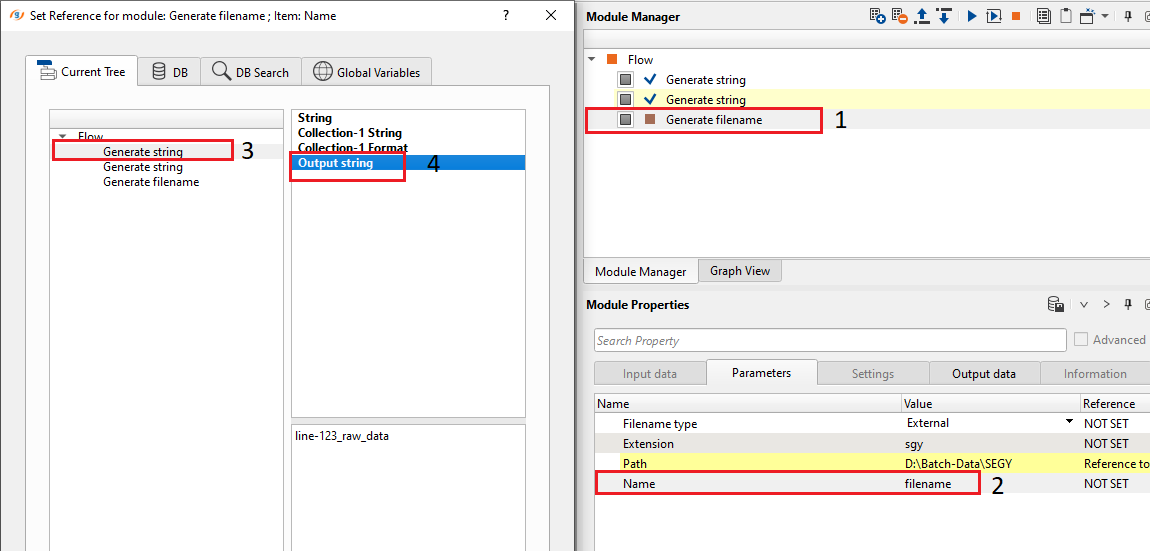
After making both the connections, it looks similar to this:
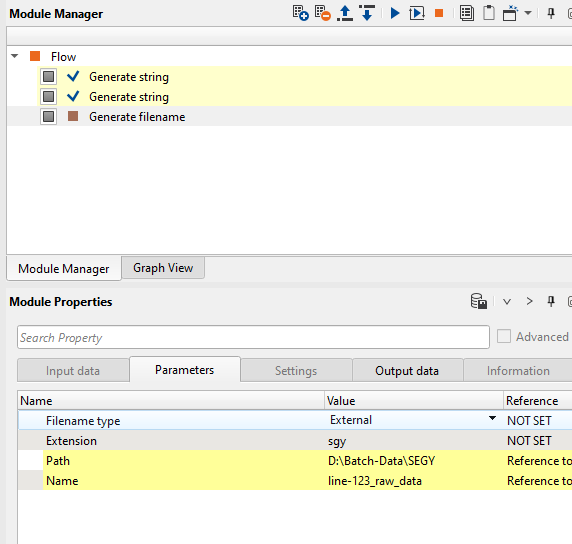
Run/execute the Generate filename module and check the Output data tab and check the input filename and it's path. In OS Windows the forward(/) and back slash(\) are not an issue.
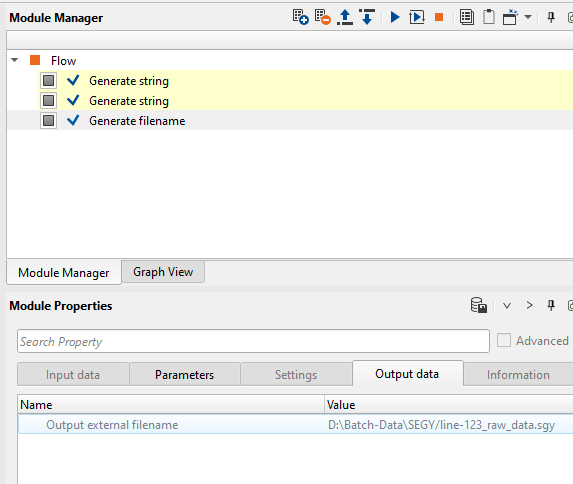
Similarly, we can select the Filename type as Internal and select the appropriate parameters according to their input choices. In case of Internal Filename type, in the 3rd row of the parameters tab, we see the Generate method. Here we have two options. Generate and Search. What is the difference between them?
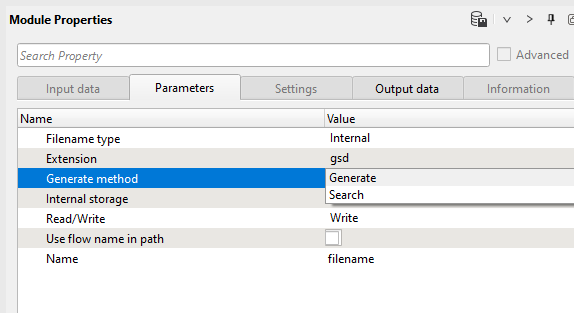
Generate usually generates the filename if you want to use it as an output filename or for any other purpose, whereas Search option looks for the specific filename within your internal database and find it.
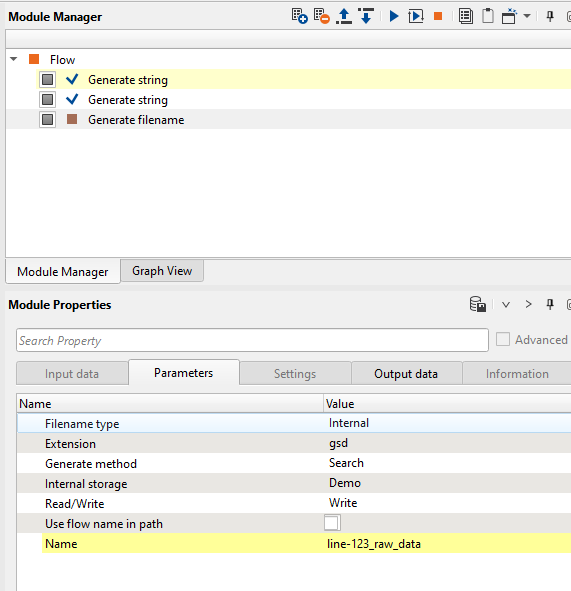
In this instance, we are going to use Search option since we are going to use the filename line-123_raw_data as an input file name and connect the Name to the file name from Generate string module Output string as shown below.
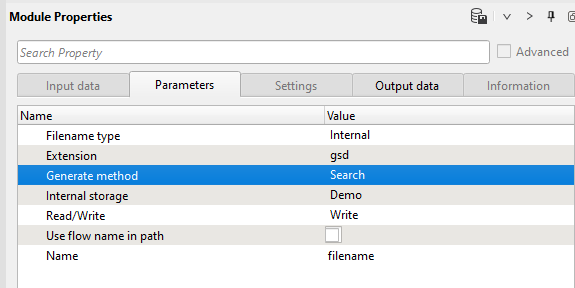
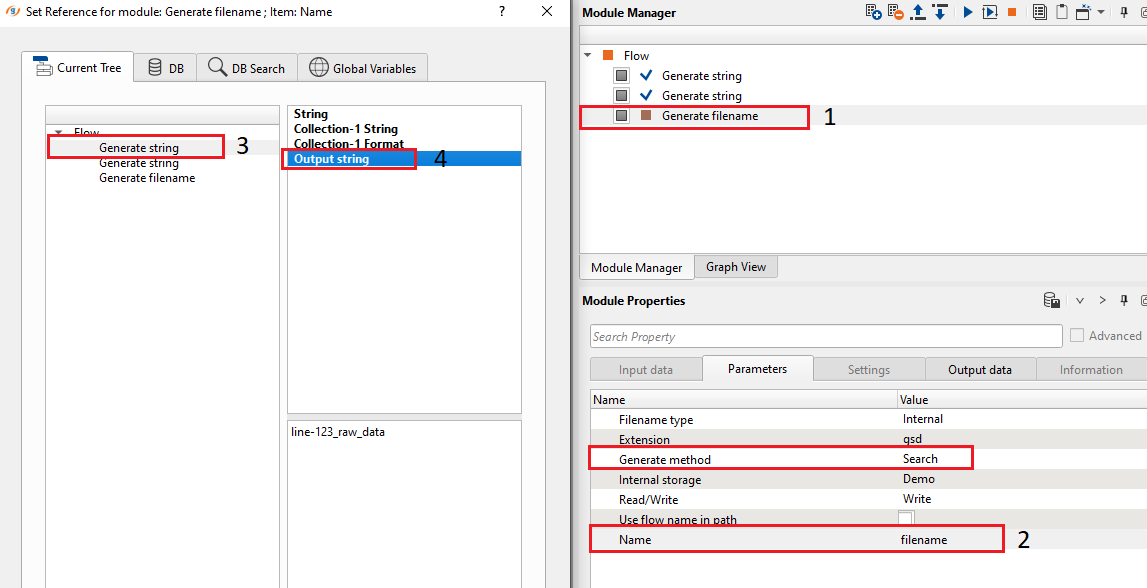
Now look at the Name parameter in the Parameters tab of Generate filename module. It should look something like this:
In this way, we can generate as many as input/output filename(s) using the modules Generate String & Generate filename. The next part is about how to use these generated files names in the batch processing. Here we are going to read a SEGY file, so we added the module Read SEG-Y traces module. In this module, we need to assign the seismic file name. Make connection by calling the Seismic filename from the Generate filename module.
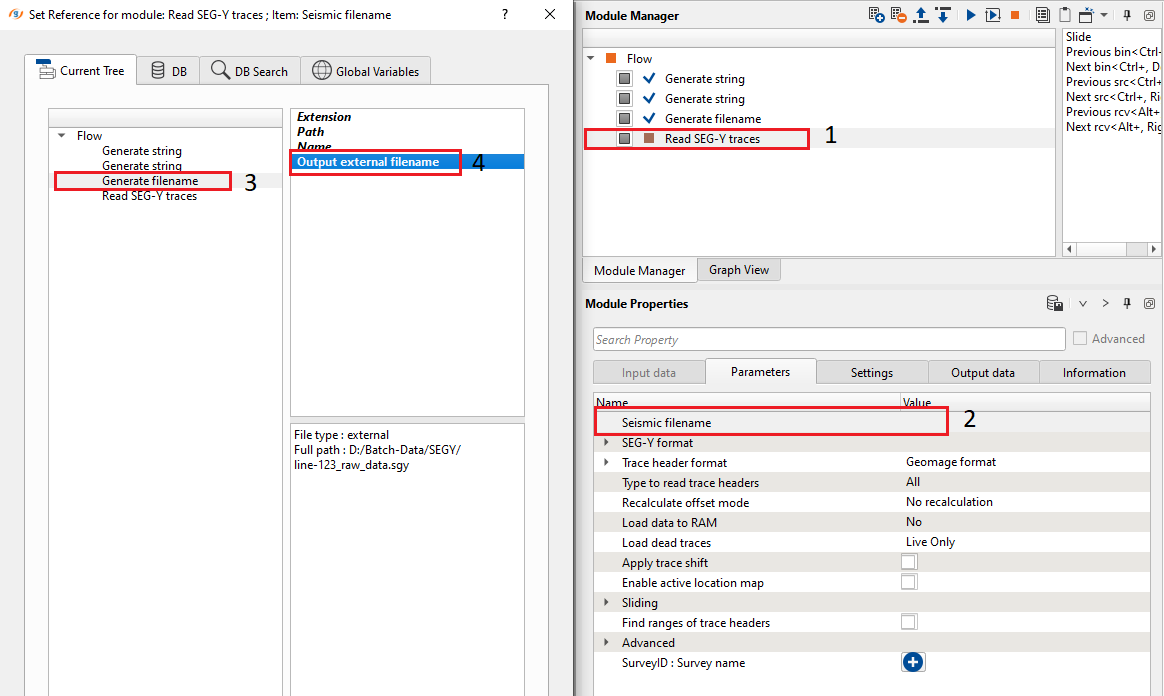
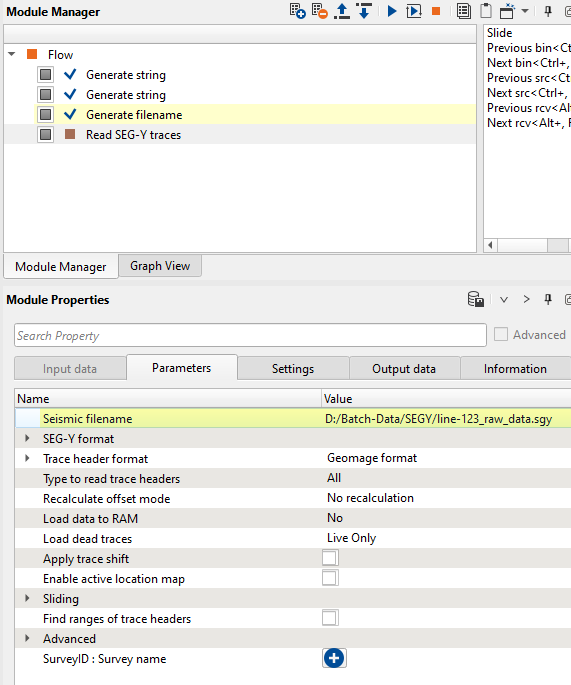
From the above image, we can call the Seismic filename from the Generate filename module. Similarly for any module or any variable we can select the appropriate value from the Global parameters table and connect them to the appropriate parameter field.
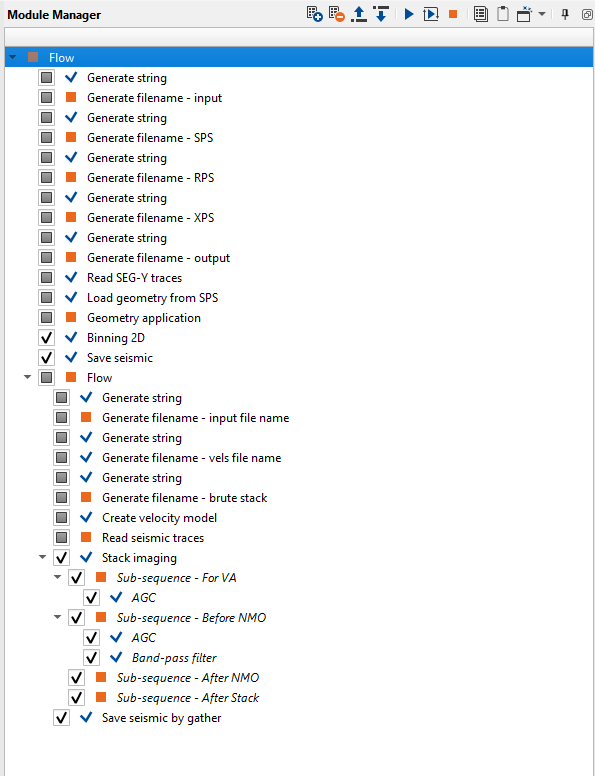
The next example is the entire geometry assignment workflow with auto/batch execution. We've created a workflow to assign the geometry, binning and finally saving into the internal format. It is followed by creating brute stack. The workflow is as shown below:
Assigning variables: we want to assign a variable to a particular parameters. For that we selected Binning 2D module and want to assign the CMP Interval value from the Global properties. Let’s see how it can be done.
We would like to assign a variable called CMP Interval to which is known as Binning increment (meter) in Binning 2D module. To assign this value, we should double click on the Binning increment parameter. It will pop-up a new reference window. Here go to Global variables tab and select the CMP Interval as shown below:
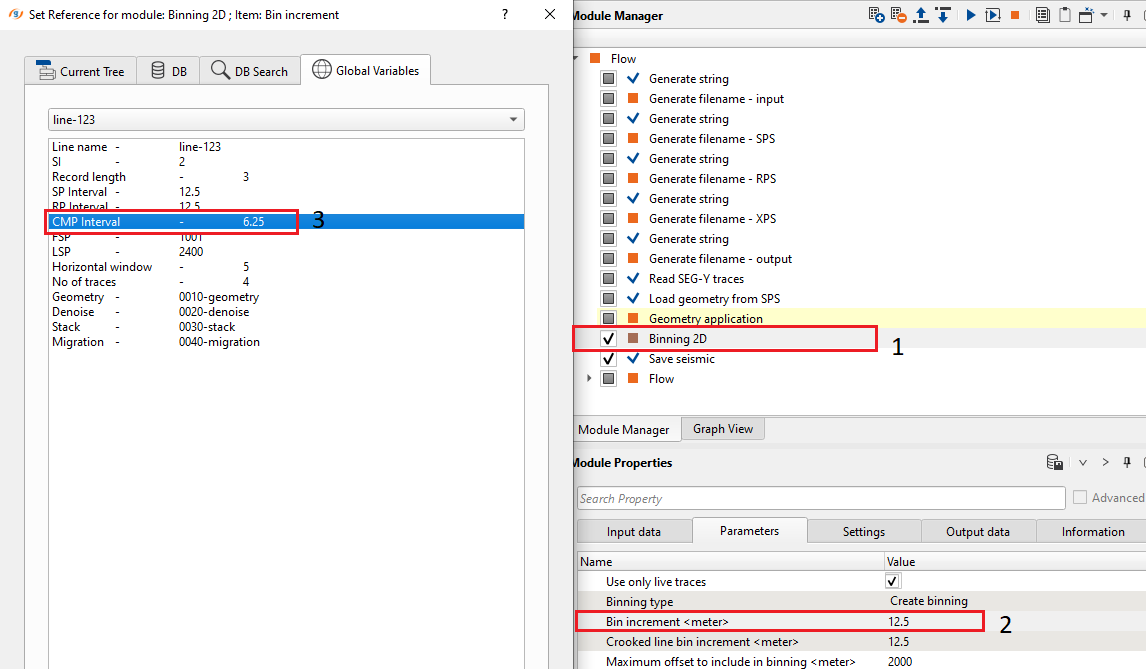
Look at the Parameters tab of the Binning 2D module properties, there is the Bin increment (meter) parameter value that was set to the Global variable parameter and we can see that back ground color changed to Amber (Orange). In this way can we able to assign variables.

In the same way, we can assign all the required parameters from the Global properties window. Once the skeleton (template) workflow is ready, we can create the same workflow for all the lines within our Global properties table.
To do that, we MUST select the skeleton workflow first and then go to Global properties tab and select all the lines as shown below:
Now click on the Open create batch flows window icon ![]() in the Global properties tab. It will open a new window:
in the Global properties tab. It will open a new window:
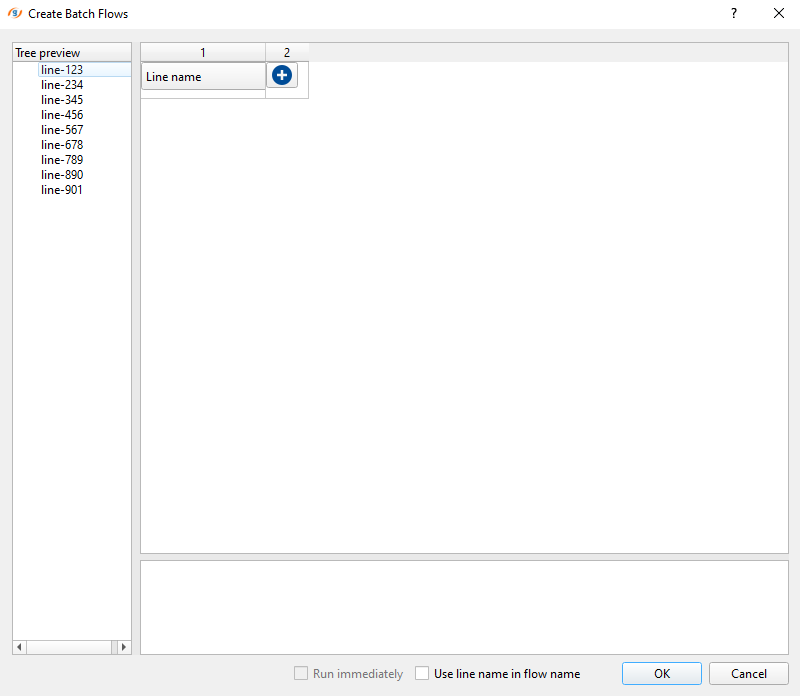
Now we need to select all lines on the left side of the window under Tree preview. On the right side, we can see that 1 & 2 row headings with Line name as preselected by default under Column 1. Add another column by clicking on the ![]() icon. Now it should look like this:
icon. Now it should look like this:
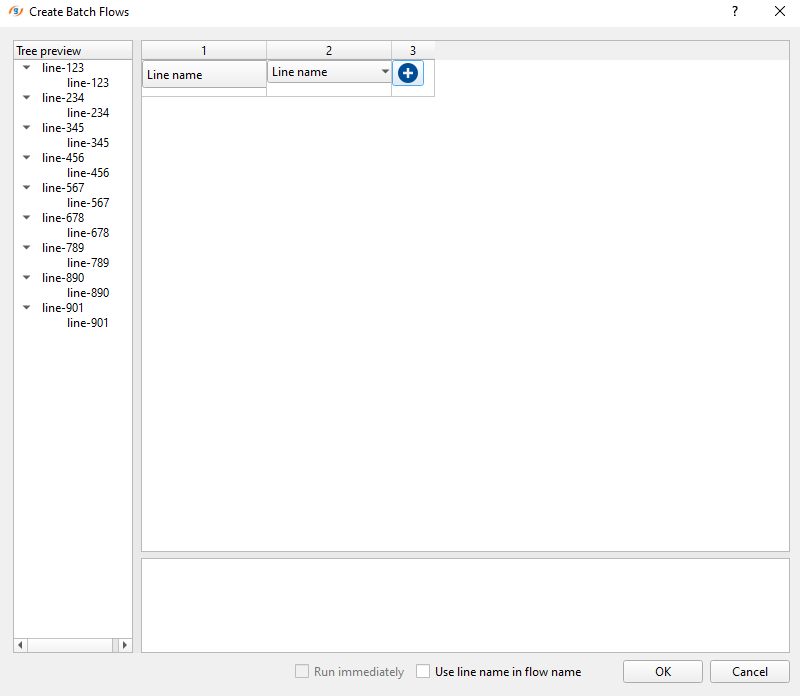
Both columns 1 and 2 are set as Line name. Also, on the left hand side we have a tree view with line name as a tree followed by the same line name as a branch. Next, we need to change default the Line name column name to something else, that we are going to use in our workflow by selecting it from the drop down menu:
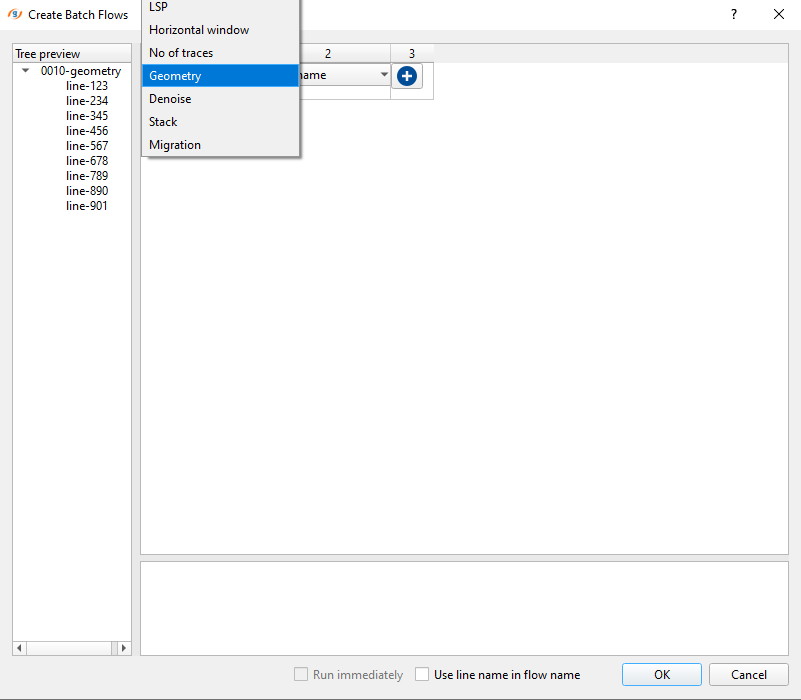
Now select 0010-geometry as the main heading for Column 1:
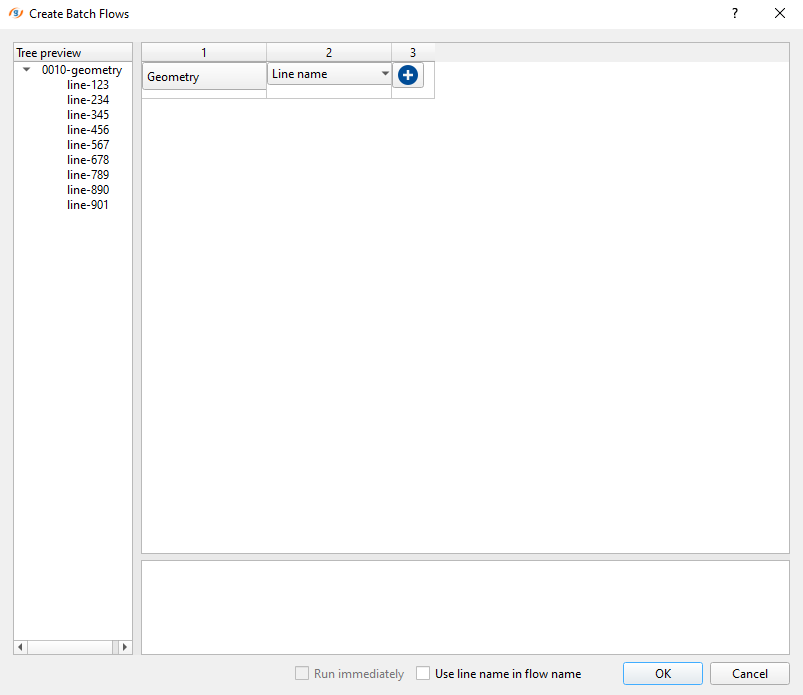
What we have learned from the above exercise is that if we want to create a particular workflow for all the lines under the same name, we can choose this option and the system automatically put them together in the selected tree.
Now click on OK and see what happens:
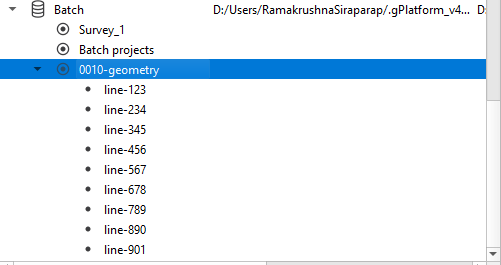
Similarly, we can create different workflows for different processing sequence and all the lines will be placed under the same processing sequence heading mentioned in the Global properties table. As soon as the workflow(s) created for the selected lines, we need to look at Batch prepare and Batch state tabs in the g-Platform window:
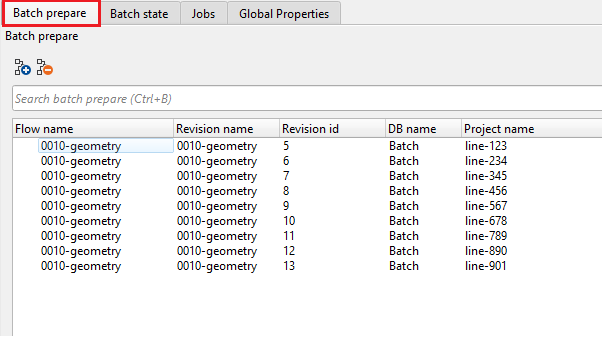
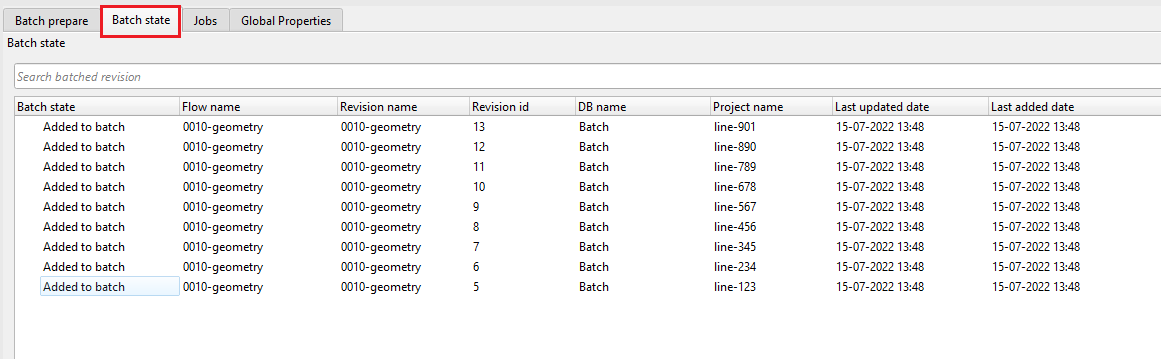
3. JOBS QC - BATCH STATE:
In the Batch state tab, we can see prepared jobs as shown below:
To submit the jobs, we should go to the Batch prepare tab and click on the icon ![]() Execute revision. It will submit all the jobs at once. If we want to submit the jobs one by one then we should select the icon
Execute revision. It will submit all the jobs at once. If we want to submit the jobs one by one then we should select the icon ![]() .
.
As soon as we execute the jobs, all jobs have different color (success execution, in the process, waiting, error) as shown below:
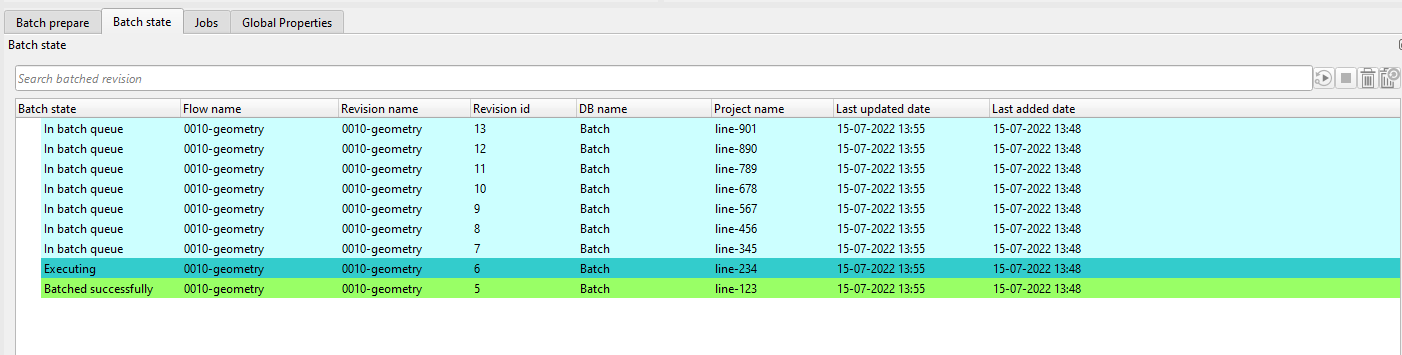
From the above image, we can see that one job is in Executing phase and all other jobs are in In batch queue. Once the current job finishes, then the next job will take over and so on.
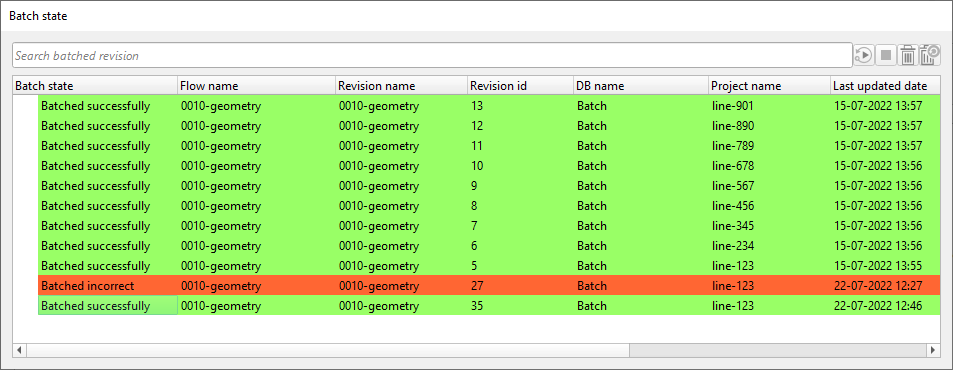
In case there is an error then the Batch state will change the status as shown below:
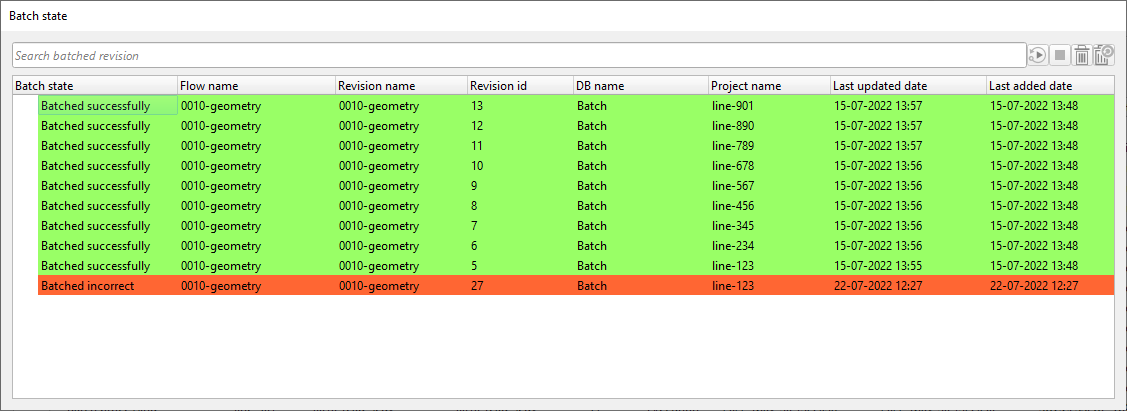
To find out what is the wrong with that particular workflow,we need not to go to the workflow but we can check the error message inside the Jobs tab in g-Platform window:

In this case, we can see that the job was failed due to Bin points are out of grid. So we can check the parameters and rerun the job. For that we need to make the necessary changes in the workflow and recreate the workflow and this will give a new revision ID. We MUST submit this new revision ID job for batch processing.
For an example, here we are recreating the batch for a single line and observe the revision ID for the same line before and after the recreation. For line line-123 the previous revision was 27 and now it is 35.
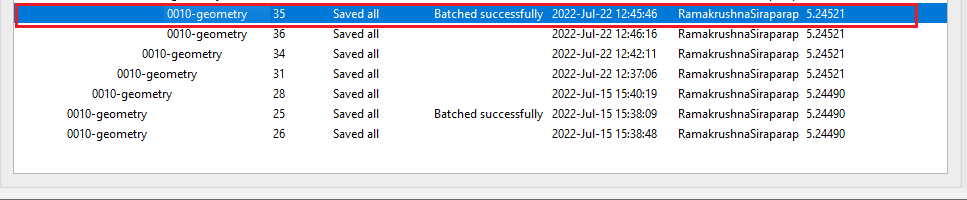
Now we submit this job (Revision ID 35) as a single job and observe the Batch state:
In this way, the we can submit all jobs in the batch mode (If there are any errors in the skeleton jobs then fix the skeleton job first and then recreate the workflows again and then submit the batch jobs with the latest revision ID jobs only).
 If you have any questions, please send an e-mail to: support@geomage.com