 | DISTRIBUTION EXECUTION (COALITION SERVER) |
| | DISTRIBUTION EXECUTION (COALITION SERVER) |
|
<< Click to Display Table of Contents >> Navigation: Tutorials >
|
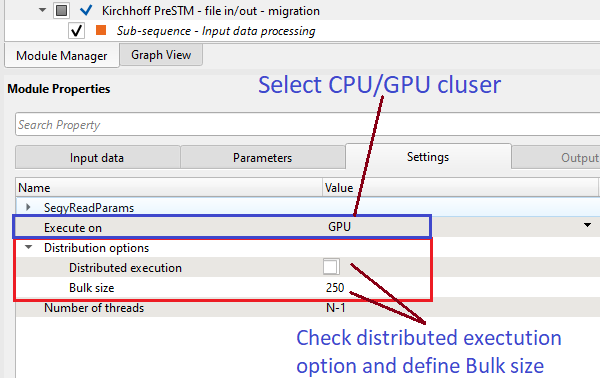
Modern seismic acquisitions require high-performance systems with parallel computations (distribution execution). g-Platform allow to run a major part of modules in distribution mode on CPU and GPU clusters. After installing all the required packages to configure the Coalition server, it is time to submit the jobs in the CPU/GPU clusters. Not all workflows require submition in the distribution mode, however it is necessary for some heavy processing modules like SRME 2D/3D, Radon multiple attenuation, Kirchhoff PreSTM - file in/out - migration, Kirchhoff PreSDM - file in/out migration TT etc.
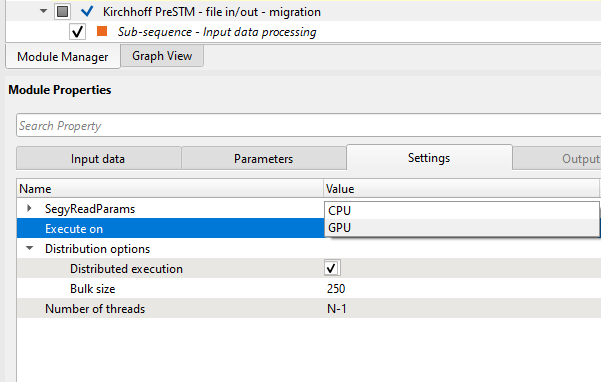
For execution any workflow/job in the distribution mode, we should go to the Settings tab of the particular module and choose Distribution mode with other parameters:
How to calculate Bulk Size parameter for migration:
GRT- is nothing but GPU RAM TOTAL;
For example, if RAM value is 11.2 GB, we will use only 10GB as 1GB of RAM is used by others processes;
GRA– is known for GPU RAM AVAILABLE;
For example, if RAM is 10 GB, the parameter value will be calculated as following:
10 * 1024 * 1024 * 1024 = 10737418240 (size in bytes);
Data parameters:
NS– indicates number of samples (for example, 2000 samples);
MinOFF– indicates the minimum offset of CIG (for example, 0m);
MaxOFF– indicates the maximum offset of CIG (for example, 10000m);
StepOFF– indicates the CIG offset step (for example, 200m);
TCIG– indicates the number of traces in one CIG, this parameter is calculated as following:
TCIG = (MaxOFF – MinOFF) / StepOFF, for example (10000-0)/200=50
CIG_B– indicates the size (in bytes) of a single CIG, this parameter is calculated as following:
TCIG * NS * 4, for example 50*2000*4=400000bytes
MAXIMUM BULK SIZE– is an optimal parameter for PSTM calculation, this parameter is calculated as following:
MAXIMUM BULK SIZE = GRA / CIG_B,for example 10737418240/400000=26843.5456 – this number indicates the maximum bulk size.
Please note, from common practice, it’s better to round this number down, use 26000.
Cluster parameters (CPU/GPU) and bulk size were set up. Next, execute the job either by double clicking on Kirchhoff PreSTM - file in/out - migration module or press the ![]() icon.
icon.
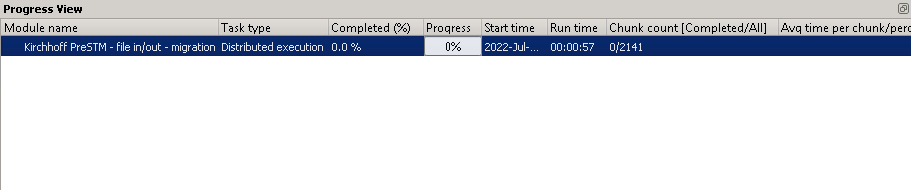
Now look at the Progress View window, the workflow is ready to to be sent to server for computation, and after a few second of configuration checking it will be started. If not, please check g-Platform server settings:
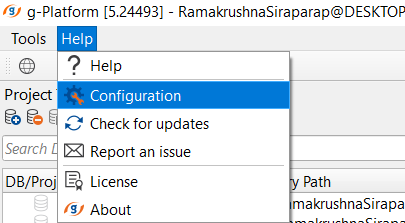
Open the coalition server (as per the IP address provided at the Configuration settings of g-Platform). To configure the Coalition server settings, in g-Platform main window go to Help -> Configuration:
It will open a new window as shown below.
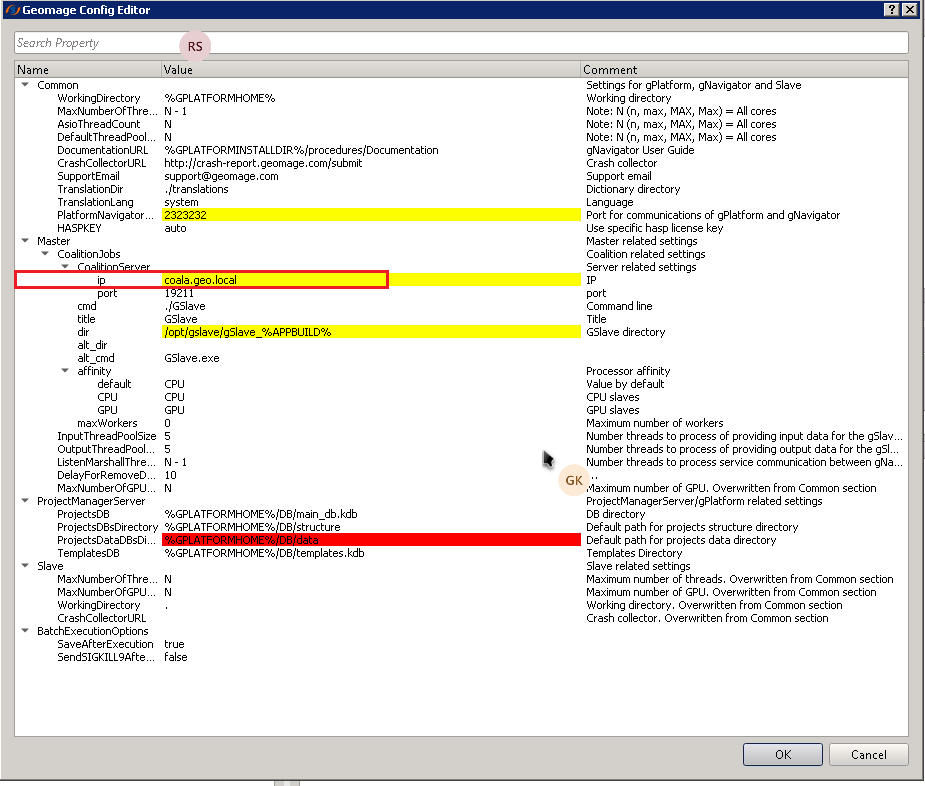
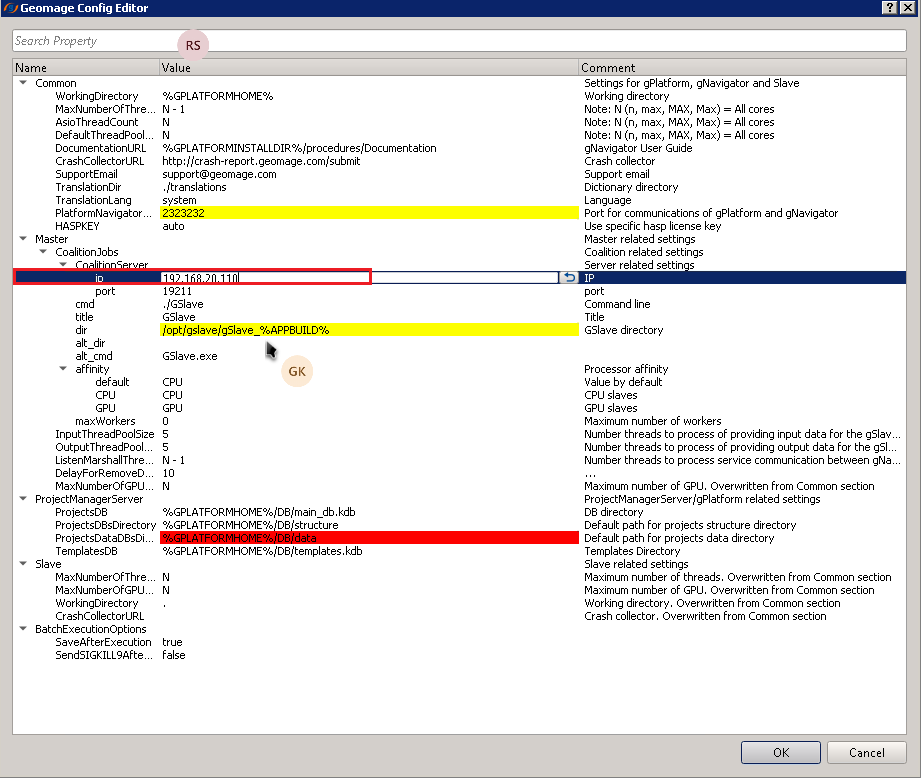
Here the system administrator has to configure the ip address, port and GSlave directory details in accordance with the local network environment.
After the configuration process completed, it will come up with a pop up window as shown below.
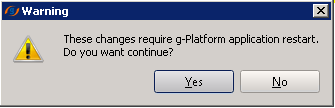
Click OK and continue to the next step.
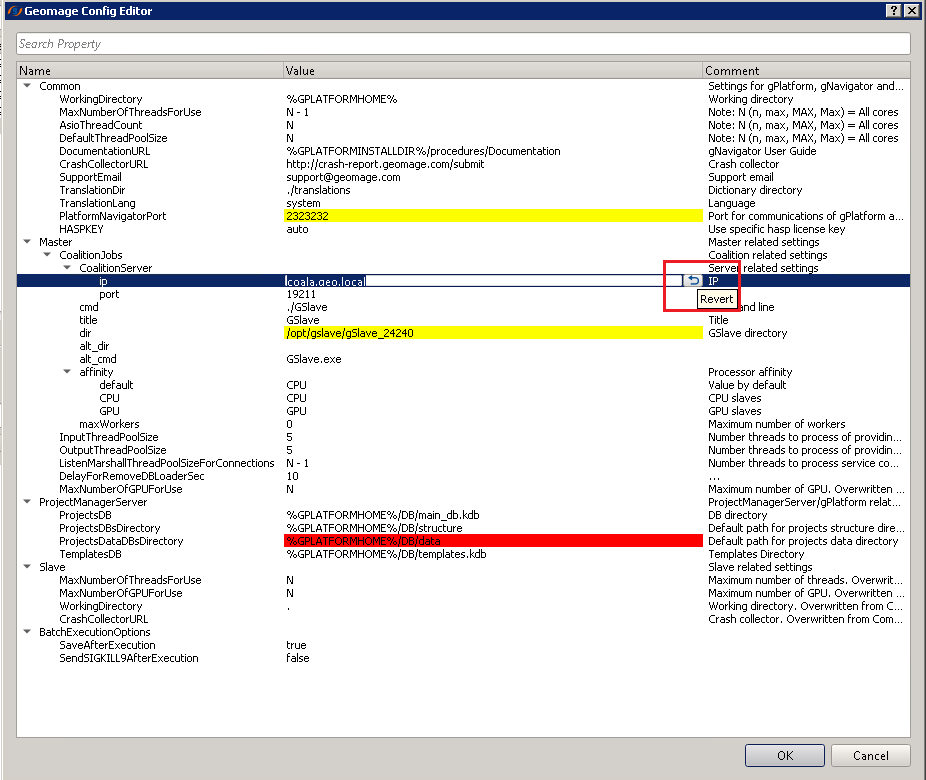
In case the Administrator wants to undo the change there is a revert button as shown below. It will override the changes we made and put it back to it's original value.
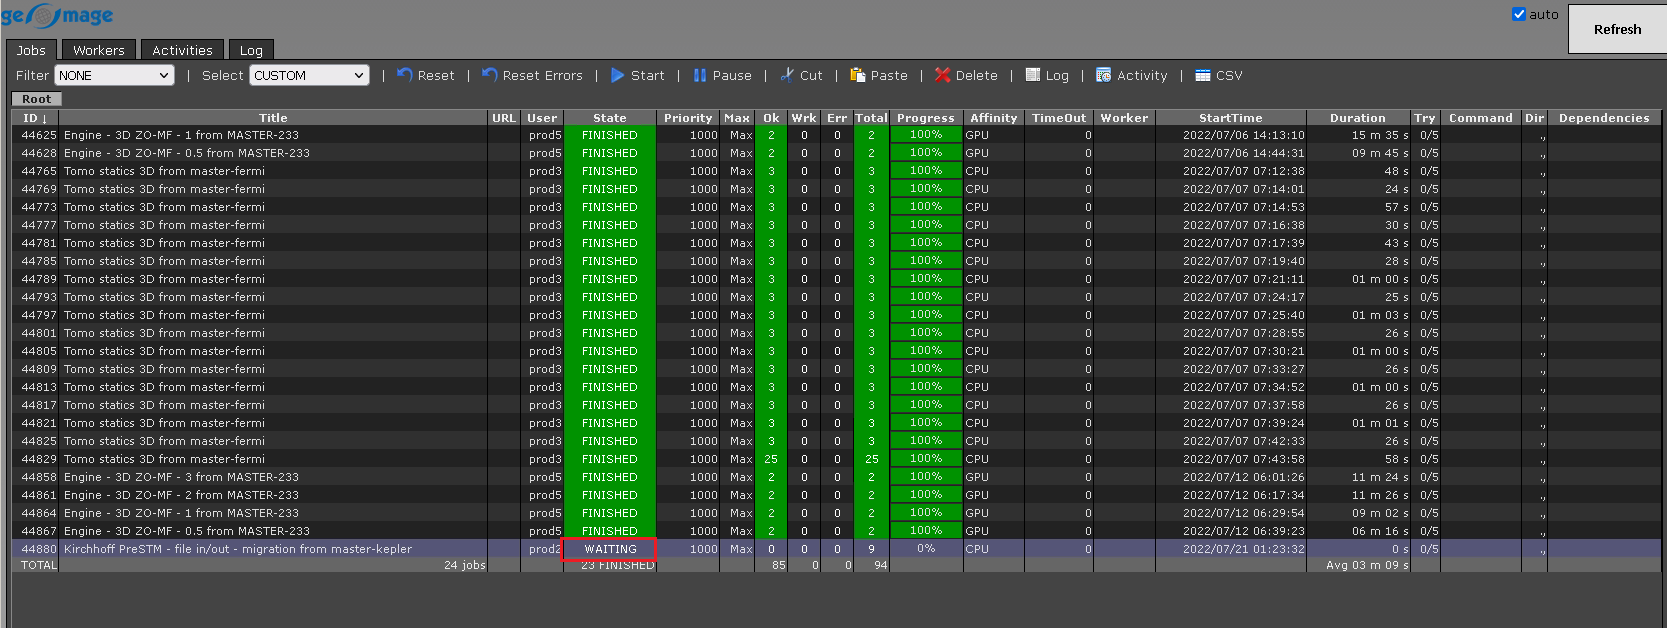
Now the job is waiting at the Coalition server and waiting for the user inputs.
Before proceeding further, we would like to discuss each one of the parts of the Coalition Server window.
The Coalition Server window has many features and settings:
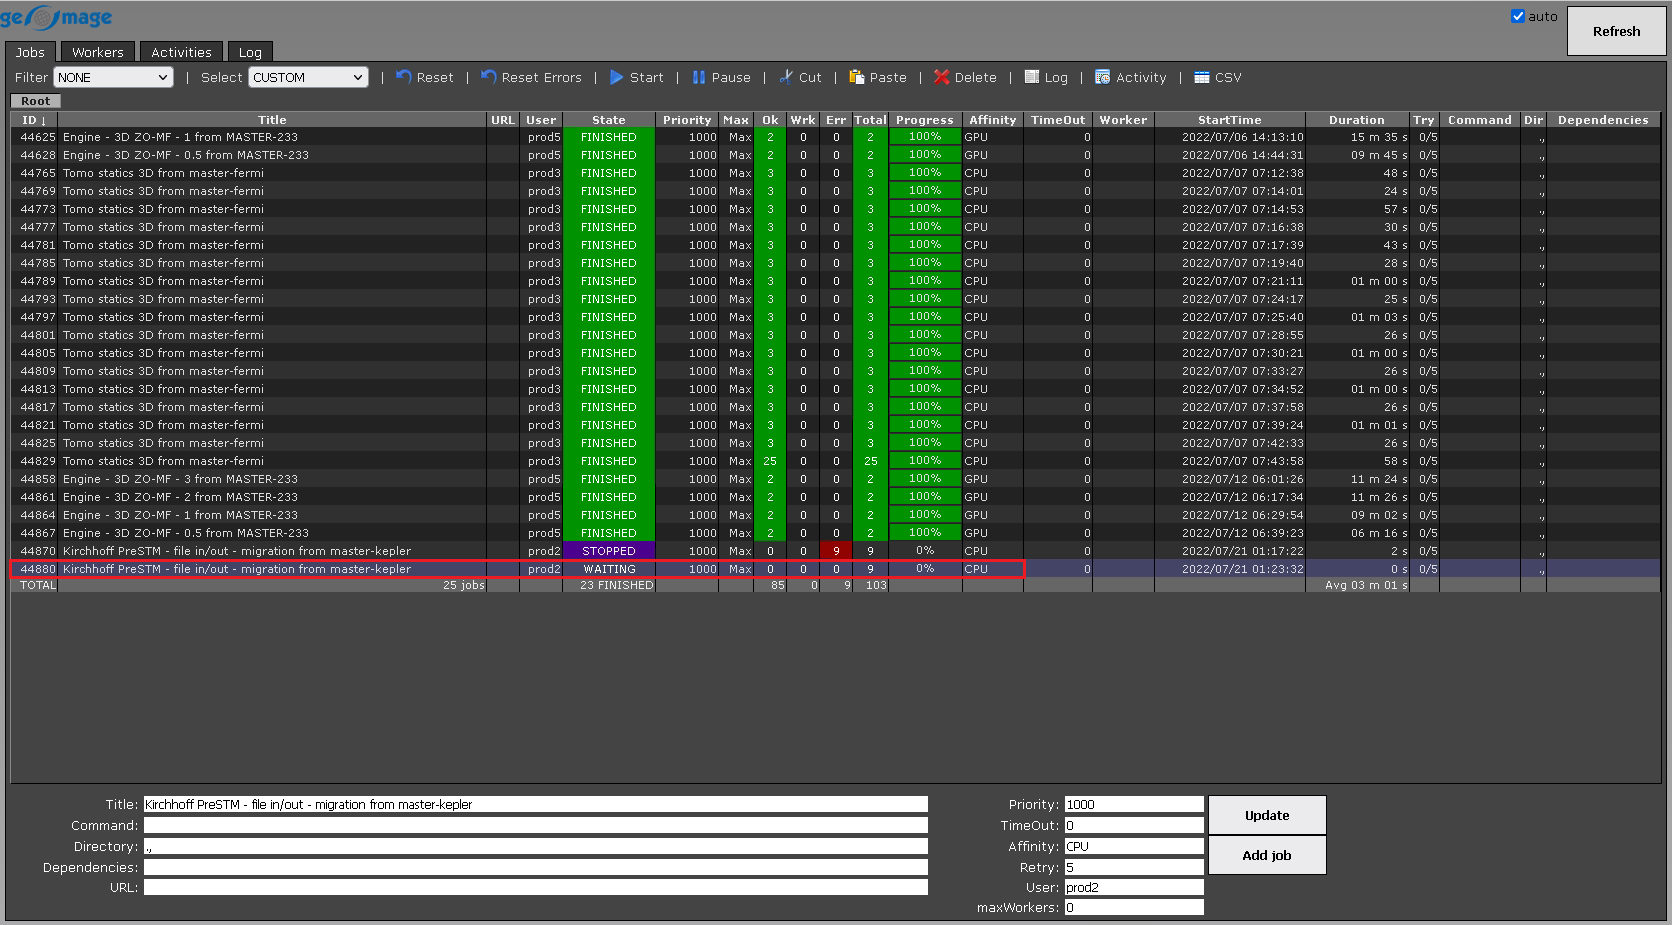
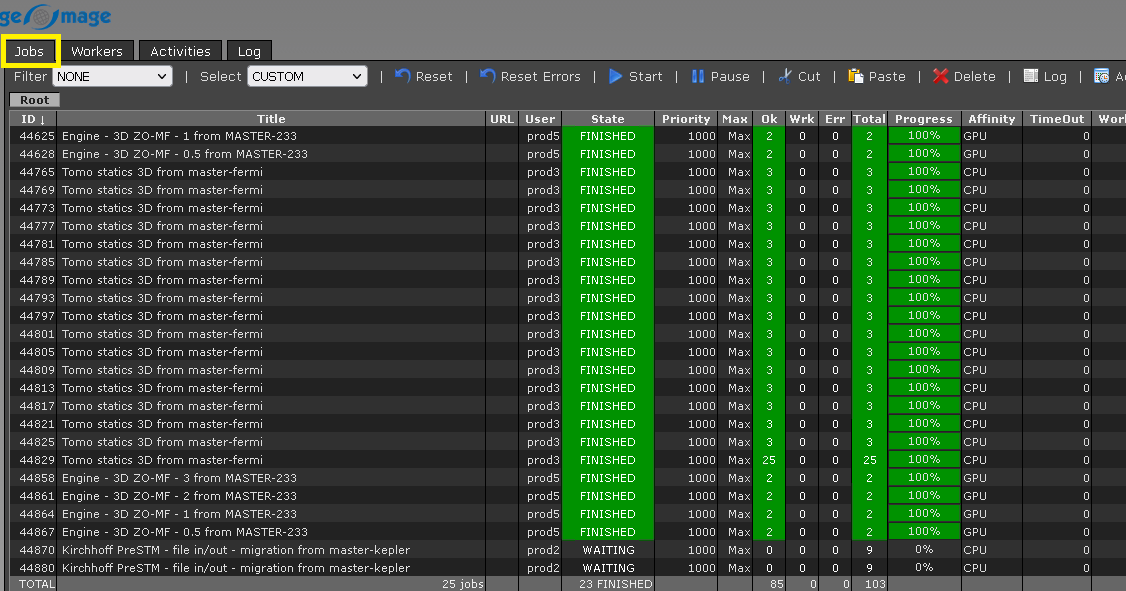
At the top of the window we have Jobs, Workers, Activities and Log as shown below.

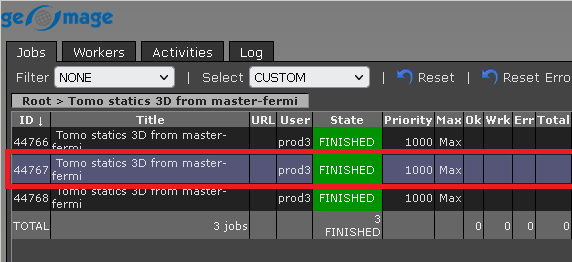
Jobs - this part displays all the jobs current and/or previously submitted jobs and their respective status. We can open it and check all the details (log):
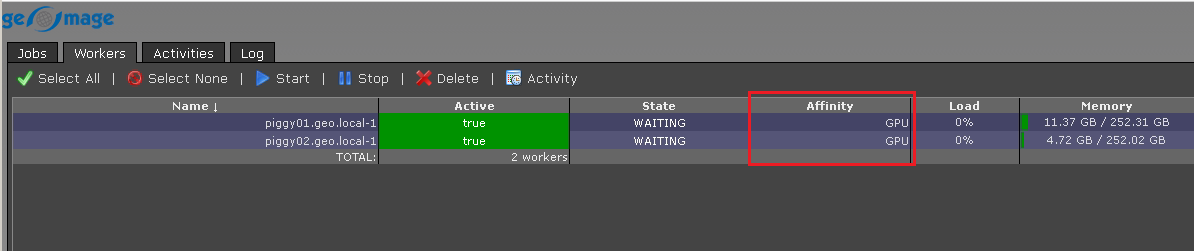
Workers - this is individual nods on the server. It can be GPU and/or CPU. It will display the available clusters:
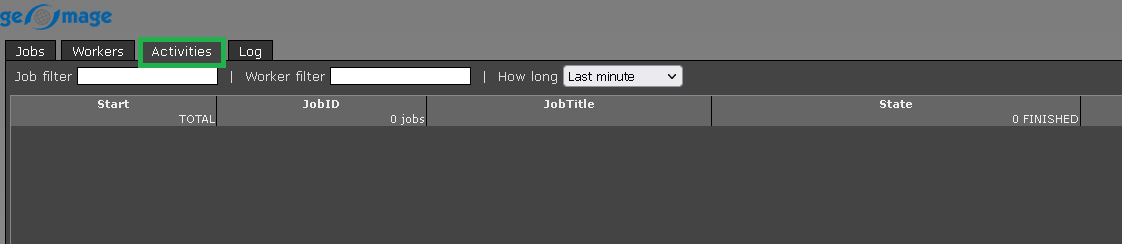
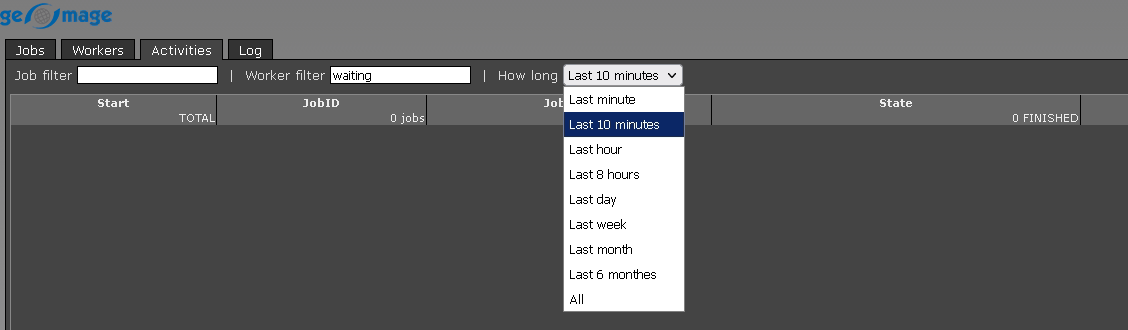
Activities - it will display any changes or activities happened in the last 10 minutes, one hour etc. We can filter and display the content:
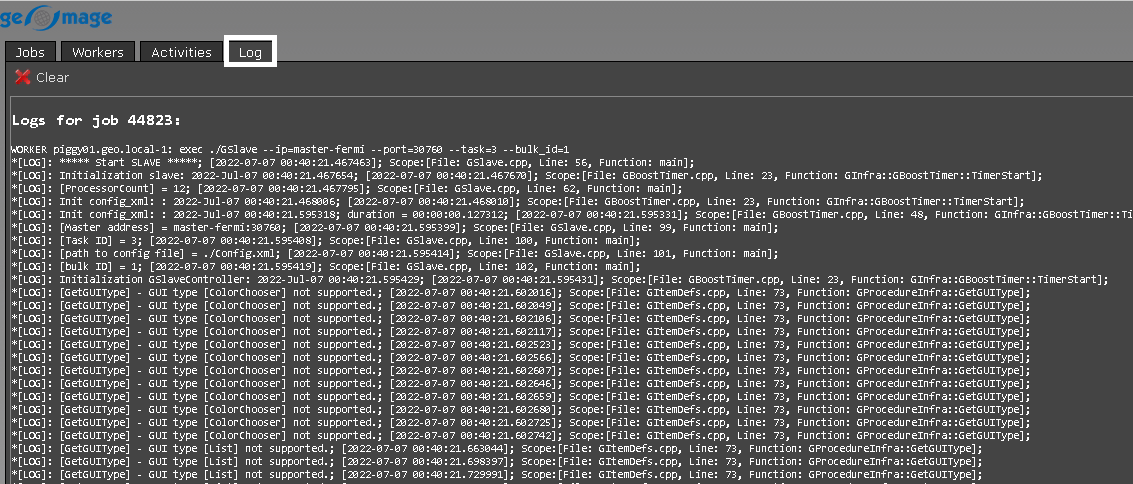
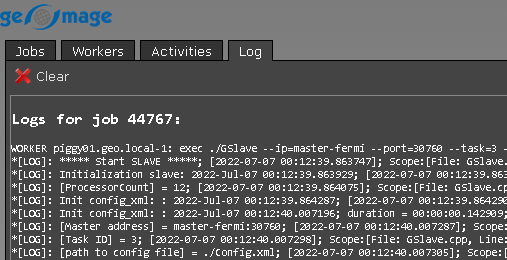
Log - this is where we can look into the log files (more detailed explanation is further down the console):
On the far right land corner, we have auto Refresh  . By default it is unchecked, it is advised to uncheck this option. It will auto refresh the jobs as they progress.
Next we have

Filter - We have many options here to display. The user can select any option to filter the display;
Select - this options selects the particular job/workflow with the selected filter option;
Reset - to reset the status of the job;
Reset Errors - to reset the errors;
Start - after selecting the particular job, press the start button to start the process;
Pause - to stop the running job;
Cut -
Paste -
Delete - to delete any job from the display;
Log - to view the log file. We will discuss more in detail about how to display and read the log file;
Activity -
CSV -
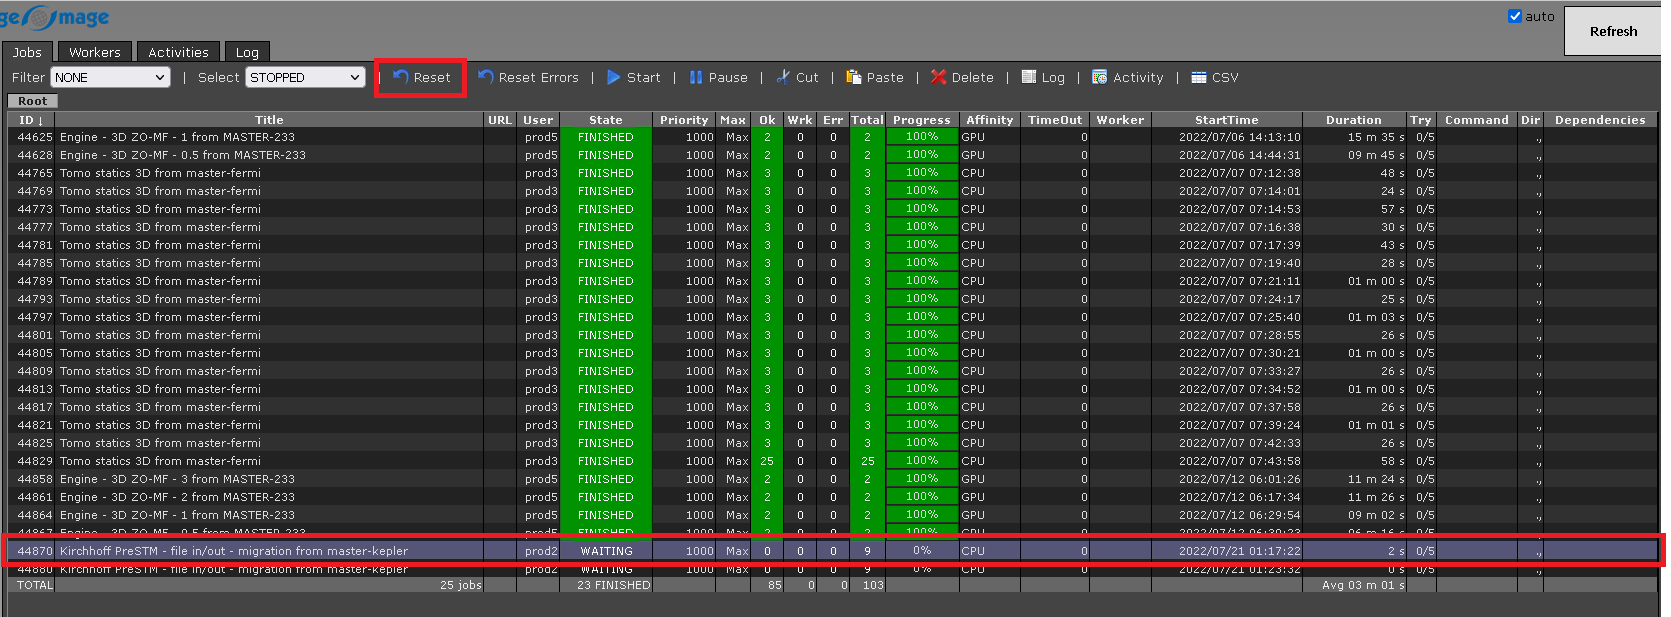
Filter:

We can select jobs in accordance with their status. It the above image, the default filter is NONE which means it will display all the statuses of the jobs. Let's change the status to STOPPED and WAITING and see what results we get:


Select: also have the same filter options like Filter item:
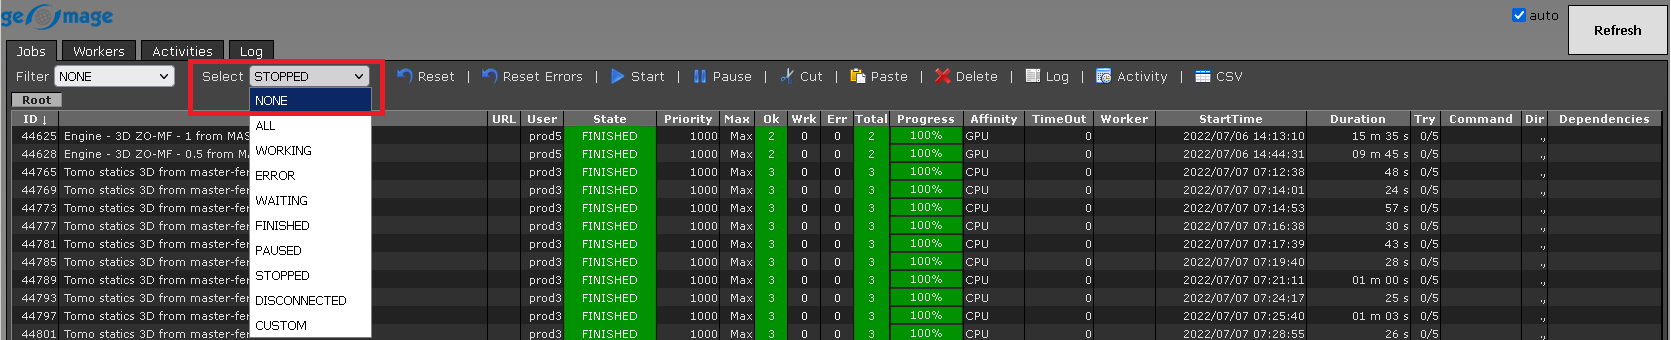
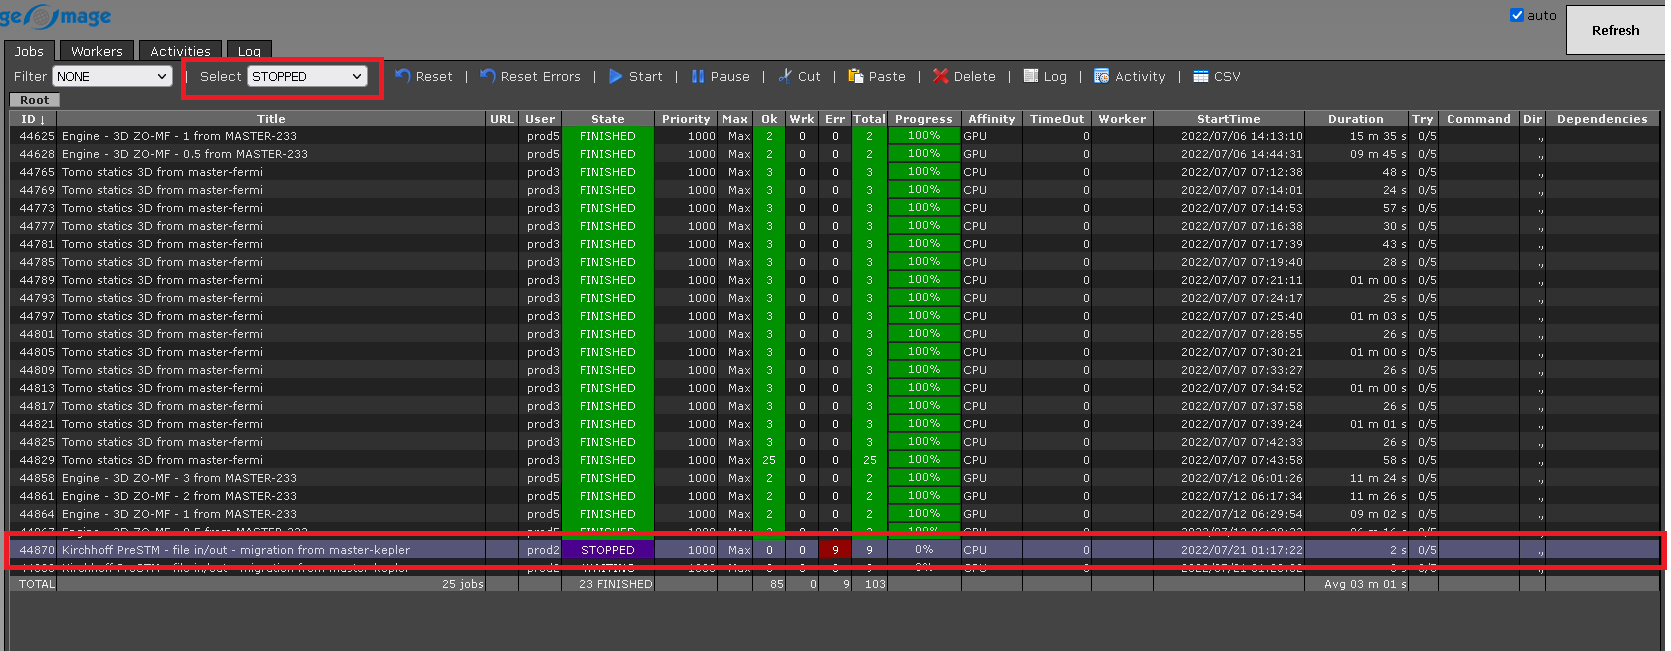
In case, we want to select the job which is stopped from many submitted jobs, we should select the filter option STOPPED from the drop down menu of the select item. It will select and highlight the selected job as shown below:
Reset:
When we selected any particular job and want to reset the status of this job, click on the Reset option. It will pop up with a window as shown below:
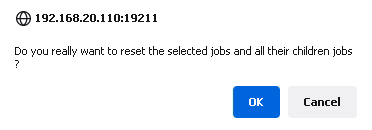
Click OK. Now this job status is changed from STOPPED to WAITING as shown below.
Similarly, we can perform the other tasks like Start, Pause and so on.
To view the Log file of any particular job/workflow:
1. Select the job
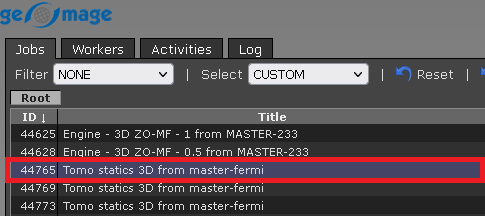
2. Double click on the job
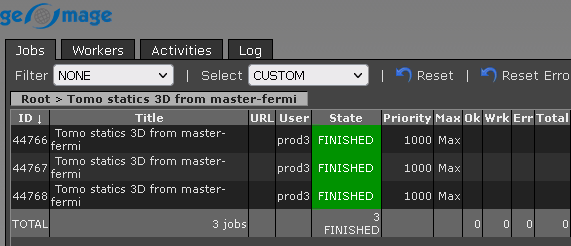
3. Double click on the selected file. We have 3 files here each one corresponds to 3 workers. So we can choose any one of the log file and it will display the information related to that particular worker only. Similarly we can select any other file and check the log information.
4. It will display the log file of this particular file/job id
Let's jump into the bottom part of the Coalition server window. There are few important points to mention Priority and Affinity.

It has:
Title - displays the selected job;
Command - It displays the background command performed by the Coalition server to assign the job to a particular worker (User doesn't need to enter anything);
Directory - it displays the g-Slave directory (It captures automatically from the configuration file and the user doesn't need to do anything here);
Dependencies -
URL -
Priority - This is one of the important parameter. Depending on the priority level the job scheduler executes the job. If we need to increase job priority we just should to increase a number, for example from 1000 to 1001;
TimeOut - By default 0;
Affinity - This is the second most important parameter in job scheduling. This defines which type (CPU or GPU) of processor should be used for calculation. We can change the affinity to CPU/GPU in accordance with the cluster configuration and requirement. Some modules works only on CPUs (see it documenation) and in that case, we must put the affinity as CPU only;
Retry- By default 5. It will try to submit the job 5 times before exit;
User - It automatically captures the current user and displays the user name;
Max Workers - User has the control to limit the maximum number of workers to perform the task. In a setup;
Update - updating any changes that were made by user (like priority, affinity etc). We must click the Update button to make the changes effective;
Add job -
Once we are finalizing the setup, we are ready to submit the job. Let's see what we defined in the Settings tab of our job:
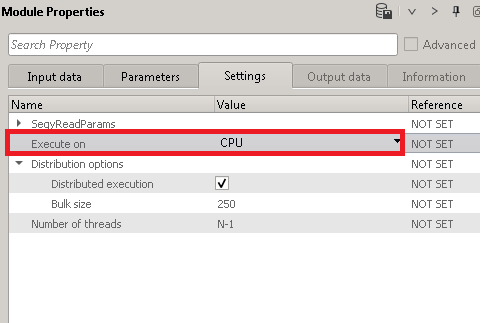
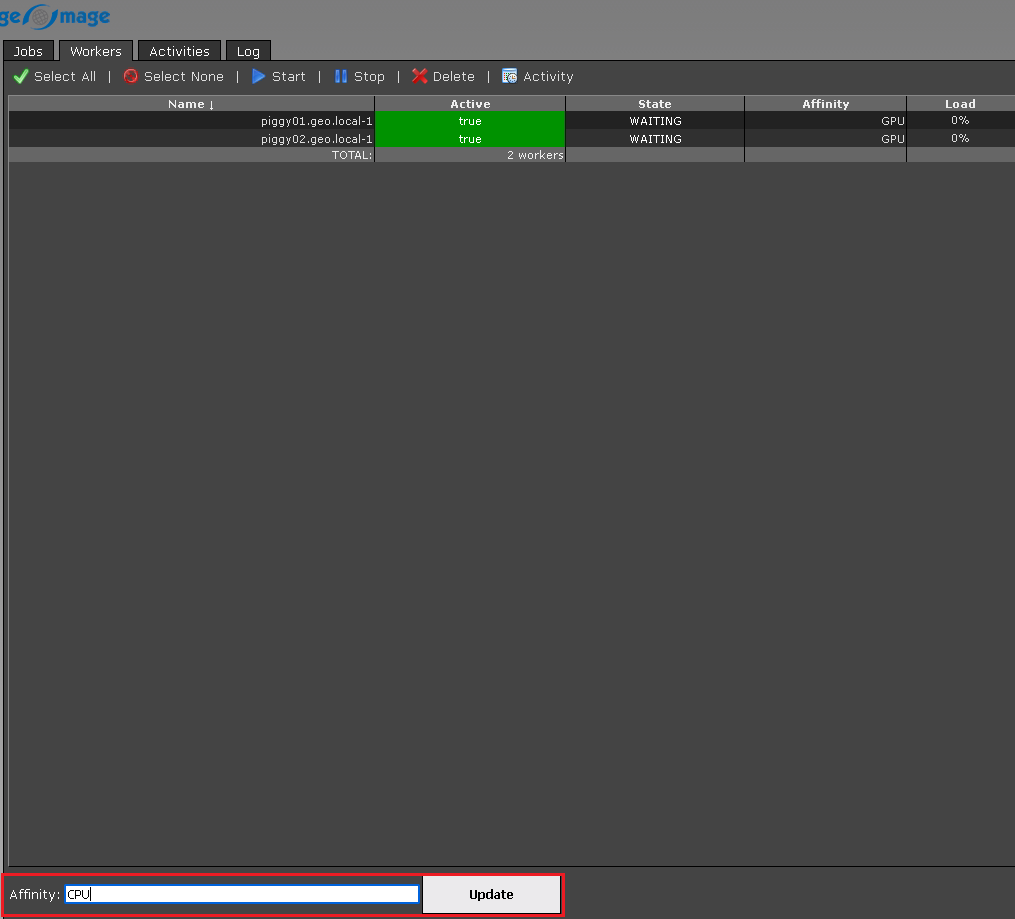
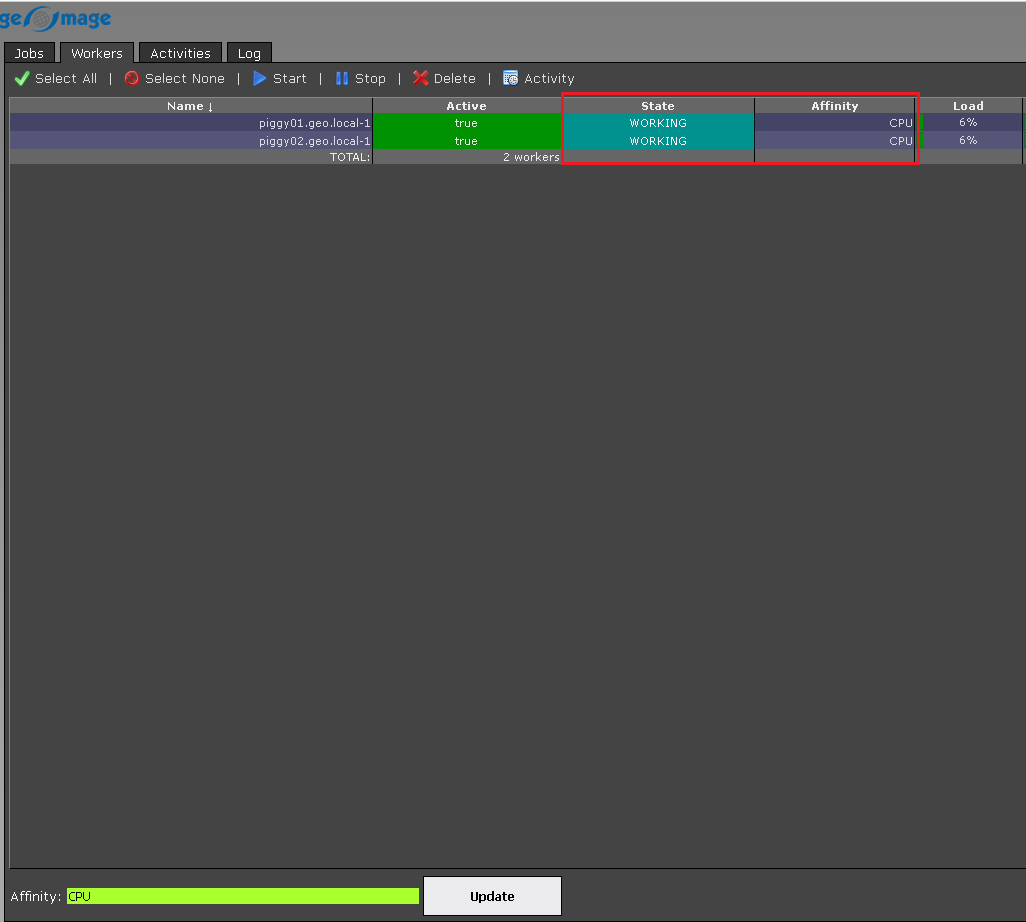
We've selected to execute the job in CPU and let's see what workers do we have:
We have 2 GPU workers piggy01 & piggy02. In order to execute the job, we must change the Affinity of these two workers from GPU to CPU (if we have both CPU and GPUs in the cluster).
We should select the Workers (for multiple selection hold Ctrl and/or Shift) and change the affinity from GPU to CPU and click Update button:
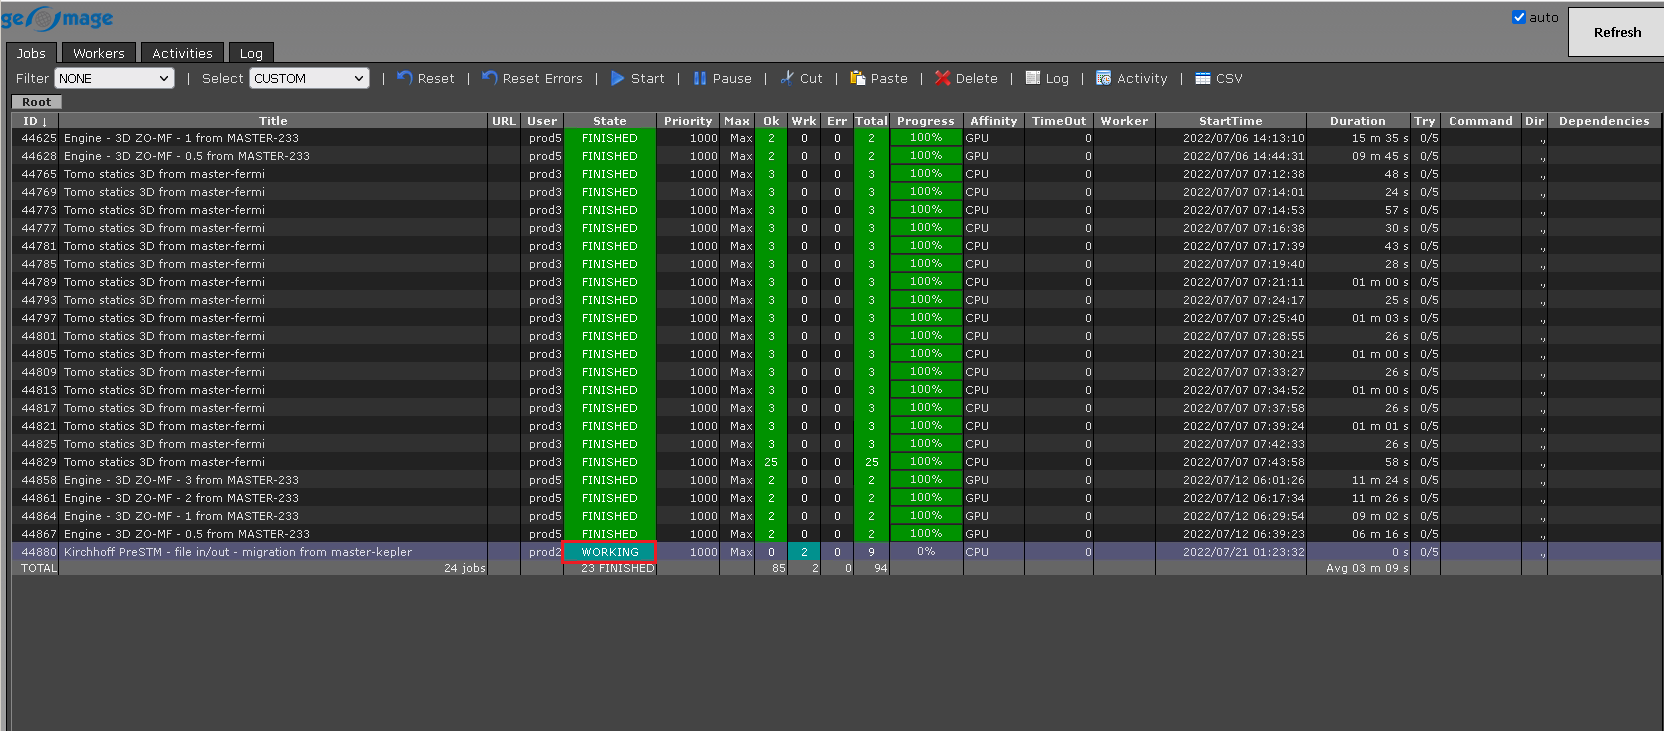
The job status changes from WAITING to WORKING:
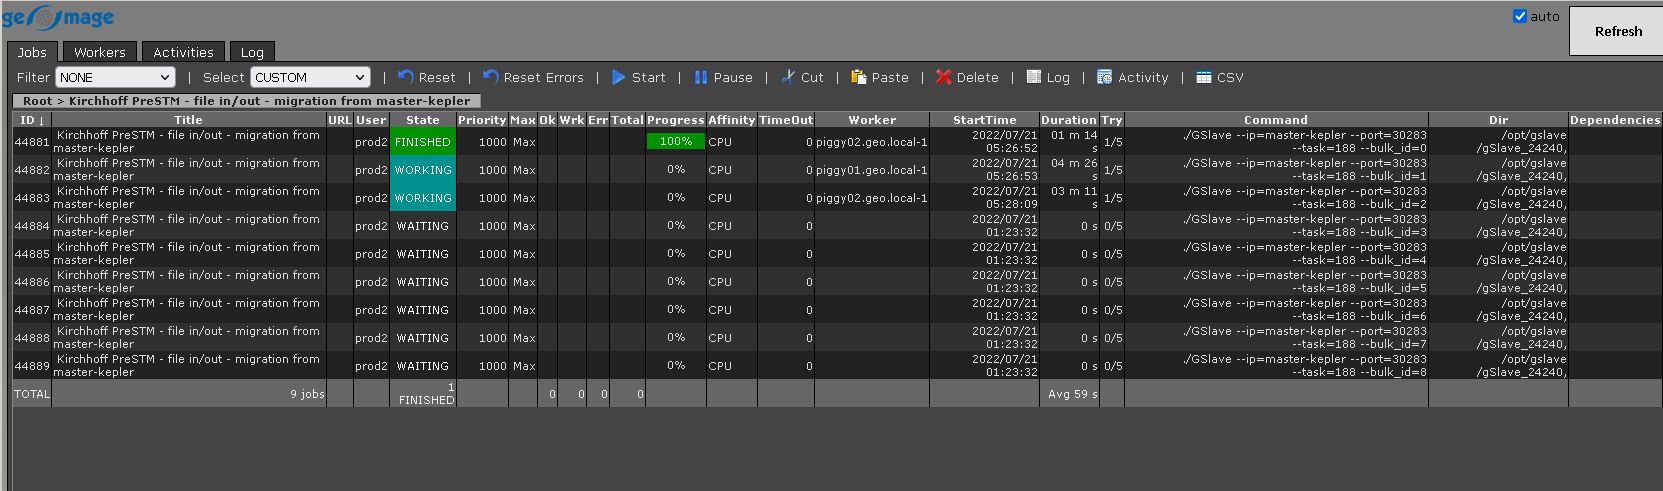
Depending on the bulk size, it will divide the data into different chunks (we have 2141 CMPs, so 2141/250 which gives us nearly 9 chunks. Now it will assign 2 workers (since we have maximum 2 workers only) and process these chunks, other chunk is waiting for free nodes.
 If you have any questions, please send an e-mail to: support@geomage.com