Spectral balance
Restoring/compensation of frequencies using Spectral balance
Theory
Seismic data is made up of amplitudes and frequencies. During the seismic data acquisition, the source (vibroseis/dynamite/airgun) generates the required energy that the seismic waves travel through the sub-surface. In the process, there is lot of energy is absorbed by the earth which acts as a filter. Also, the energy get dissipated, dispersed, scattered & attenuated. Due to the loss of energy, both frequency and amplitudes suffer. There are various schemes to compensate the loss of amplitudes and frequencies.
Spectral balance is one of the method which helps in recovering the lost frequency component of the seismic data. As we mentioned earlier, when the seismic energy propagates through the earth it loses it's energy due to absorption and scattering of the energy. Due to this, frequency attenuation happens especially of the higher frequencies in the deeper regions. To compensate or recover this frequency, we use spectral balance.
How does spectral balance work?
First, we transfer the data from time domain to frequency domain. Next, in the frequency domain, it breaks/divides the data into different frequency bands, running a transparent AGC on each of the frequency bands with the amplitude set to a predetermined level and then recombining all the frequency bands to rebuild the original trace.
The process can accomplish two primary functions with respect to the amplitude spectra:
- Down weight low frequency noise due to shot noise which is often higher amplitude after surface consistent deconvolution.
- Increase the amplitude of higher frequency components of the data (usually to run after surface consistent deconvolution).
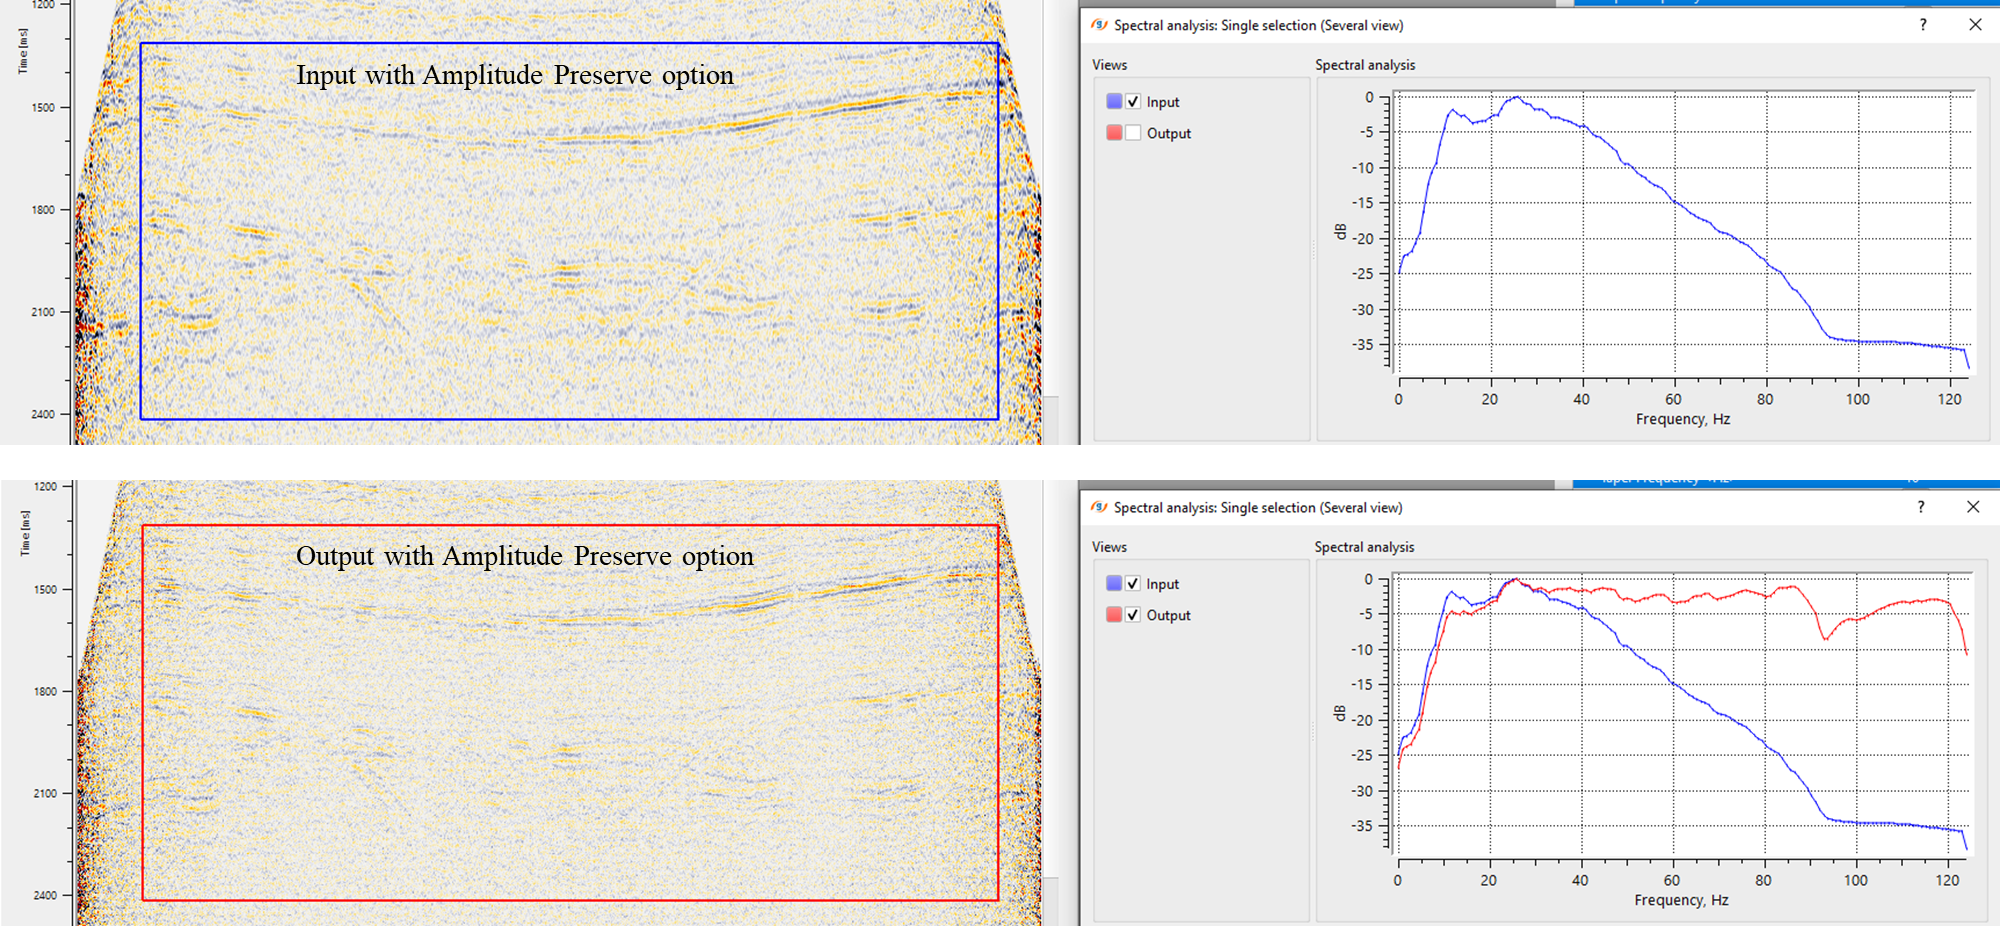
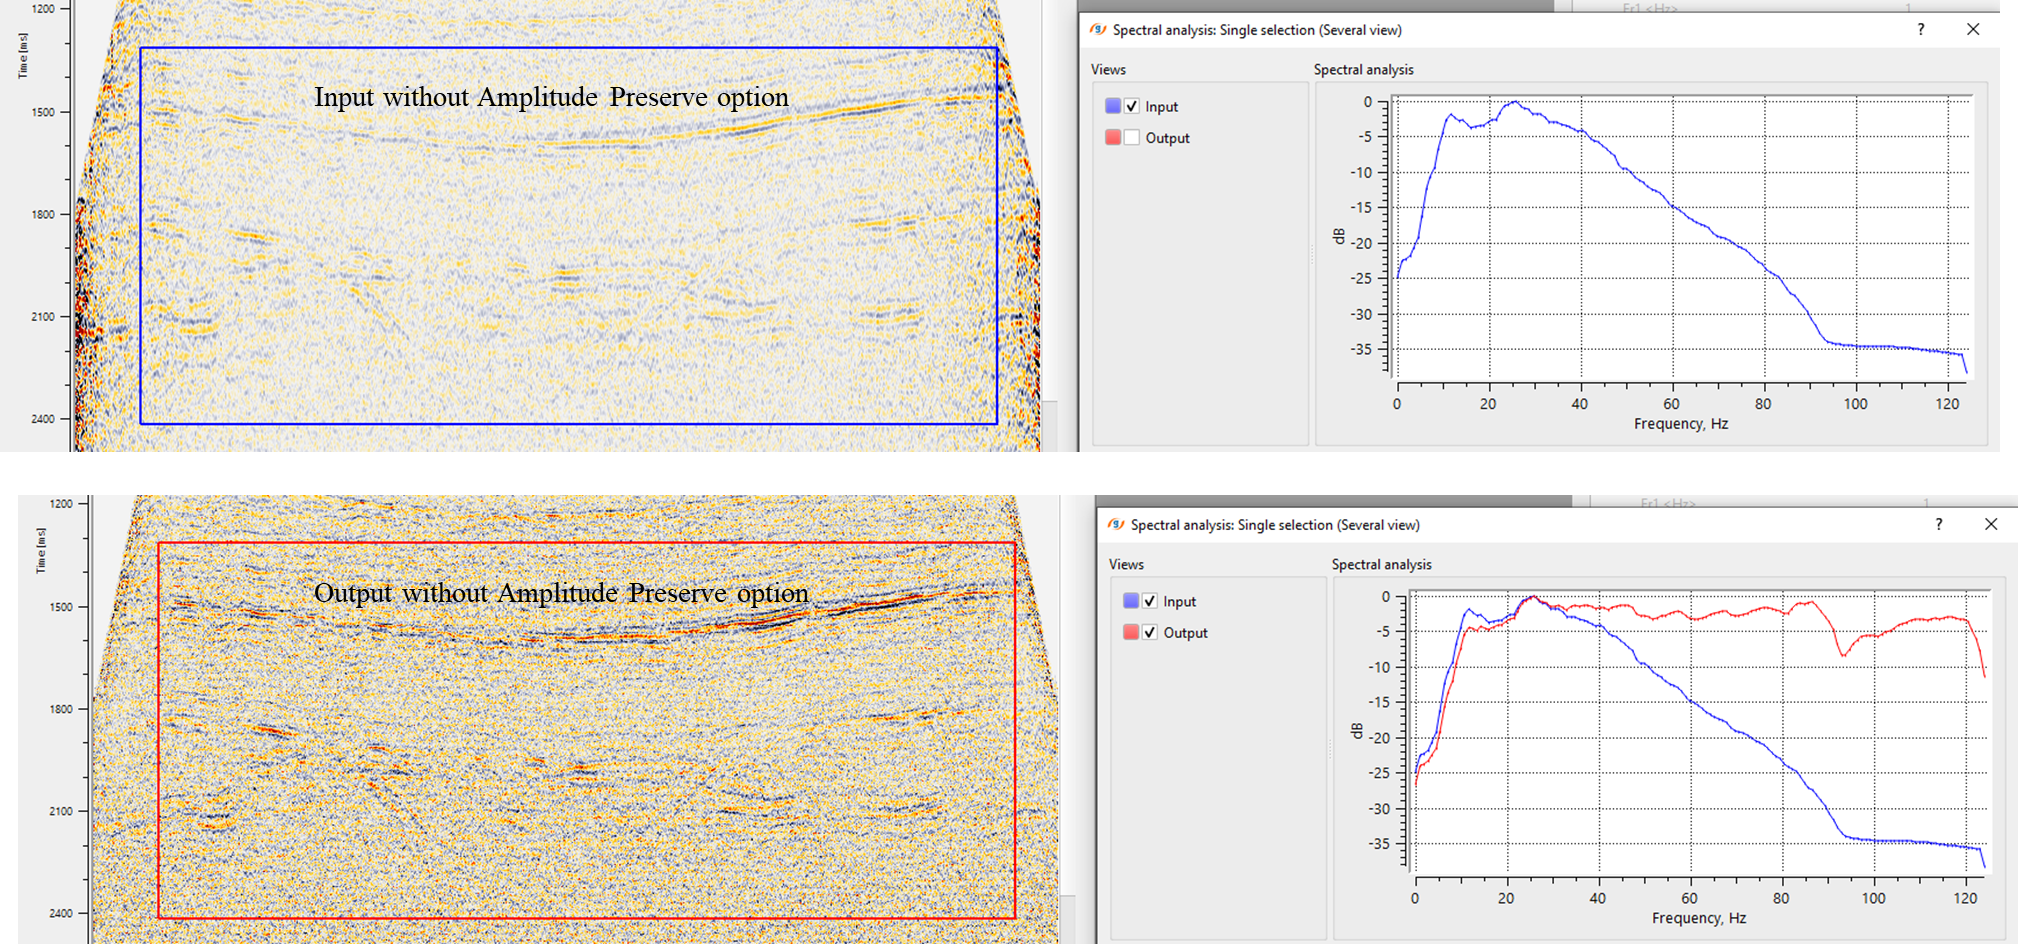
After the application of Spectral balance, the user can expect a flattened spectrum with the recovery/restoration of higher frequencies in the deeper part of the sub-surface. To check the functionality of the module, the user can simply perform a spectral analysis before and after Spectral balance application on input data. Compare the input and output spectrum to see the recovery of the higher frequencies after spectral balancing.
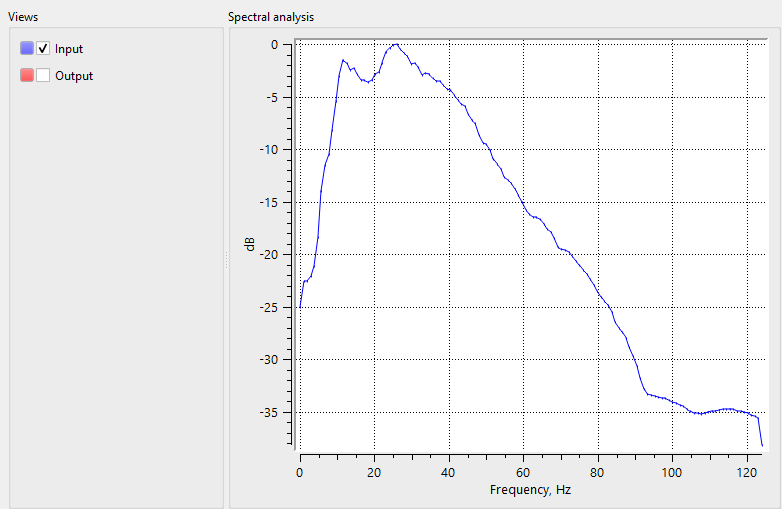
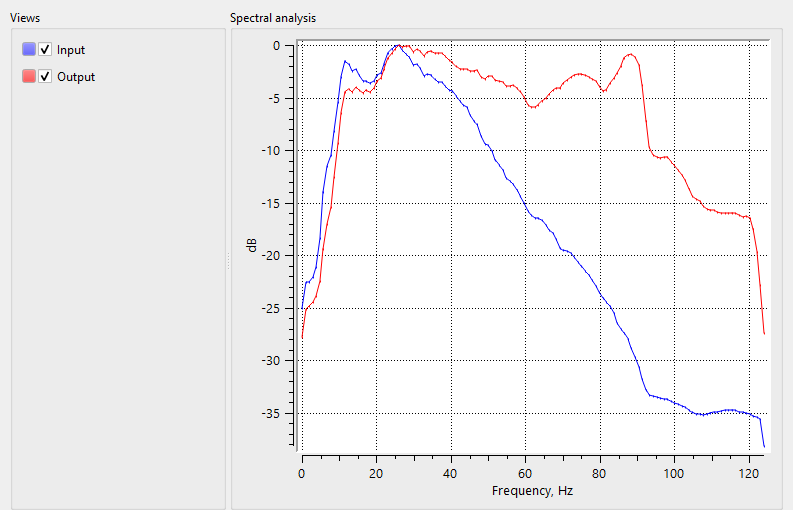
Input data
Input DataItem
Input gather
Connect/reference to the output gather.
Parameters
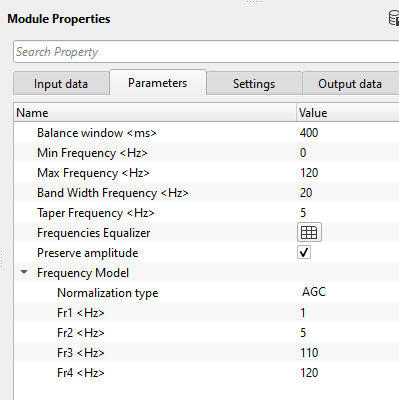
Balance window
specify the running window for frequency bands equalization.
Min Frequency
specify the starting/minimum frequency to be considered in the frequency band determination.
Max Frequency
specify the maximum frequency to be considered in the frequency band determination.
Band Width Frequency
This parameter determines the step size of the frequency band. For example, if the min & max frequencies are 1 to 120 and the band width frequency is 20 Hz then the frequency bands will be 1-20 Hz, 21-40 Hz, 41-60Hz,.....,101-120 Hz. etc.
Taper Frequency
Provide the frequency taper value. This ensures that there aren't any sharp boundaries between the frequency bands.
Frequencies Equalizer
This will modify the amplitude distribution of the different frequency bands. It corrects the imbalances by applying targeted adjustment to all frequency bands. Higher frequencies attenuate faster that the lower frequencies. So, the user should provide the frequency and the corresponding amplitude % in the table.
Frequency - Provide the frequency value
Amplitude - Specify the % amplitude value against the frequency value.
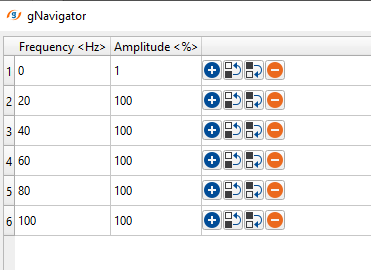
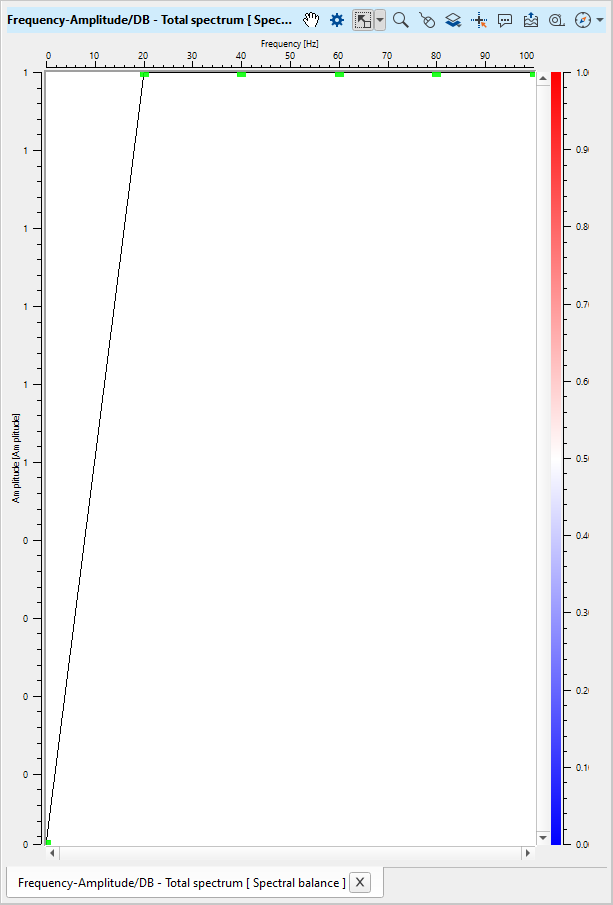
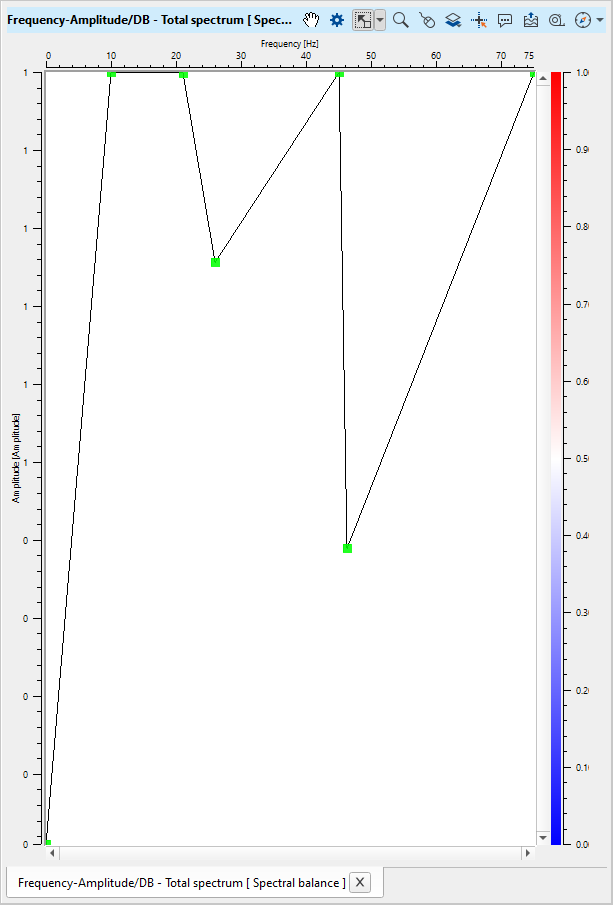
Based on the Frequency amplitude pairs, it generates the Frequency - Amplitude spectrum. As we can see in the below image, from frequency Zero (0) to Frequency 20, the amplitude is moved from 0 to 1 or 100% of the amplitude. It remains the same for the rest of the frequencies as we defined in the Frequency equalizer parameters table.
The user has the option to manually edit the frequency and amplitude values in the table or by editing on the frequency amplitude spectrum itself. In the below images we've spectrum response of the user specified frequency amplitude values (as shown in the parameters) and manually edited values on the frequency amplitude spectrum itself. To manually edit on the spectrum, the user should drag the Green dots on the frequency amplitude spectrum.
Preserve amplitude
By default, FALSE (Unchecked). If this option checked, it will not change the amplitudes of the input data.
Frequency Model
This is the working frequency range. Specify the frequencies to be considered.
Normalization type { AGC, Envelop }
Choose the normalization type from the drop down menu. By default, AGC.
Fr1
provide the 1st frequency slope
Fr2
provide the starting frequency
Fr3
provide the ending frequency
Fr4
provide the last frequency slope
Settings
Auto-connection
By default, TRUE(Checked).It will automatically connects to the next module. To avoid auto-connect, the user should uncheck this option.
Bad data values option { Fix, Notify, Continue }
This is applicable whenever there is a bad value or NaN (Not a Number) in the data. By default, Notify. While testing, it is good to opt as Notify option. Once we understand the root cause of it, the user can either choose the option Fix or Continue. In this way, the job won't stop/fail during the production
Notify
It will notify the issue if there are any bad values or NaN. This is halt the workflow execution.
Fix
It will fix the bad values and continue executing the workflow.
Continue
This option will continue the execution of the workflow however if there are any bad values or NaN, it won't fix it.
Number of threads
One less than total no of nodes/threads to execute a job in multi-thread mode. Limit number of threads on main machine.
Skip
By default, FALSE(Unchecked). This option helps to bypass the module from the workflow.
Output data
Output DataItem
Output gather
Output from this module is a spectral balanced output gather.
Information
There is no information available for this module so the user can ignore it.
Examples
In this example workflow, we are applying spectral balance to an inline stack.
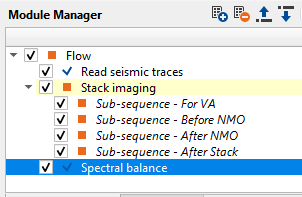
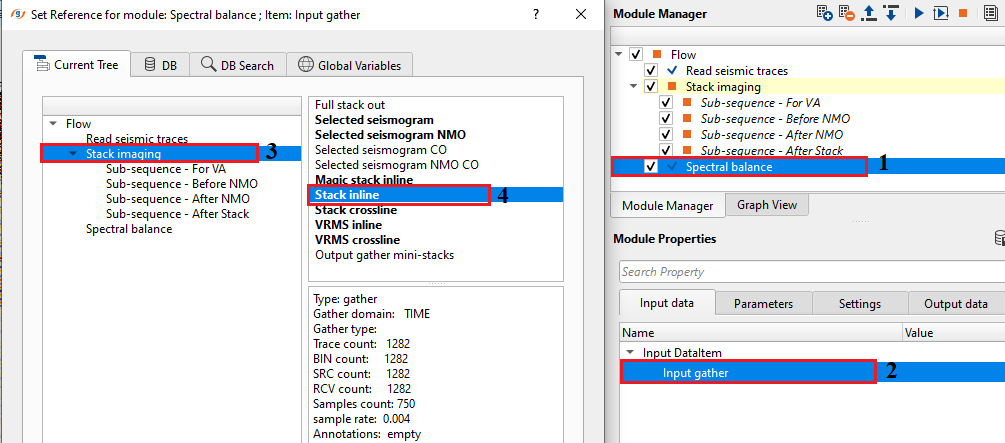
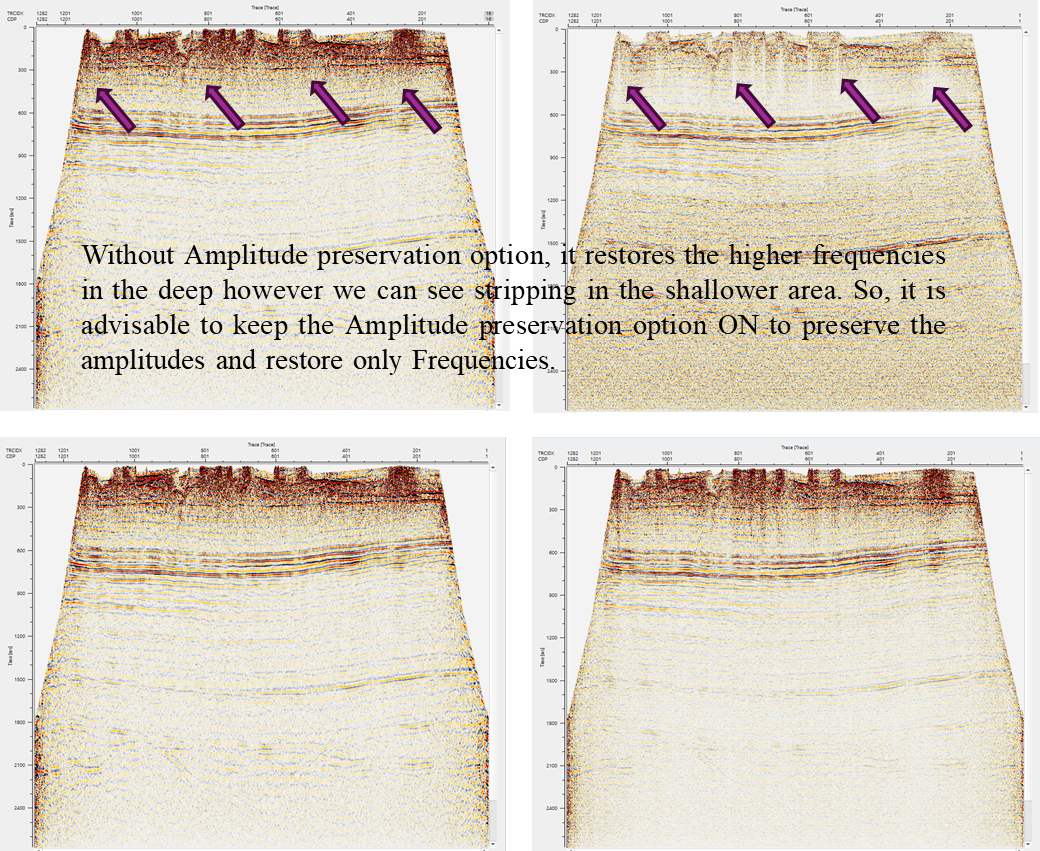
Spectral balance applied on an inline stack with two different options i.e., with & without Amplitude preserve option.
Actions
There are no action items available for this module so the user can ignore it.
Video lesson
YouTube video lesson, click here to open [VIDEO IN PROCESS...]
Related articles
Yilmaz. O., 1987, Seismic data processing: Society of Exploration Geophysicist
 * * * If you have any questions, please send an e-mail to: support@geomage.com * * *