Step 1
Go to the seismic files view of the seismic data predefined workspace.
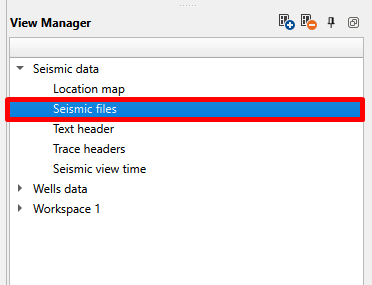
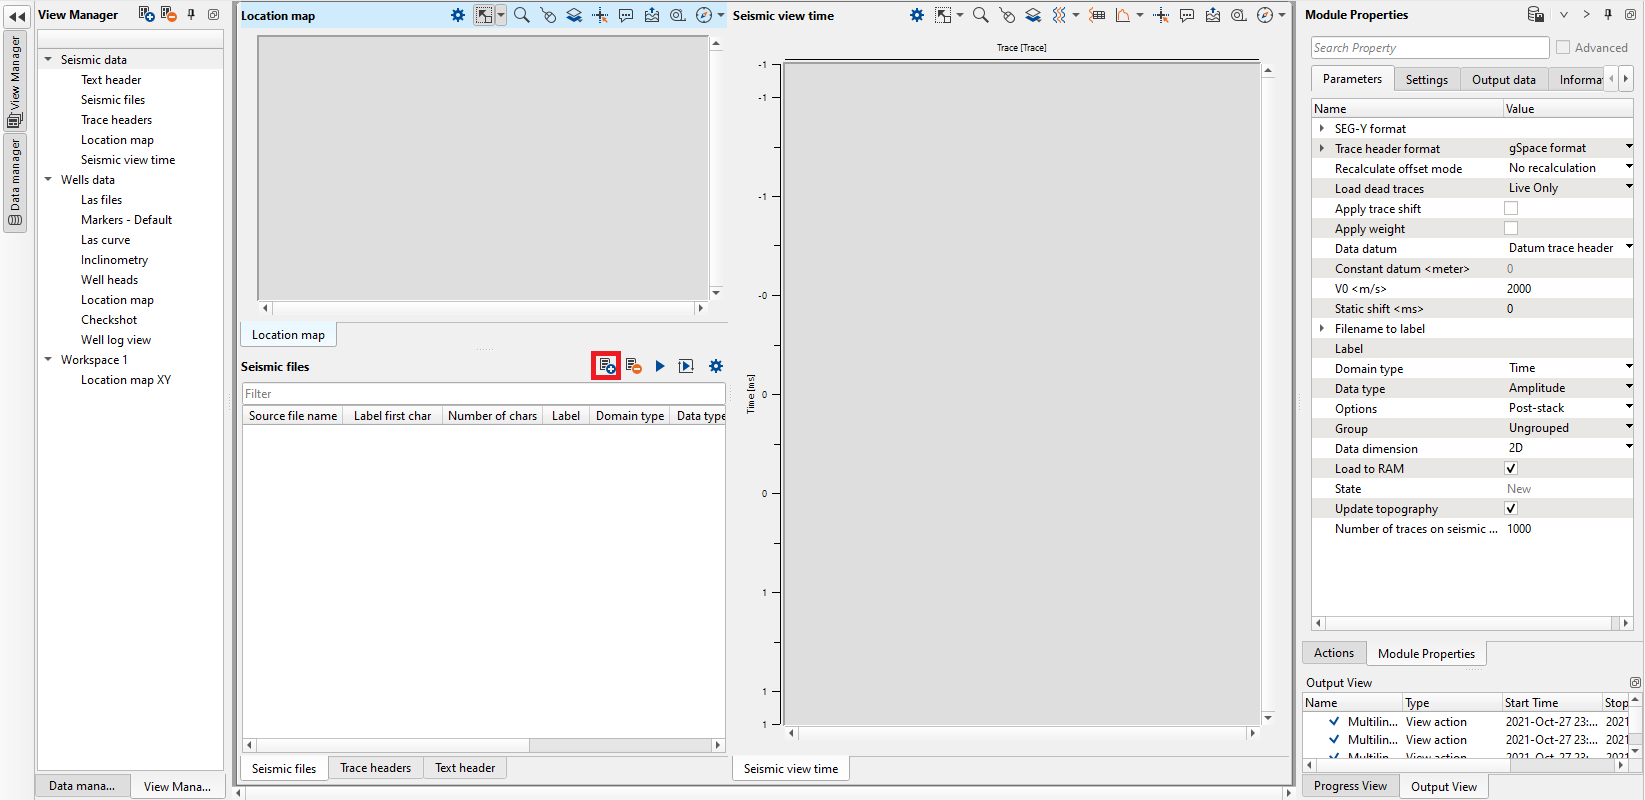
For this choose the seismic files view in the view manager:
In the seismic files view press Add files button: ![]()
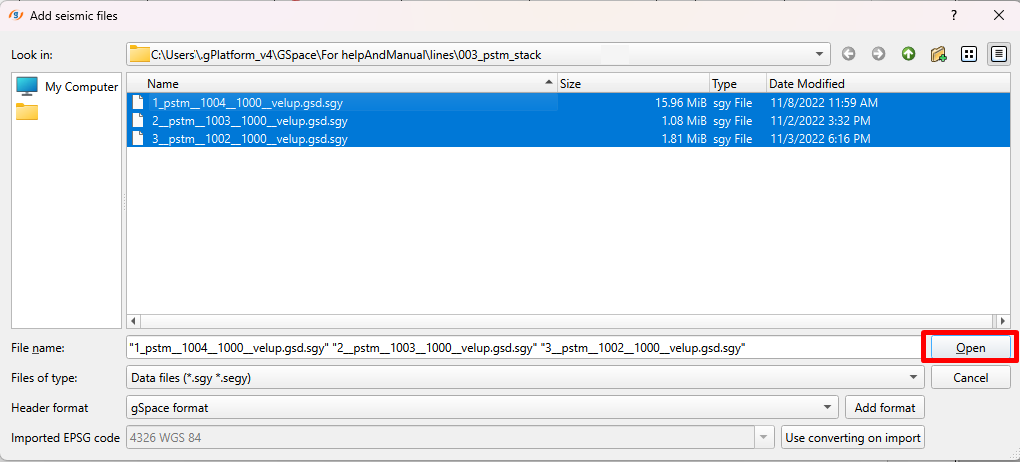
Locate seismic data and press Open:
Step 2: Data Preview and setting parameters
In the seismic files view set Domain (time/depth), Data type (amplitude/velocity/attribute), Options (Pre-/Post-stack), add to group (for example processing type), Data dimension (3D/2D).
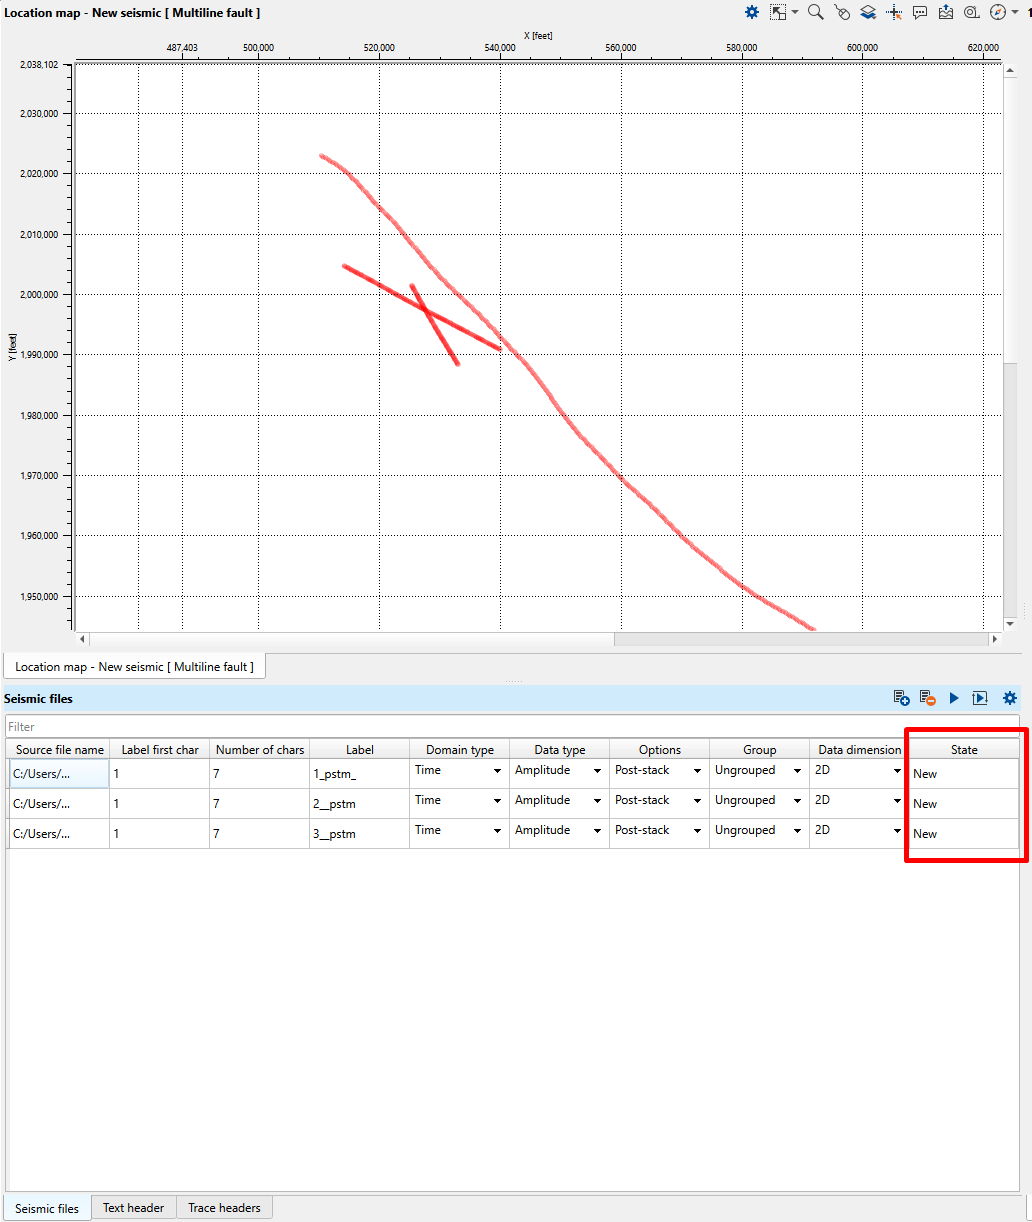
On the location map the loading lines or bins will appear in RED - it means they haven't been loaded yet. Also they marked as 'New' in the State column in the seismic files view (may not be displayed if the default header format differs from the actual seismic):
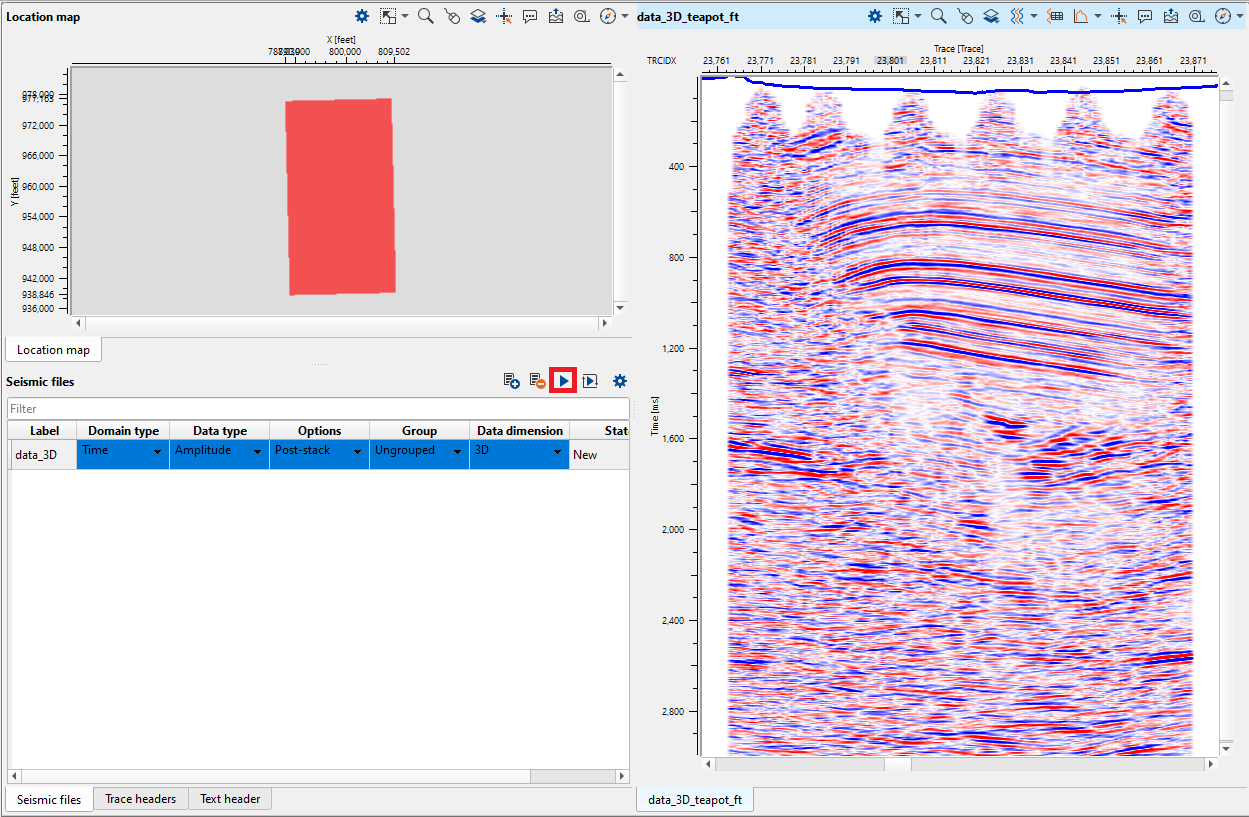
In case of 3D bins will appear in RED:
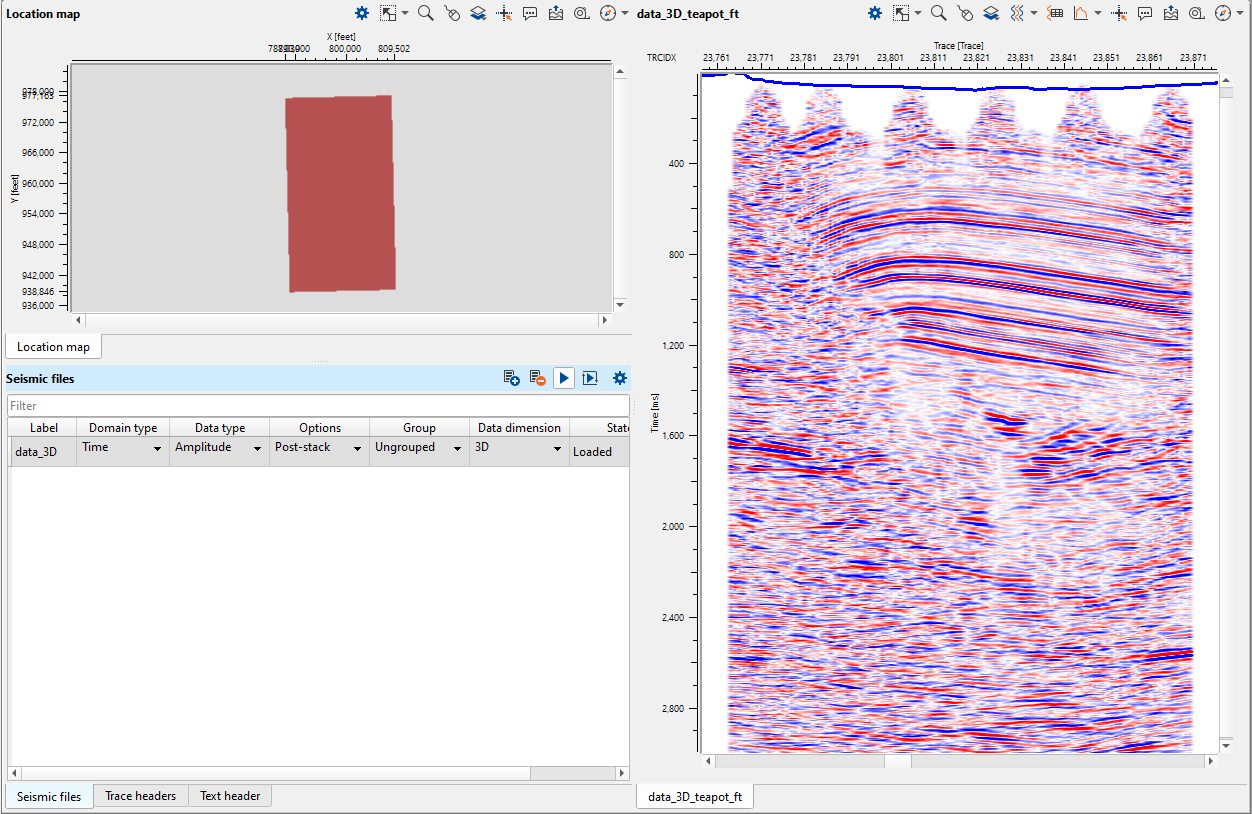
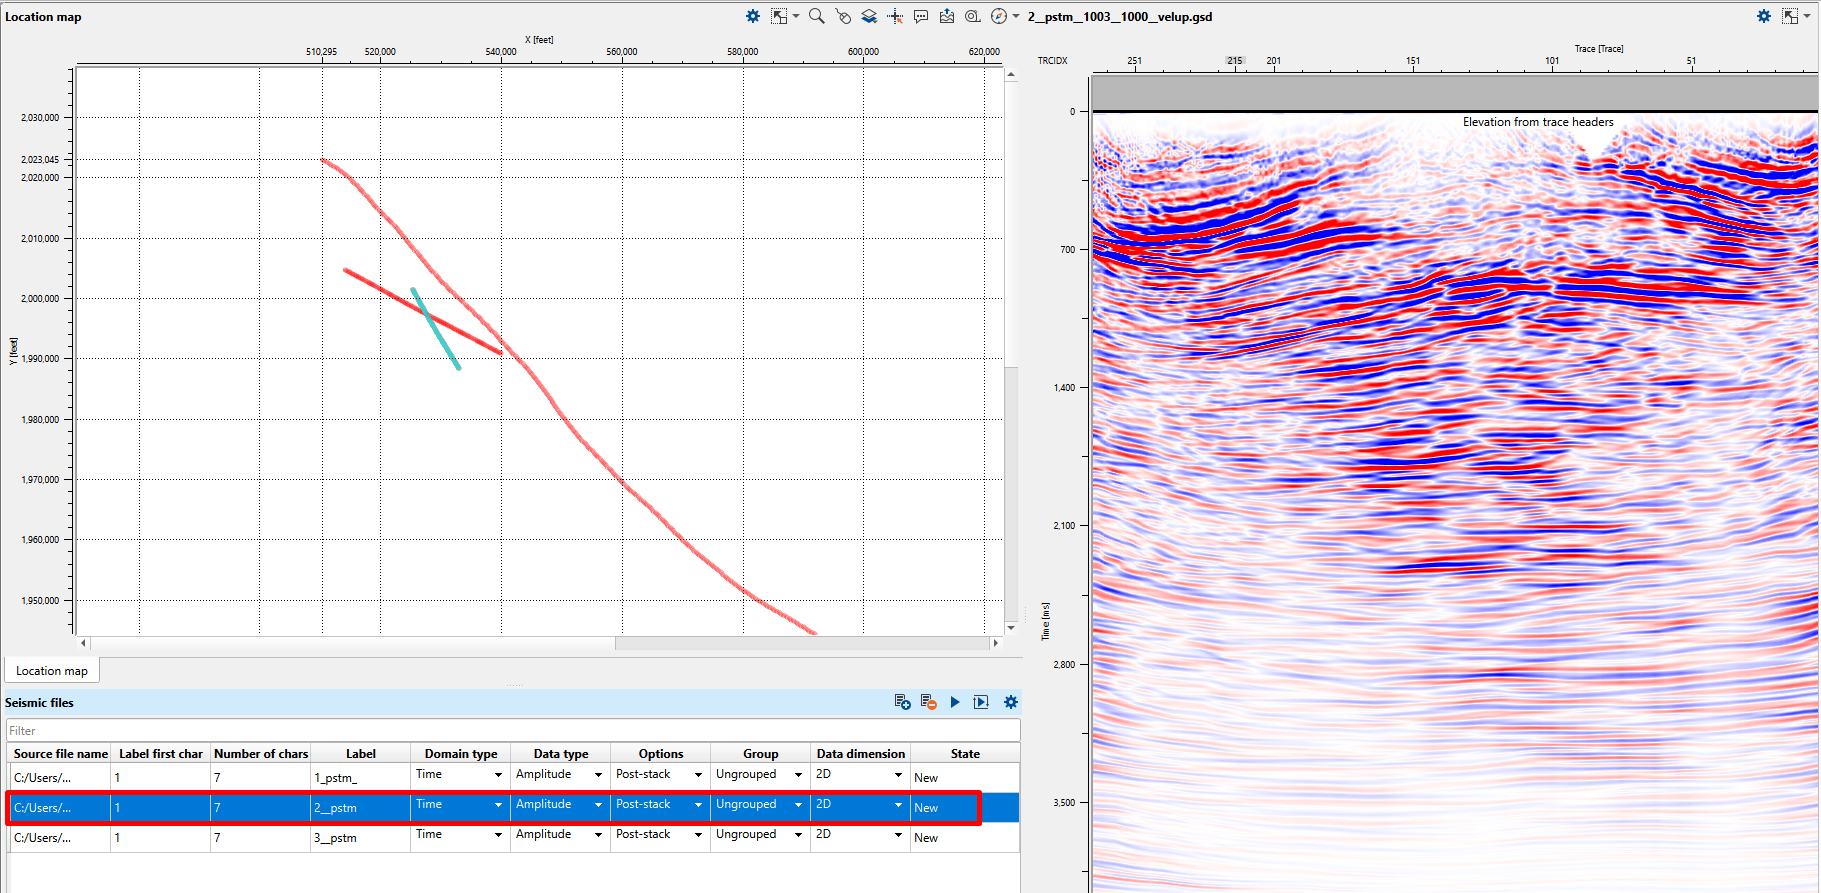
Choose specific file in the seismic files view to see the traces:
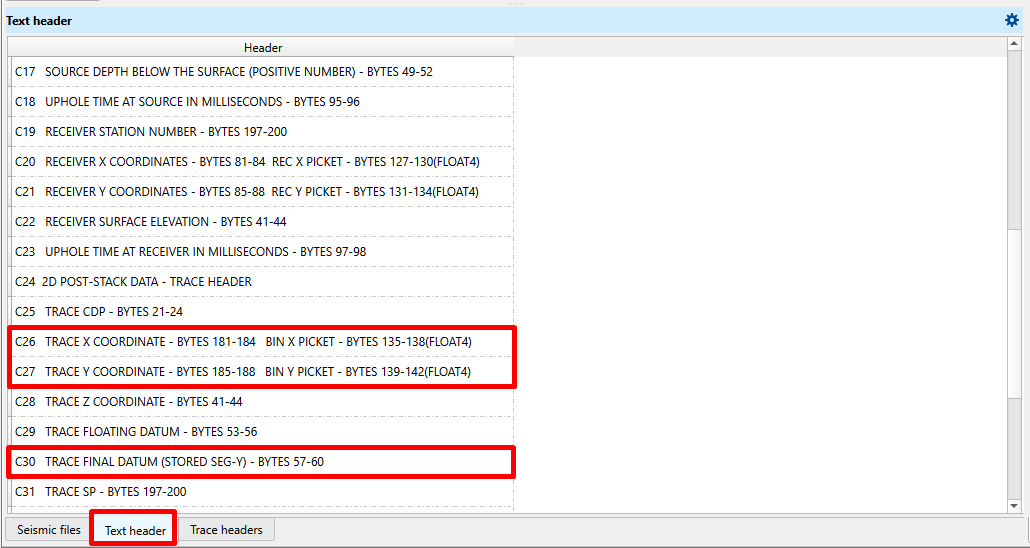
The text headers usually contain the main trace geometry information. In the text header view you can check which bytes contain it (X, Y and elevation in the case below):
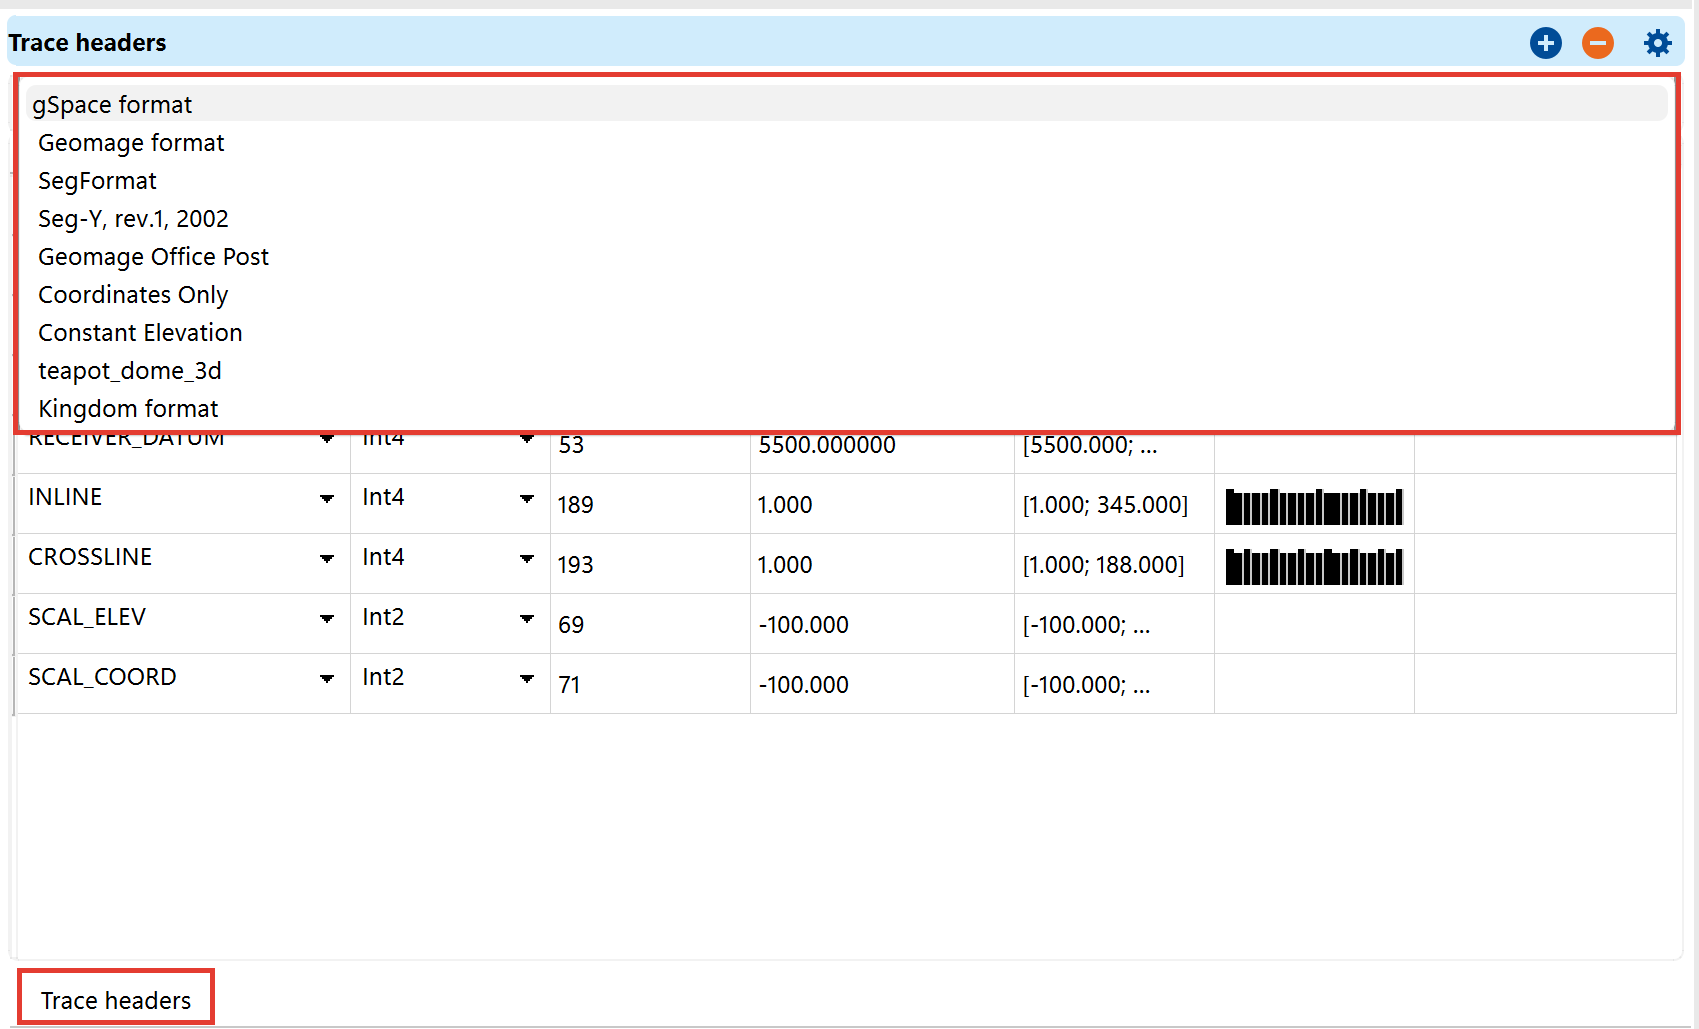
In the trace headers view choose one of the available trace header formats:
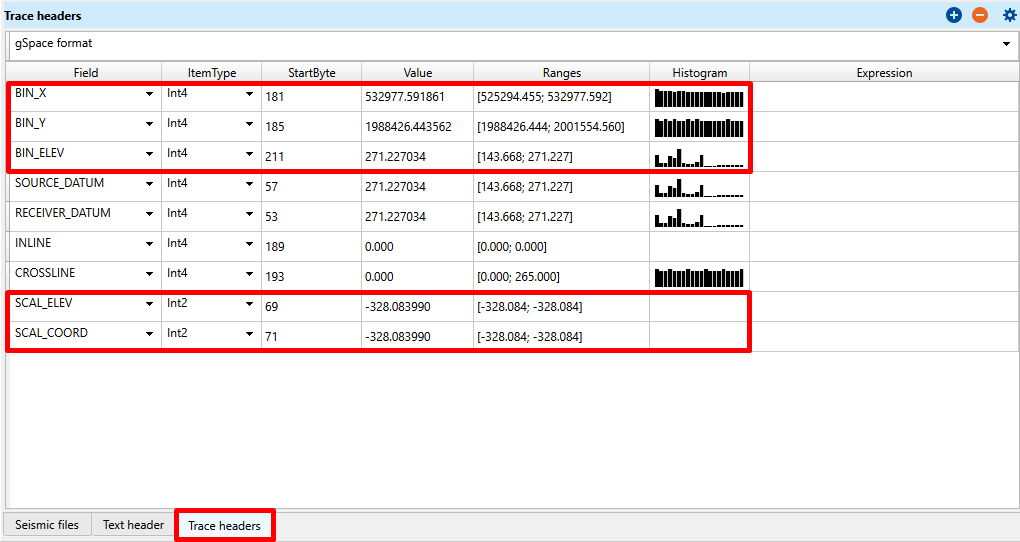
After that check that the bytes of the main fields are set correctly (trace X, Y and elevation and coordinates scale factors and other). To determine that you have your bytes set correctly the Ranges and Histogram columns can help you
In case your seismic data in a different format than all available, select gSpace format and type StartByte value in any line according to your data:

After setting the new value, a window with a new format creation will appear:
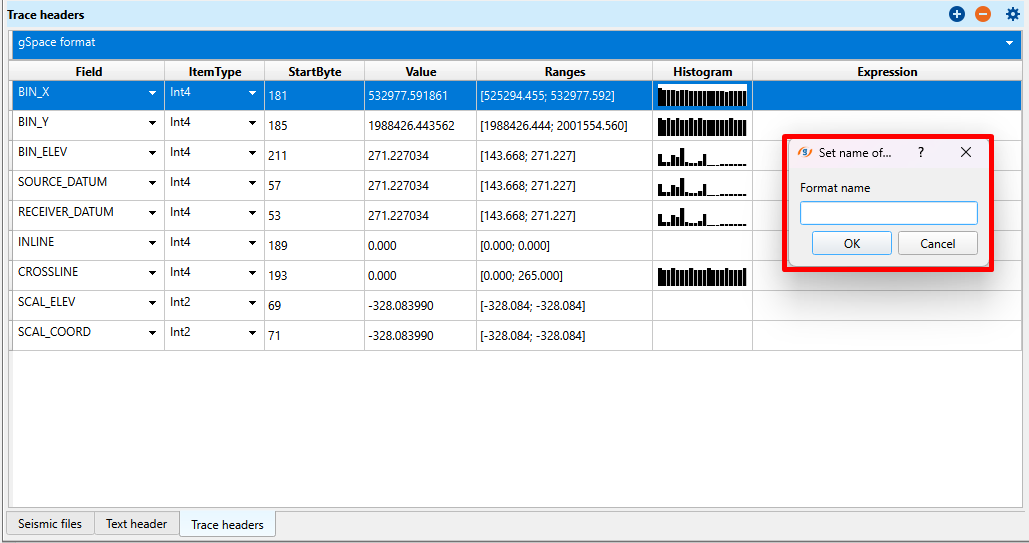
Type your format name and continue to change headers according to your data.
Once created, you can choose the new format later in other projects..
You have an option to use expression instead of trace headers. For this type an expression in the Expression column. To reference to the trace field use "data type (byte)". For example, the expression "int4(185)" returns the value read as a 4-byte integer from byte number 185. All available functions you can find here.
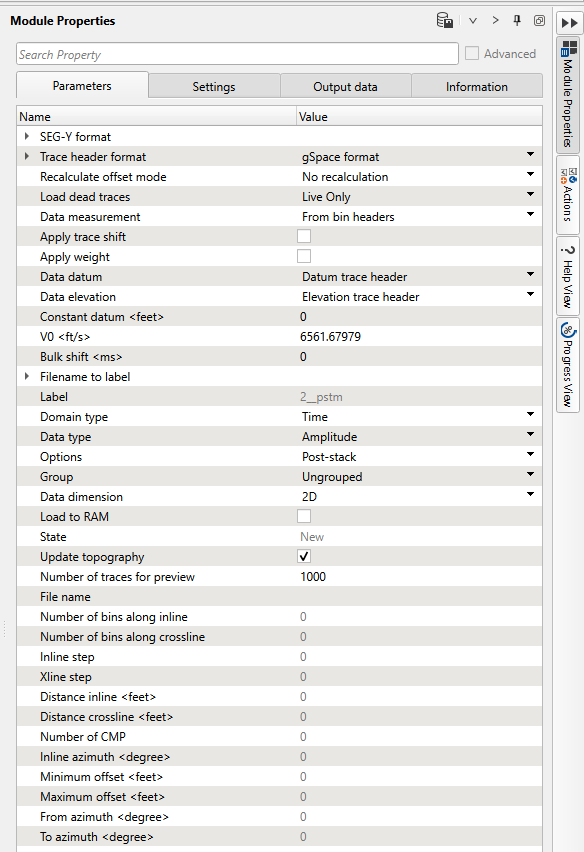
In Module properties the additional loading parameters can be set such as Data Datum, Replacement velocity:
Note
g-Space uses topography information in some processes (such as velocity model creation). If you don't have topography information in your segy file you can set "Data elevation" parameter to "External topography" and it will be loaded from Geomage server.
Once all parameters are set press "Apply selected seismic" button ![]() or "Apply all seismic" button
or "Apply all seismic" button ![]() .
.
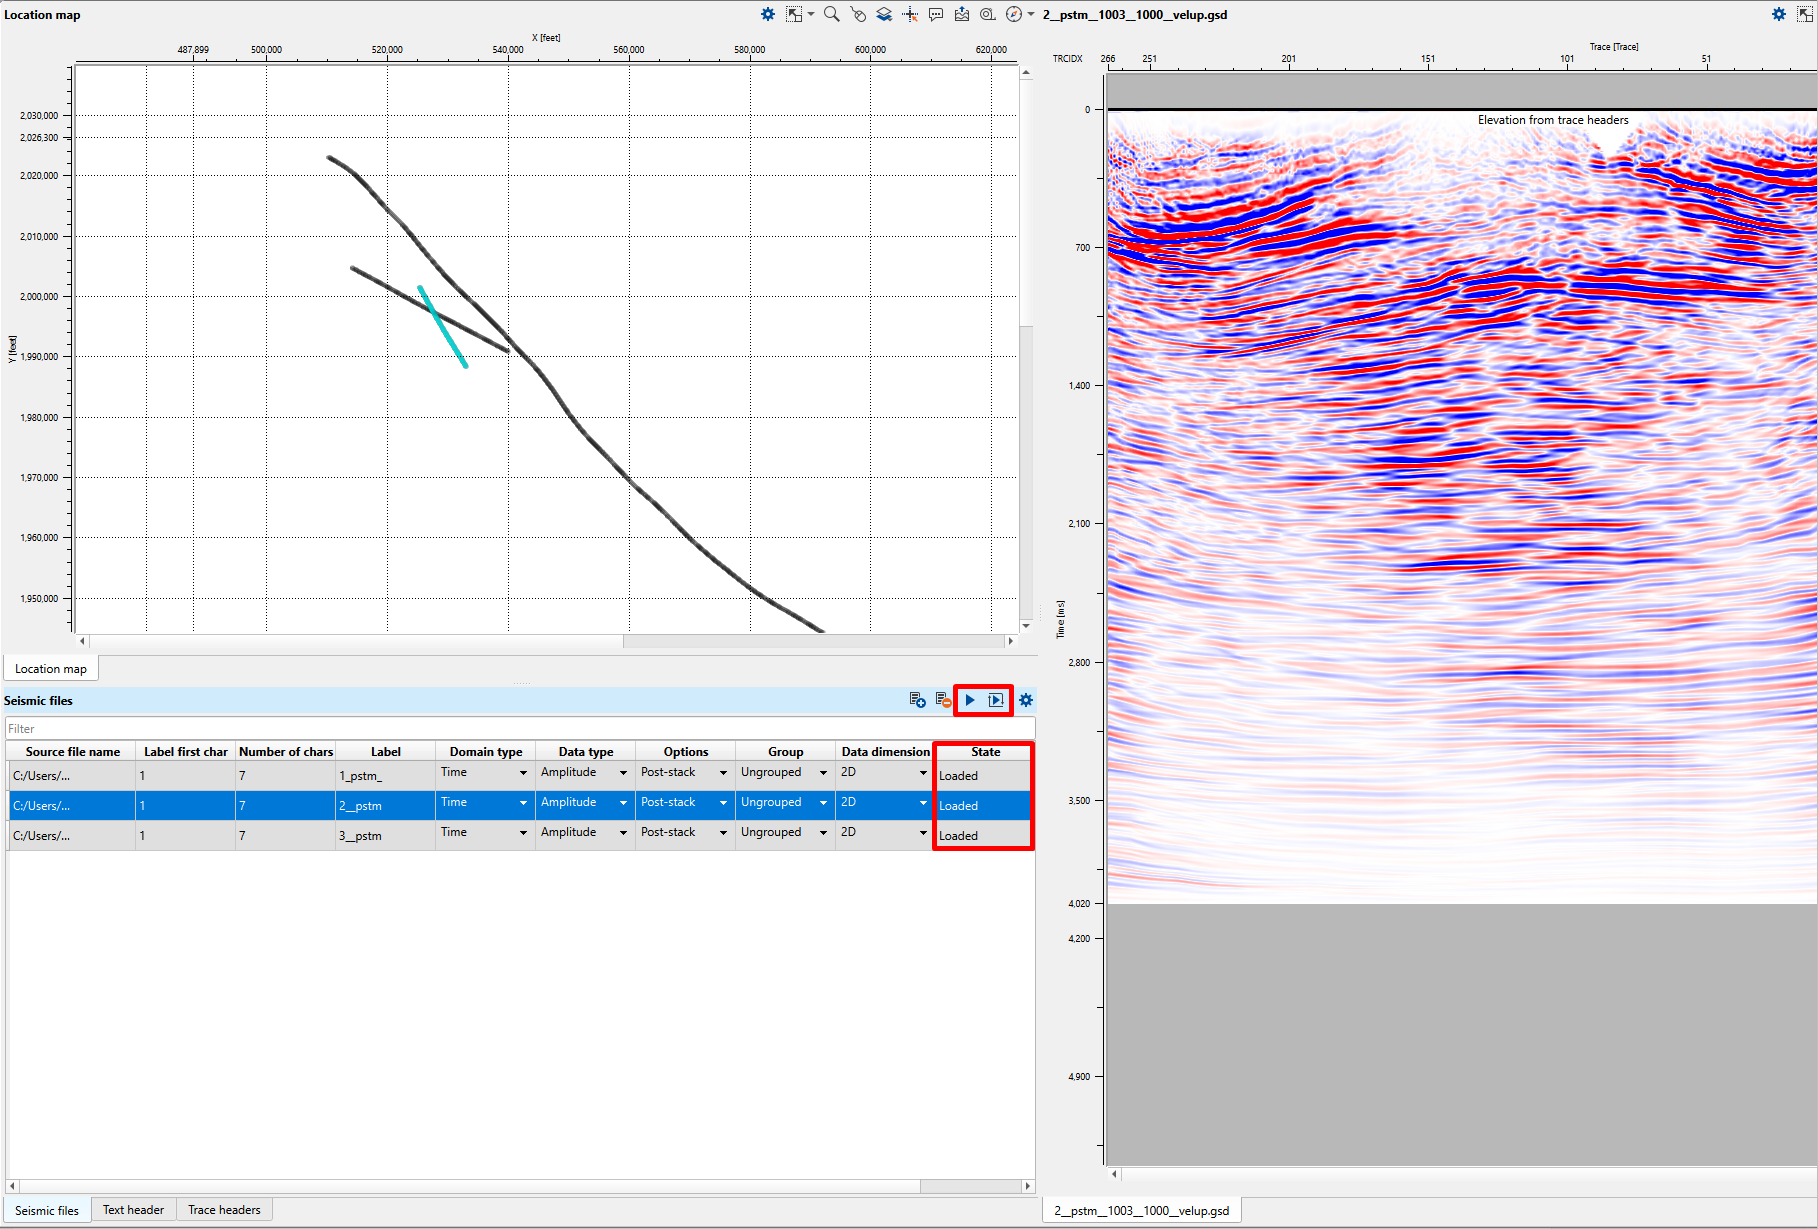
On the location view the loaded lines will appear in Black and State will change to "Loaded":
In case of 3D on location view the loaded volume will appear in Dark red: