Note: The suggested 3D volume size should be less than the current workstation RAM size. It is also worth to mention that the RAM size should be 2.5 times bigger than the input data size.
To view 3D volumes in g-Viewer, the user should first load the 3D volume by adding the data file(s) from the File tab and click the Add button.

Once the file is loaded, it partially loads the trace headers information. In order to see the all the trace headers information, the user must click on the "Load trace headers from selected files" ![]() option located on the Seismic files window. It will load all the trace headers information. This will update the Location map. Please check the Location map and confirm whether the positioning is satisfactory. If not then the user should check the "Trace header format" and redo it again.
option located on the Seismic files window. It will load all the trace headers information. This will update the Location map. Please check the Location map and confirm whether the positioning is satisfactory. If not then the user should check the "Trace header format" and redo it again.
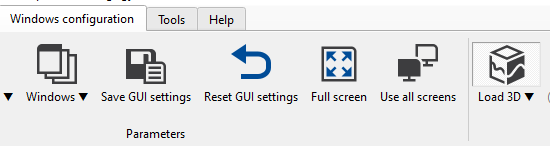
Now click on Load 3D icon from the Windows configuration tab.
When the user clicks on a small inverted triangle of Load3D icon, it gives two options to choose from.
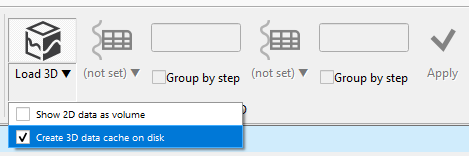
Select the appropriate option. In order to show 2D data as volume then the user should set the Group accordingly and click Apply. Please keep in mind that the 2D data should be Prestack only.
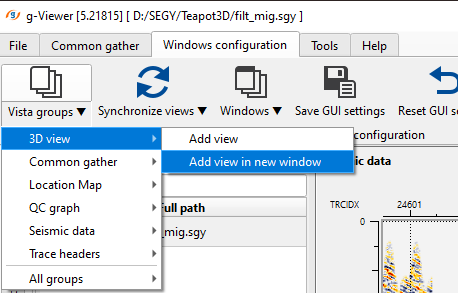
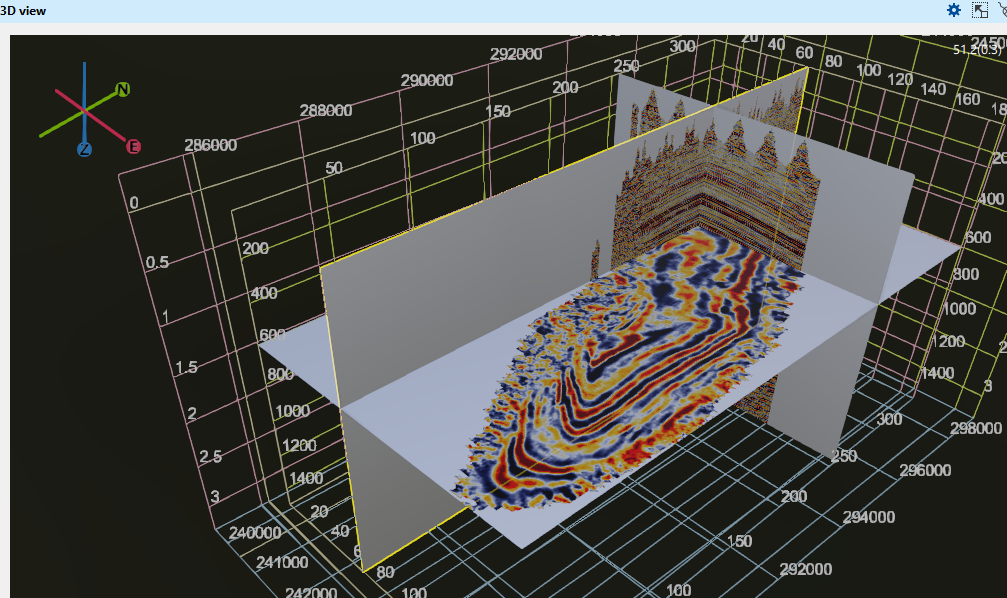
Now go to Windows Configuration tab in the ribbon and click on Vista Groups -> 3D view -> Add view in new Window.
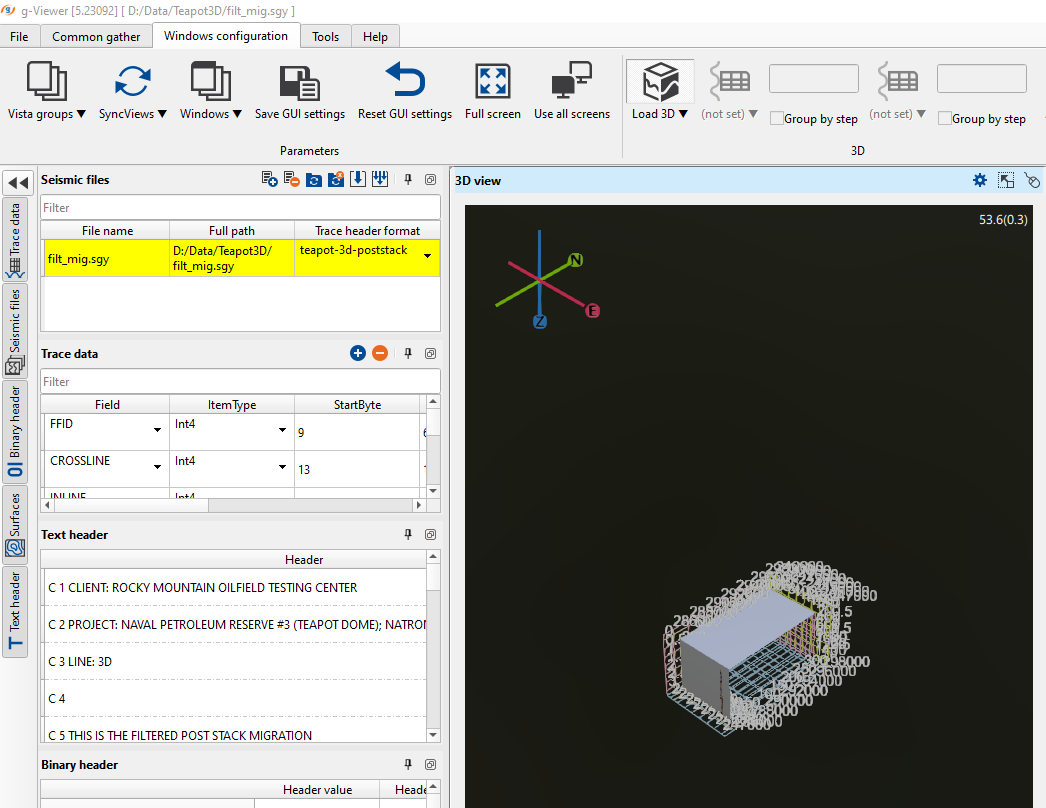
Once we added the vista items in the new window, now we can able to see the vista items as shown below.
To adjust the view, the user can click on the "Adjust to size (Ctrl+A)" icon ![]() from the 3D view window. To Zoom In/Out, the user can use the mouse wheel to go back and forth.
from the 3D view window. To Zoom In/Out, the user can use the mouse wheel to go back and forth.
How to move around the volume?
To rotate the volume in any direction use MB3 (Right mouse button). User can also able to do the rotation by holding Ctrl+MB3 button.
To move the volume either up/down or left/right, use Shift+MB3(Right mouse button). This option won't rotate the volume. It will remain in it's original position during the movement of volume quite contrast to using Ctrl+MB3 where it rotates the volume
To move any inline/xline, just click/select on that inline/xline with MB1 and move wherever you want.
To move the time/depth slice, it's as same as the inline/xline. Simply hold MB1 and move up/down.
The user can use the mouse wheel (MB2 or middle mouse button) to zoom in/out the volume.
Vertical scale
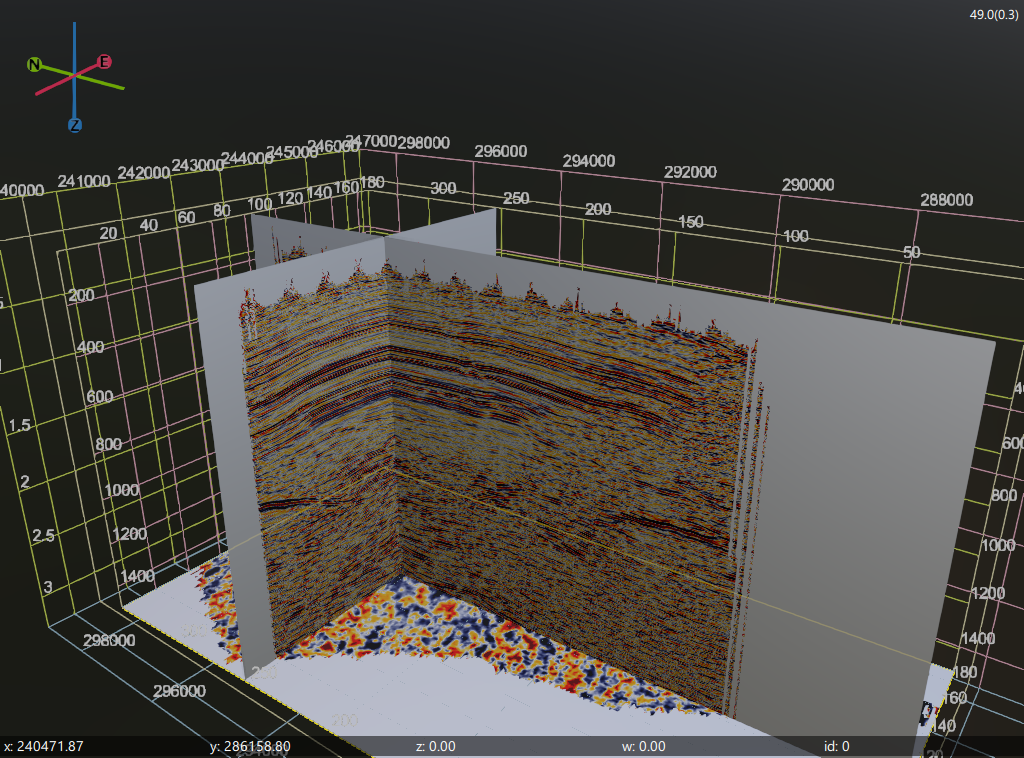
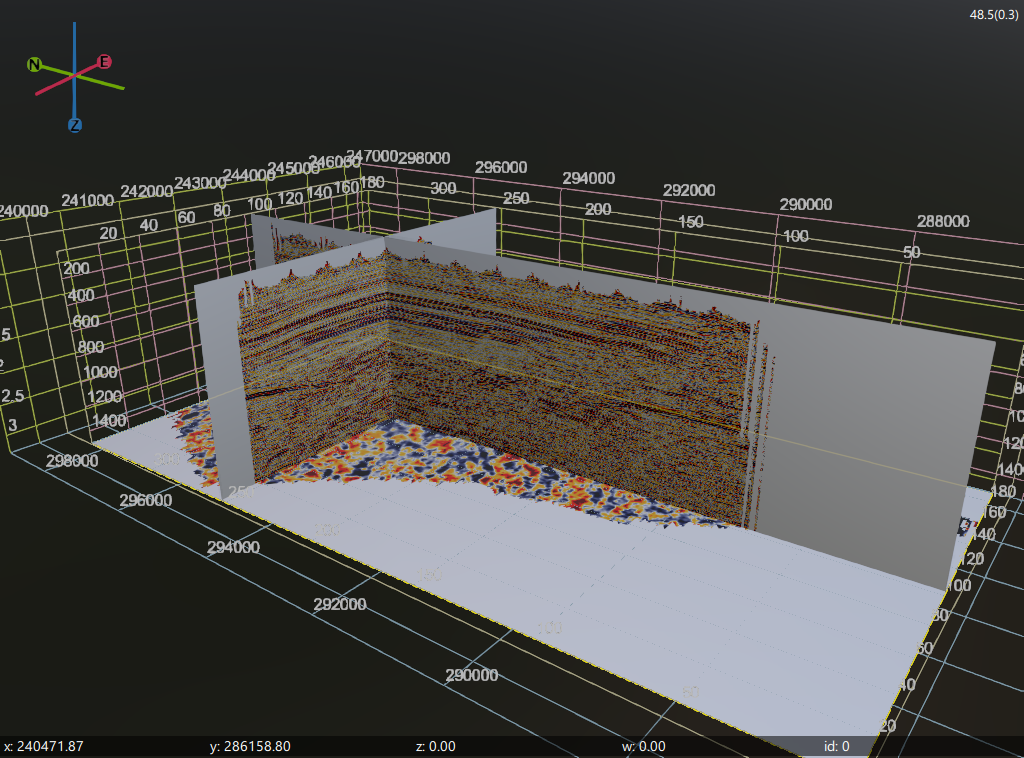
In 3D view, we have two vertical scales. One is inside the volume and other is outside the volume. These two vertical scales shows us two different set of values. Why?

The vertical scale of the inside grid (marked as blue rectangle) is showing the volume in samples. Like if we have 3000ms of record length and we have 4ms of sample interval, it will display like 200, 400 etc.
The vertical scale of the outside gird (marked as red rectangle) is showing the volume in seconds. If the record length is 3000ms then we can see it as 1s, 1.5s etc.
View properties of 3D view:
View properties of 3D view window is divided into 3 parts.
View properties
Vista items
Vista item properties
View properties
It is the top of the section. The user can pay attention to few parameters.
Label size - The user can change the size of the X,Y,Inline, Cross line, Time/Depth slice labels. By default it is 1. Here we are changing it from 1 to 2. We can see the changes in the below image.


TTD - Time To Depth. By changing this parameter value, the user can either expand or compress the volume. By default, this value is set to 2000
In the above display, on the left hand side we can see the display TTD at 2000. The same volume is displayed on the right hand side with TTD as 1000.
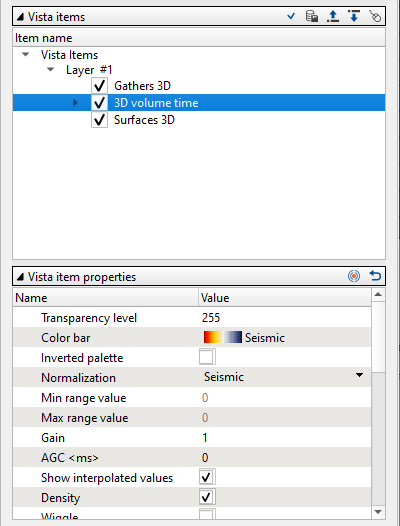
Vista items:
In this window, all the displayable items present. In case of 3D view, usually we have Gathers 3D, 3D volume time, Surfaces 3D items.
Whenever the user selects any one of the Vista items in this window, their corresponding properties will appear in the bottom window. Here the user can change the display properties of the selected Vista item.
Vista item properties:
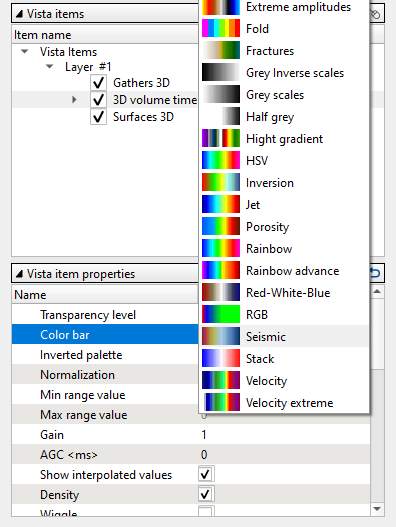
As we mentioned earlier, this is a direct connection with the selected Vista items. If the user wants to change Color bar of 3D volume time vista item, first they need select in the Vista items and come to Vista item properties window and choose the desired color bar option available from the drop down menu.