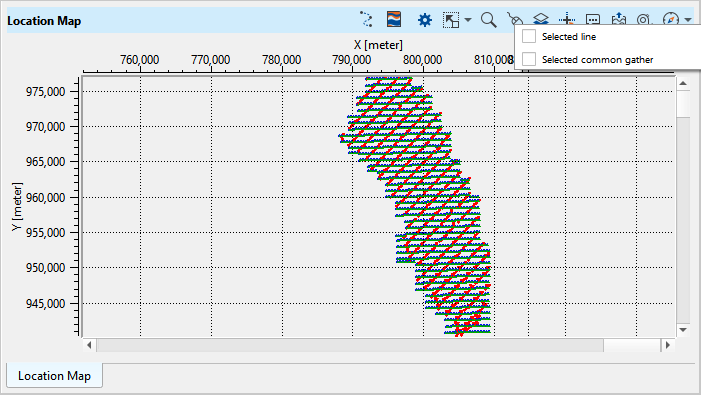
With the interactive location map in g-Viewer, the user should find it easy to choose Common Shot, Common Receiver, or Common Mid-Point gathers from the location map by selecting the Control item icon (4th icon from left). Within the location map the user can not only can select desired CS/CR/CMP gathers, but also measure the distance between Shot/Receiver/CMP gathers and/or line length etc. by using the Ruler icon (2nd icon from right).
To expand or compress the horizontal or vertical scales of the location map, the user can able to do so by holding the MB1 button either on the horizontal/vertical scale and move up and down to see the changes. To do the same in the middle of the location map, the user should use the middle mouse button (MB2) to activate the hand grab symbol to move around.
![]()
![]()
To make any visual changes to the location map, user should click on Show Properties (cog wheel) button then the Show properties windows pops-up.
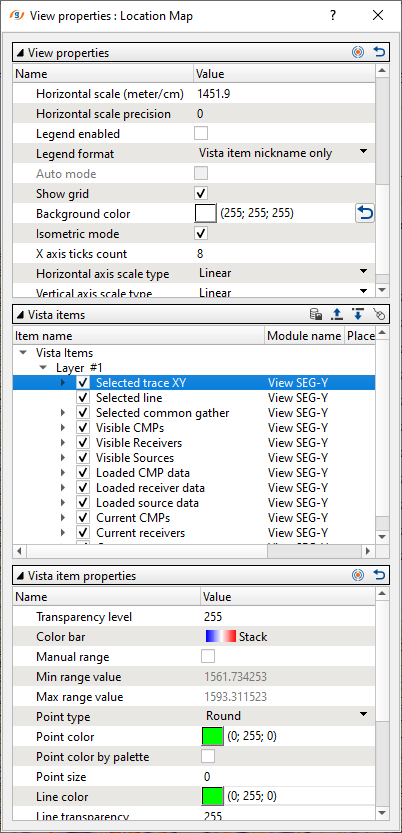
To make any changes of the visuals, user should select any vista item (middle window) and the corresponding Vista item properties window activates and show the contents of it to make the necessary changes.
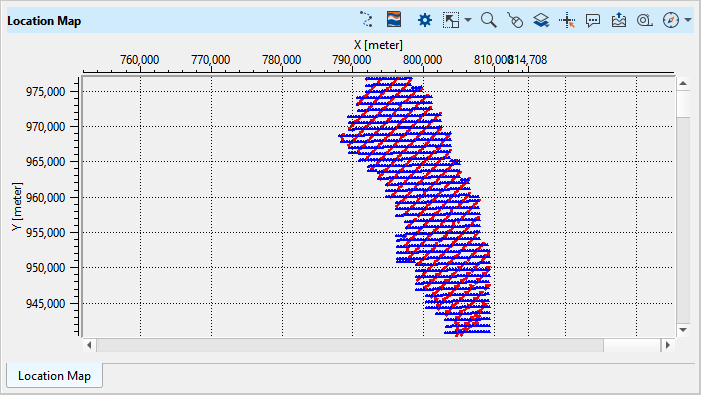
In this instance, we've selected the vista item Loaded receiver data and the corresponding vista items properties activated. If you observe the Point color of Receiver is Blue and now we would like to change it into Green or whatever color the user wants to change.
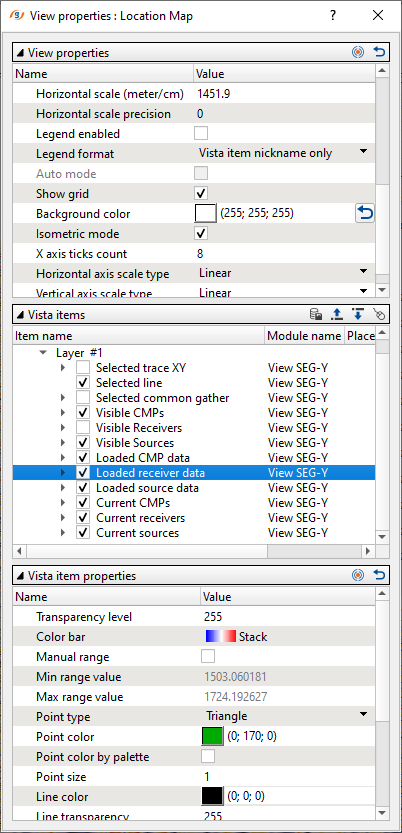
To do that, the user should click on Point color inside the Vista item properties and then we see a Select color window pops up. Now select the desired color and click OK and look at the changes(receivers color) in the location map.

Likewise the user can able to make necessary changes not only in the location map but also in the g-Viewer where there is a Show properties (cog wheel) icon is available. Besides, location map got other features to select any particular Selected line and/or Selected common gather. To achieve this, the user should select the Control item and choose the specific option from the available.
If we observe the above image, we can see that there are 2 options available to display the contents from the location map.
From the Select control item icon in the Location map, we have two options.
Select line - This option is useful in case there are multiple 2D lines are loaded and the user wants to select a particular line among those 2D lines. In case, there are multiple 3D volumes with different coordinate positions then by choosing this option, the user can able to select one of the volumes.
Selected common gather - With this option, the user can able to select FFID, Source_SP, Receiver_SP, Source_Seq, Receiver_Seq, Source_Line, Receiver_Line etc from the location map. To do that, the user should go to Common Gather tab and select the Group by option and select preferred headers from the Headers icon. More detailed explanation is covered Common gather.
As we mentioned earlier, location map is not only used for displaying the selected line and/or common gather but it can also be used to measure the distance between to points.
If the user wants to measure the distance between two shot points for example, then they should select the "Ruler" icon (2nd icon from right to left) on the location map, and draw a line between the two points to measure the distance between the two shot points. The functionality is the same to measure between any two points on the location map, even for an arbitrary straight line.
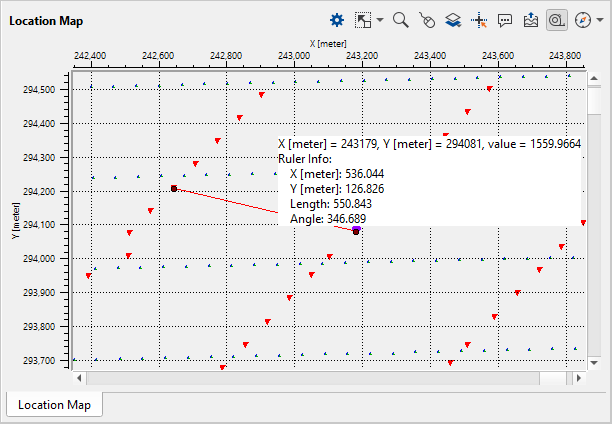
Here we would like to measure the distance between two source lines. So we selected the Ruler icon and draw a line by holding MB1 and continue draw till to the desired location. Now the tool tip will give all the information.