In this section, the user has the options to display the Vista group (View) , synchronizing the views etc.

Vista groups : Vista groups and it's functionalities were discussed more in detail at the Views chapter
Synchronize views : To synchronize all the seismic views (for an example to zoom IN in seismic data window, the same zoom will applicable on other seismic views like Common shot, Common receiver and Common bin). If user click on the Synchronize views, we have an option settings as shown below.
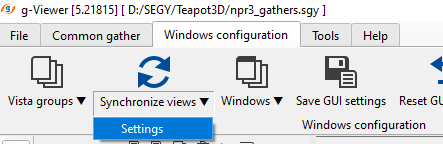
When we click on the Settings options, it will pop-up a window as shown below.
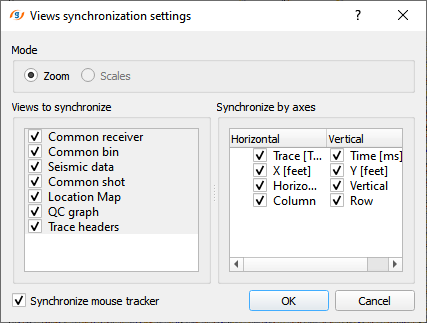
If we observe on the left hand side of the window, whatever the vista items are available for the module View SEG-Y are appearing and they all were synchronized both horizontally and vertically. However if the user wants to synchronize only few then they can un-check the others and keep only the desired ones. Same like on the right hand side, if the user wants to synchronize only the horizontal axis and not the vertical one of any vista item then they can simply uncheck the vertical axis.
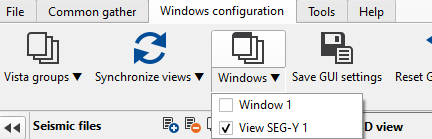
Windows : This displays the number of windows present/added into the View Manager. And also we can able to see what is the current active window.
Save GUI Setting : This will save the the user preferred display settings. When the user launches the g-Viewer next time, the dispaly will remain the same as the previous session.
Reset GUI setting : At any given point of time if the user wants to bring back the default display settings then they can choose this option. Besides, this option is useful to display the velocity lines if the g-Viewer software(prior to 5.21238 versions) was previously installed and unable to see the velocity lines on the gather then the user should click on Reset GUI settings.
Full screen : This option collapses/expands the left and right hand side of the panels like the Seismic files, View Manager, Progress view, Module Manager etc. and gives more room for the actual seismic display.
Before clicking the Full screen, the display will be something like this..
Once the user selects the Full screen option then the display will be like this ....
Use all screens : This is a very cool feature. If the user wants to expand the current display into multiple screens (2 or more), simply click on the "Use all screens" icon to distribute the display in all available screens. Cool, isn't it?
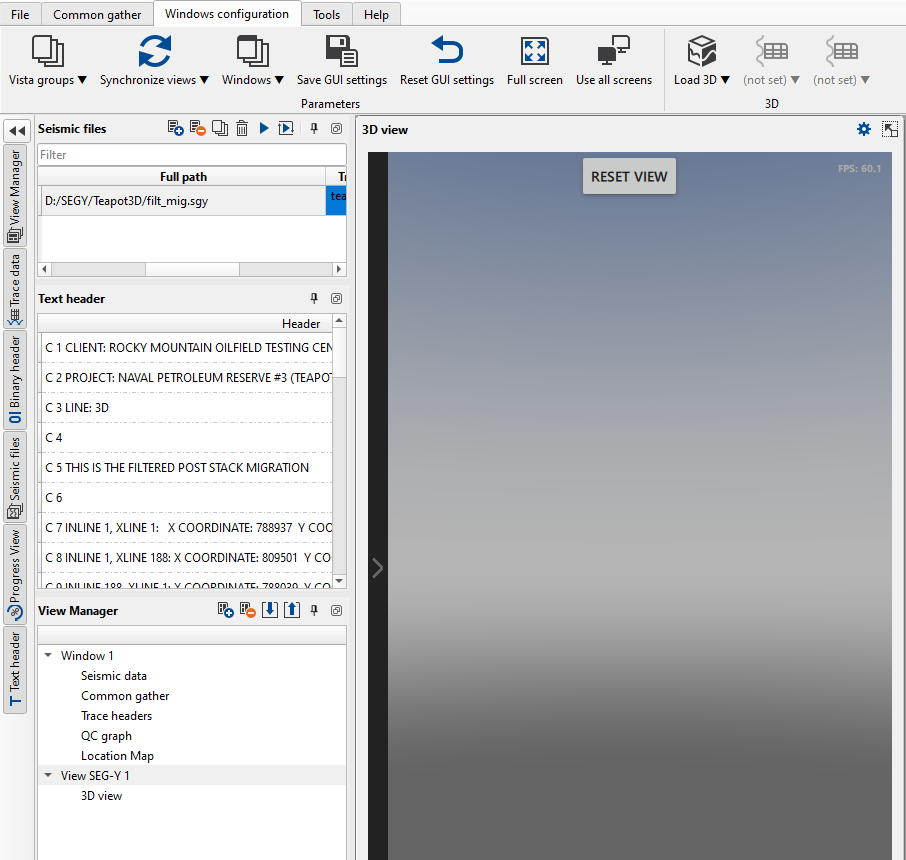
Load 3D : This icon is for visualizing 3D volumes/cubes. To display any 3D cube, user should load the 3D volume first and then select Load 3D option and select Vista groups- > 3D view-> Add view or Add view in a new window option. Initial display should look like this. When the user hover the cursor at the top middle part of the 3D view display, RESET VIEW will be visible.
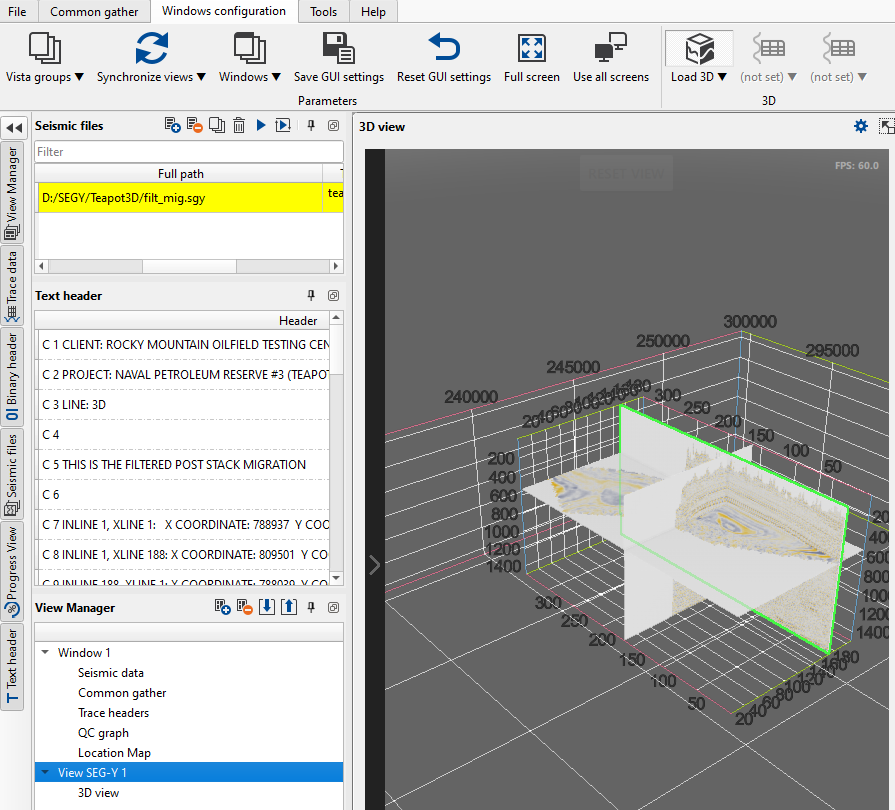
Now click on the REST VIEW button to display the 3D volume according to it's geometry.
If, for any reason, the user is unable to see any visuals in the 3D view, they can click the ">" icon located on the left-hand side of the 3D view. This will expand a menu with several options. From there, select Reset View and then choose the Load 3D option again to restore the visuals.
