Workspace is a graphical setup of views that used to organize working process according to user's habits. User can add unlimited number of workspaces with unlimited number of Views in each Workspace.
There are two predefined Workspaces where additional Views cannot be added:
•Seismic data workspace - used to load and manage seismic data loaded into the project
•Wells data workspace - used to load and manage well data loaded into the project
User still can arrange Views in those predefined Workspaces.
Creating new Workspace:
There are three options to add Workspace:
Option 1:
Go to Main bar and click on Workspace button

Option 2:
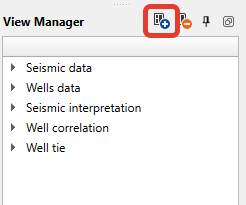
On the upper part of View Manager click on the button add Workspace ![]()
Option 3:
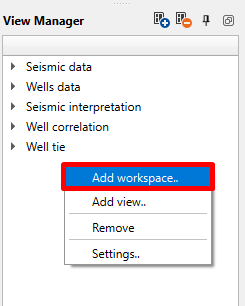
Right click mouse button on the View Manager and choose add Workspace
Operations with workspace:
By clicking right button mouse on the workspace you may choose different operations you want to do with it:
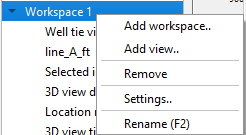
You can perform the following operations:
•Add workspace (another one)
•Add view in current workspace
•Remove workspace
•Settings - Lunch Visual Settings for active view in current workspace
•Rename workspace
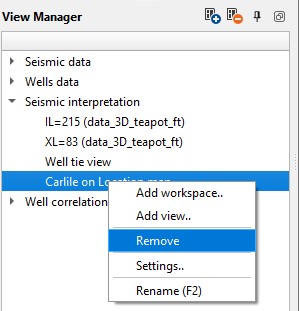
To delete view from the workspace press right mouse button on this view and select delete:
Working with Views
•Open a view – click the view type button in the Views bar.
•Switch between views – click the view tab at the top of the workspace area.
•Close a view – click the X on the view tab.
•Arrange views – drag tabs to reorder them, or tile views side by side.
•Full screen – press F11 to toggle full-screen mode for the active view.
Displaying data in a view
1.Open or select the target view in the workspace.
2.In the Data Manager, check the box next to the data you want to display.
3.The data appears in the active view.
4.Use the Object tab in Visual Settings to adjust the display of the data.
5.Use the View tab in Visual Settings for additional appearance customization.
Each view has a local toolbar at the top that gives quick access to the most useful tools for that view; the available tools change depending on the view type and the data shown.