Well tie view
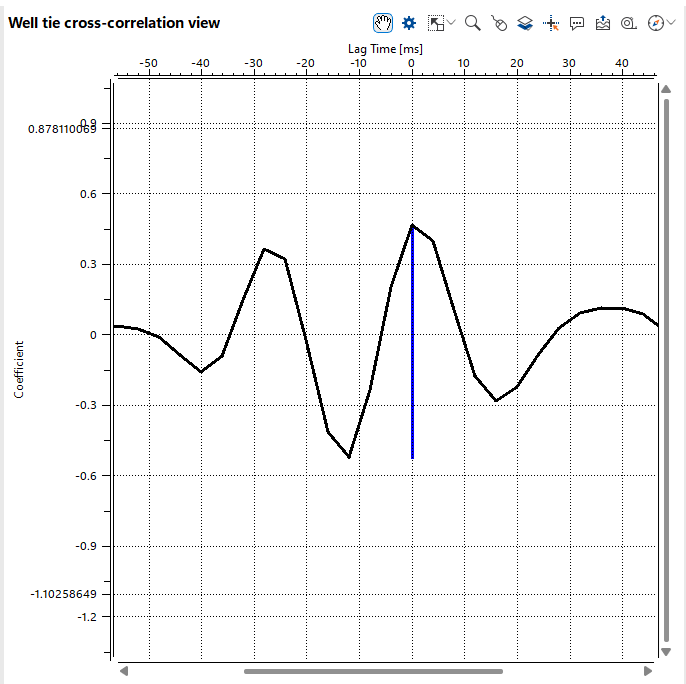
This view is designed for performing, analyzing, and visualizing the well tie process and its results. It consists of two windows: the first displays seismic and well data, while the second shows the cross-correlation function as a numerical outcome of the well tie analysis. This setup allows users to assess the alignment between seismic data and well logs effectively.

Well tie view is a customizable window where users can independently display the data they need for their work, such as log data, time-depth curves, seismic traces, and synthetic traces.
To configure this window, users need to go to the Well Tie bar in the Ribbon bar and select the data required for visualization. The user should have seismic data, well information (check shots/sonic/density/Impedance) to perform the seismic to well tie.

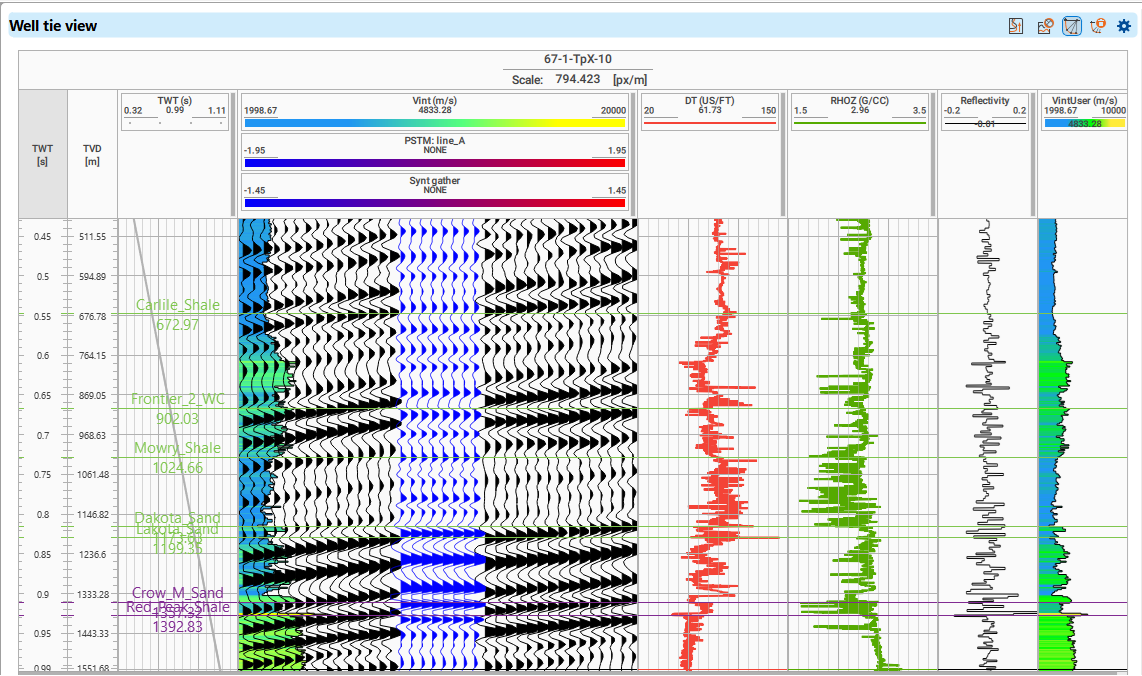
The newly created view will appear in the View manager in the active Workspase.
When a well tie view is created, its vertical scale is set from the synthetic seismogram: the interval that carries valid synthetic samples fills the view, with a small margin above and below, so the tied interval is no longer compressed into the full range of the seismic data. Undefined and zero-valued samples at the ends of the synthetic are ignored when this interval is calculated, and a well that has no valid synthetic curve is fitted to its whole content, as before.
Zooming and scrolling are not restricted, so the whole data range can still be examined. To return to this default scale after zooming, use Fit to Synthetic Curve in the menu that opens when you right-click the field with the well name, described below.
For visualization settings, users can right-click to open the Settings window for the currently active track.
The orange locks with the letters S and Z indicate the scale settings, allowing you to enable or disable scrolling and zooming, respectively, with or without pressing the mouse wheel.
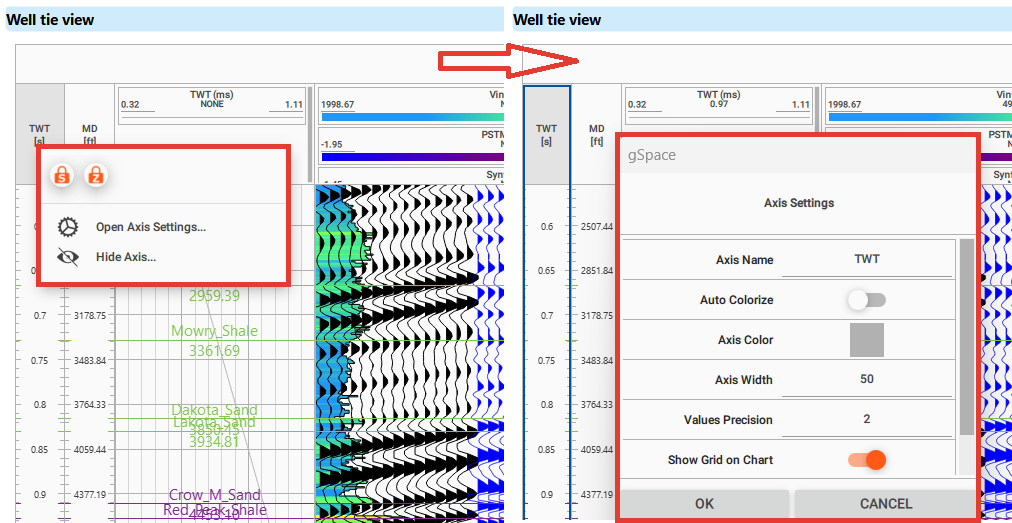
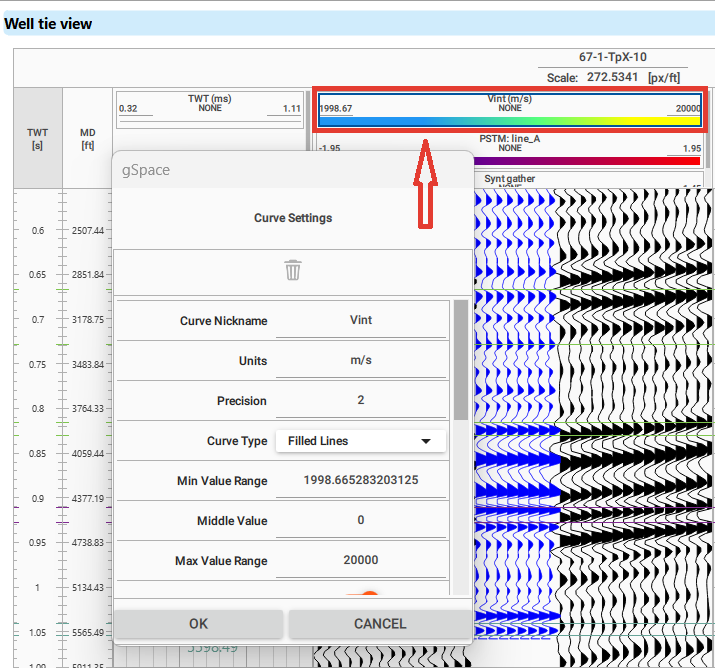
You can easily switch between the settings of each track without closing the settings window by simply clicking on the track you need.
The active track will be highlighted in blue.
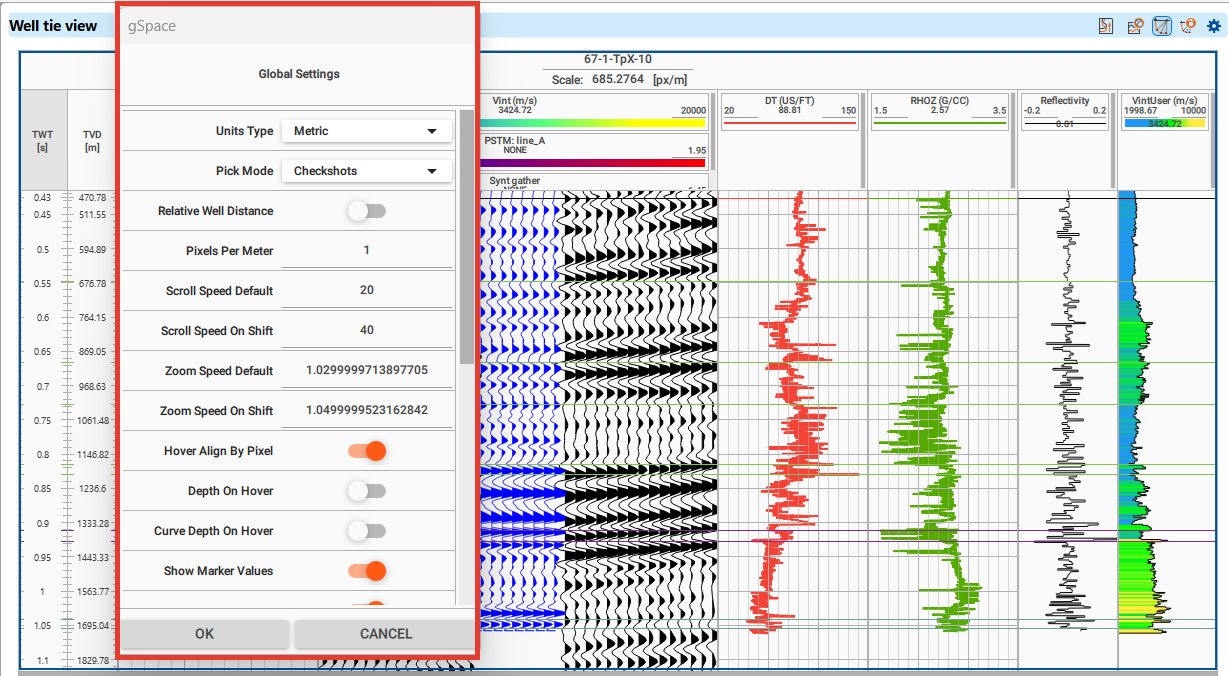
Clicking on the top field with the well name activates the Global settings, which include the following list provided below.
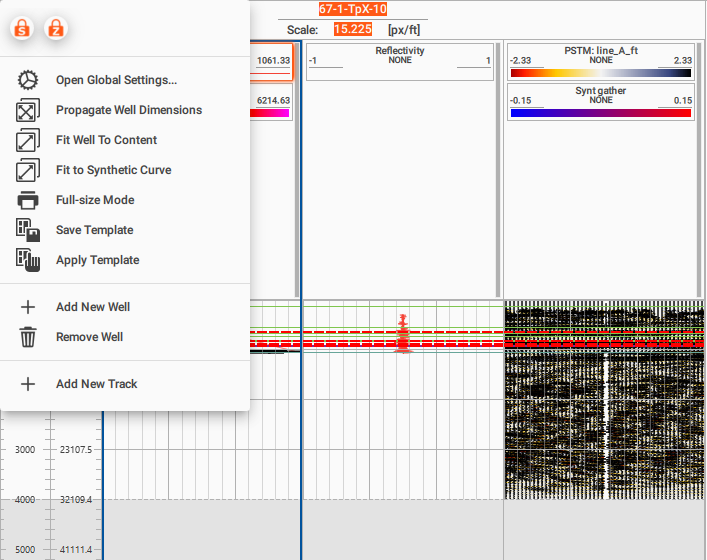
You can also access the Global settings by right-clicking on the field with the well name, where you will also find the following functionality:
Propagate Well DimensionsOnce it is activated, it will propagate the same settings across all the wells.
Fit Well to ContentIt will fit all the wells to the same. It is kind of Zoomed out.
Fit to Synthetic CurveIt scales the view to the interval covered by the synthetic seismogram, the scale a newly created view opens with. A well without a valid synthetic curve is fitted to its whole content instead.
Full size modeIt will open a new window for print friendly image to print the well correlation.
Save TemplateThe user can save the whole setup as a template. You can select a saved template from the Well tie bar under Well Tie Template.
Add New WellThis will allow the user to add any additional wells.
Remove WellAs the name suggest, the user can remove any wells from the display.
Add New TrackIt will add an empty track
Global settings description
Unit TypeThe user choose either Metric or Imperial from the drop down menu.
Pick Mode The user choose either Checkshots or Markers
Relative Well DistanceBy default OFF. If turned ON, it will display the relative well distance
Scroll Speed DefaultDefault scrolling speed settings
Scroll Speed on Shift Adjusts scrolling speed
Zoom Speed Default Default zooming speed settings
Zoom Speed on Shift Adjusts zooming speed
Depth on HoverDisplays the MD when the cursor is hovered on the well log.
Curve Depth On HoverDisplays the curved depth of the well log.
Show Marker ValuesDisplays marker depth values of the well log.
Show Marker NamesIt will show the marker names of the well log.
Marker Zoom on HoverEnables zooming into markers when the cursor hovers over them.
Propagate Curve data Enables the synchronization of curve data across multiple displays or sections, ensuring consistent updates to related curves when changes are made.
Marker Label FontSets the font style and size for labels associated with markers.
Axis FontSets the font style and size for labels associated with axis.
Default Brush SizeDefines the default size of the brush tool used for marking or drawing on the display.
Frame Around LithologyAdds a frame around lithology displays.
Linear VelocityDefines the constant velocity used for converting time-based seismic data to depth or distance.
UI COLORSThe User Interface (UI) to modify the color settings. When we click on it, it will expand. The user can change the foreground/back ground etc. To collapse it, just click on it one more time. Anchor Color sets the colour of the anchor lines that mark the tie points across the tracks; it is red by default.
UI DIMENSIONSThese settings are related to the Tracks/Horizons/Anchor height and width dimensions. The user can modify as per their choice. Anchor Width sets the thickness of those anchor lines, 2 by default.
AXIS SETTINGSInside these settings, the user can ON/OFF the Markers/TWT/TVD etc.
MARKERS VISIBILITYAll the loaded markers appear here. The user have the complete control to display which one needed to be displayed.
The Cross-correlation view is essential for evaluating the alignment between well log data and seismic data during the well-to-seismic tie process. It displays the cross-correlation function, which quantifies the similarity between the synthetic seismic trace (generated from well logs) and the actual seismic trace. By analyzing the cross-correlation values, users can adjust the time-depth relationship to achieve the best match, ensuring accurate ties between well data and seismic reflections.
Functional panel allows user to perform the following actions:
 open Visual Settings panel
 adjust view area to all visible objects
 set/unset zoomable
 set control item
 add Object
 enable mouse tracker
 enable tool tip
 export picture
 ruler tool
 show compass
 show minimap
 show scale bar
Amplitude of the seismic and synthetic tracks
The seismic trace and the synthetic seismogram are drawn between two amplitude limits, shown in the track header at the left and the right end of the row under the name of the trace, above its colour bar. When a trace is displayed for the first time, the limits are symmetric around zero and taken from its strongest amplitude, so the whole trace fits inside the track.
To change how strongly the amplitudes are displayed, click either limit and type a new value. The track is redrawn straight away, with the deflection of the wiggles and the shades taken from the palette both scaled to the new limits; samples beyond a limit are drawn at that limit. Narrow the range to bring up weak reflections, or widen it to calm down strong ones, so that the seismic trace and the synthetic seismogram can be compared at a similar amplitude before the quality of the tie is judged. The two limits are also the ends of the palette of that track, so the colour bar in the header always shows the range currently in use.
Horizons on the seismic track
Horizons kept in the Horizons branch of the Data manager are drawn on the well tie track that displays the seismic gather in time. Each horizon appears as a coloured line that follows the reflections trace by trace, the same way a horizon is drawn on a 2D seismic section, instead of a single flat line at the well. Only the track holding the time seismic gather shows the overlay - the synthetic gather and the log tracks are not affected - and only horizons of the time domain are drawn; horizons stored under Depth are not shown.
Each horizon keeps the colour assigned to it in the Data manager. Where the horizon has no value along the gather, the line breaks instead of being interpolated across the gap. The horizon name is shown next to the line when Show Marker Names is enabled in the Global settings.
To switch the overlay off for a horizon, clear its checkbox in the Horizons branch of the Data manager, under the user name in the Time domain. That horizon is then hidden in the well tie view.
Residual trace
Alongside the synthetic seismogram, a seismic section can display a Residual seismogram (residual trace), computed as the difference between the synthetic trace and the seismic trace at the well location (synthetic minus seismic). It is calculated only within the footprint of the synthetic overlay, so its extent matches the synthetic trace window. A flat, low-amplitude residual indicates a good match between the synthetic and the seismic, which makes the residual trace a convenient quality-control display for the tie.
The residual seismogram is generated automatically together with the synthetic trace, in the time domain only. It is a display object of the seismic section views - inline, crossline, arbitrary line and 2D line - rather than a track of the well tie display, so you switch it on in the Object list of the section view. There it is listed next to the synthetic seismogram, named Residual seismogram followed by the name of that view, for example Residual seismogram on inline time.
Drift curve
When you edit the checkshot anchors, a Drift curve - the difference in two-way time (ΔTWT) between the adjusted checkshot and the base checkshot - is generated automatically and shown in the display, and is saved as a LAS curve under the well. See Well Tie for details.
An example of a well-to-seismic tie, along with a detailed description of the required data, can be found in the Best Practice Flows - > Well Tie section