Seismic horizon correlation is aimed at mapping continuous reflectors that represent geological horizons across a seismic dataset. The process relies on several core principles:
Waveform Continuity, Stratigraphic Context, Well Data Integration, Spatial Consistency.
These principles underpin the practical steps for seismic horizon correlation in g-Space, which includes Well tie, Horizon picking, and Mapping.
Notes
Methodological Approaches
1. Phase correlation focuses on tracing reflectors by maintaining the continuity of specific phases (peaks, troughs, or zero crossings).
This method is effective in areas with clear, consistent reflectors. It involves:
•Picking a phase (e.g., peak or trough) and tracing it across the dataset.
•Ensuring that the selected phase remains consistent across traces, using g-Space tools to automatically track reflectors where possible.
2. Seismostratigraphy is the process of identifying depositional sequences and stratigraphic surfaces from seismic reflection patterns. This method is often used to:
•Identify key stratigraphic boundaries (e.g., unconformities or maximum flooding surfaces).
•Correlate horizons based on depositional features such as onlaps, downlaps, or erosional surfaces.
Begin picking horizons at well locations where the reflectors have been tied to known formations using the Well tie functionaity.
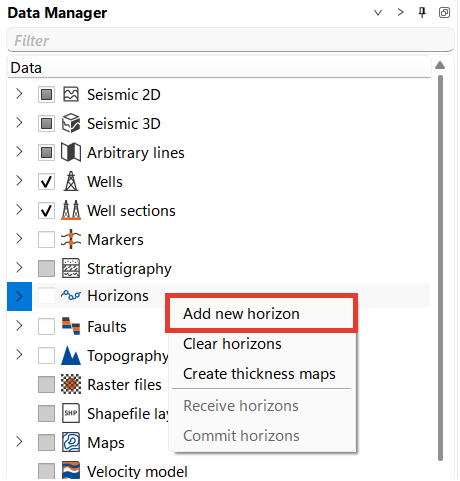
To create a new horizon go to Data manager and press Right Click Mouse on the Horizon icon. Choose Add new horizon
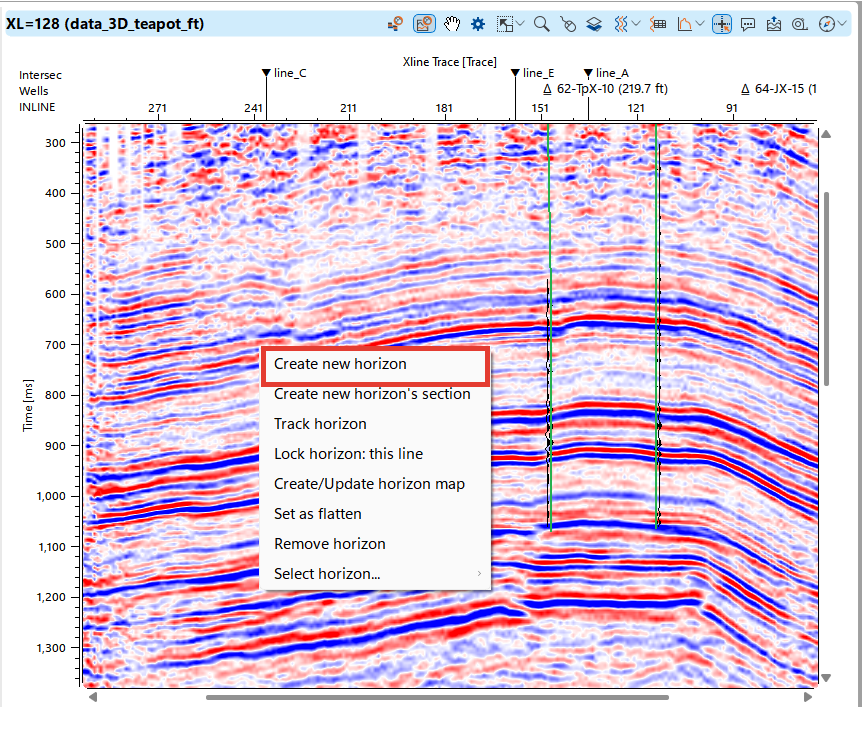
or on Seismic view in tool bar press Horizon picks button ![]() and press Alt + Right Click Mouse button on seismic view and choose Create new horizon
and press Alt + Right Click Mouse button on seismic view and choose Create new horizon
Let’s set up a workspace for horizon picking. In this example, a map is displayed showing a seismic volume, inline and crossline sections, wells, as well as inline and crossline views with linked wells, synthetic traces, and markers. The Module Properties panel is open, highlighting key settings for horizon picking.
Subscribe to our channel and watch the video on how to pick horizons in g-Space on YouTube
Click on Horizon Pick (highlighted in red) in the top panel of the view to begin picking horizons.
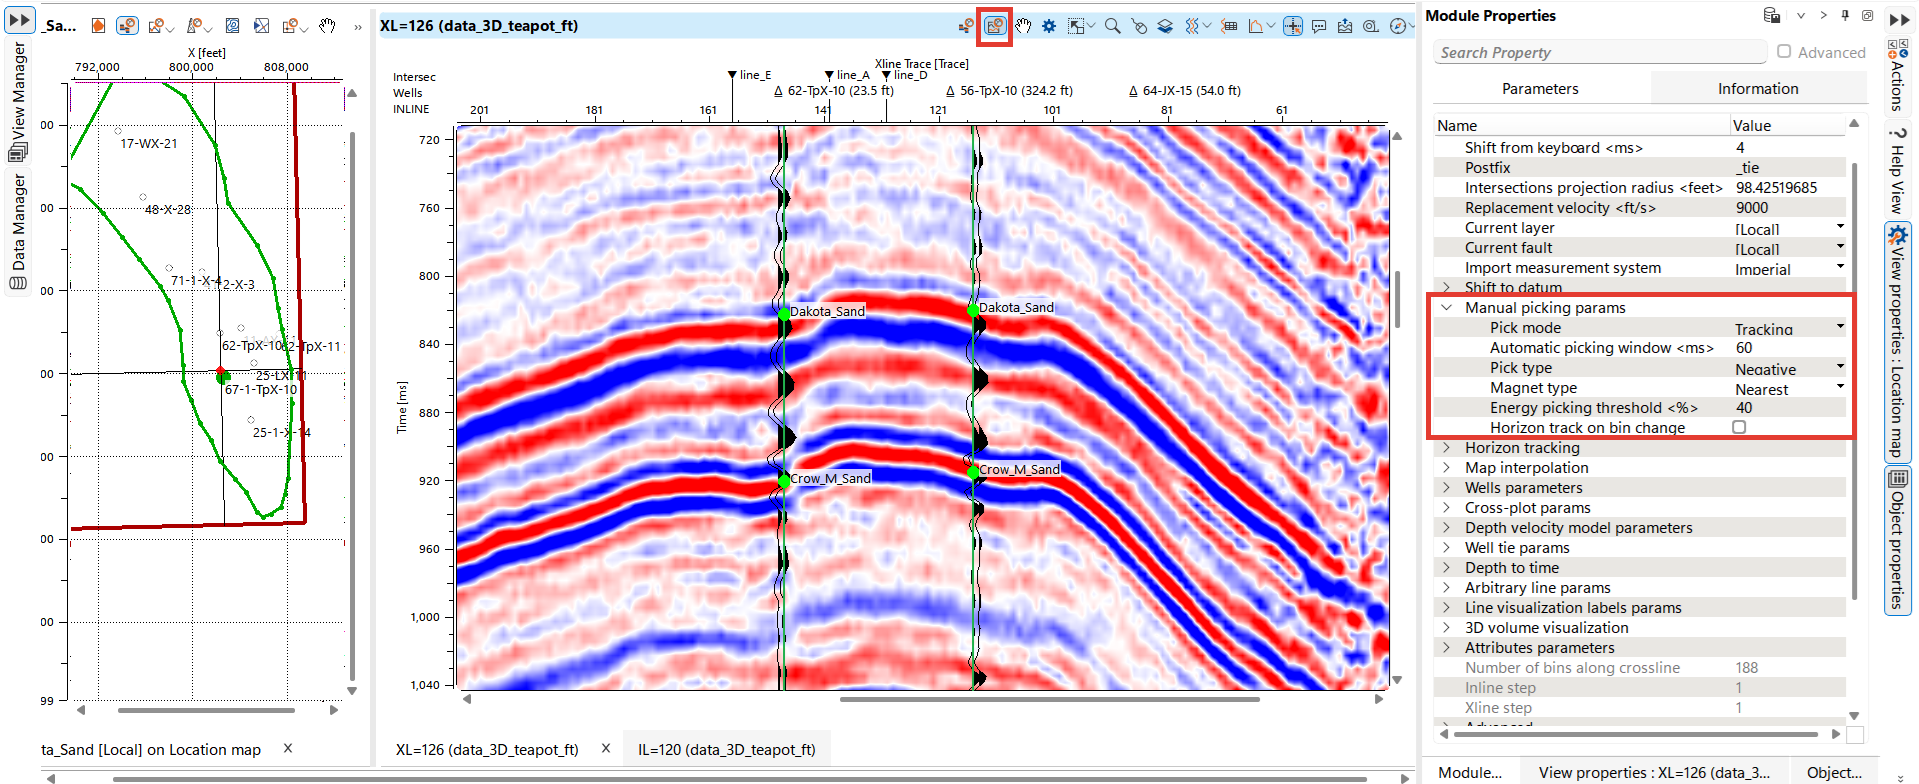
Let's review some horizon picking settings in the Module Properties panel.
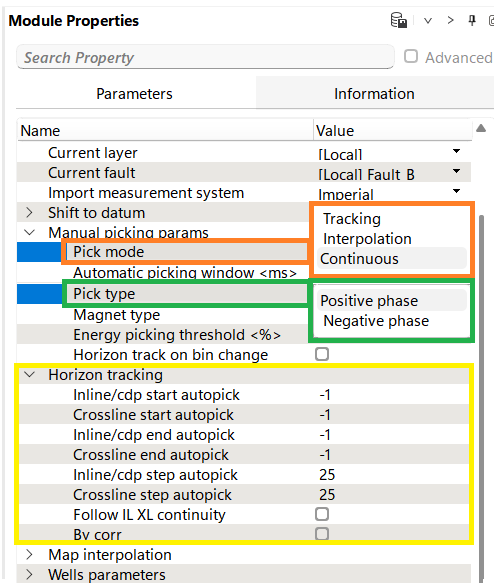
Pick Mode (highlighted in orange): Users can select between three modes - Tracking, Interpolation, Autopicking and Continuous, which define how the software traces and connects horizon picks across the data.
Automatic Picking Window: This parameter defines the time or depth window for automatic horizon picking.
Pick Type (highlighted in green): Allows users to choose between picking on the Positive Phase or Negative Phase
Horizon Tracking (highlighted in yellow): These options control the automatic picking for inline and crossline sections. Users can specify start and end points, step sizes, and choose to follow continuity along the inline or crossline for efficient horizon tracking.
Below are the pick modes available for horizon picking:
1.Tracking: Automatically follows seismic events across the section based on the selected pick phase. Click the left mouse button, in the example the click points are highlighted with black circles, to finish, click the left mouse button twice
Notes
In tracking mode, the software automatically follows a seismic event based on amplitude and phase consistency. This is ideal when horizons are well-defined and exhibit minimal interruptions or distortions, such as in clear stratigraphic layers. It reduces the amount of manual picking and ensures consistent interpretation over large sections.

To delete a segment of interpretation, press and hold the right mouse button and select the area to delete. You can also immediately proceed to editing and put new points on these segments.
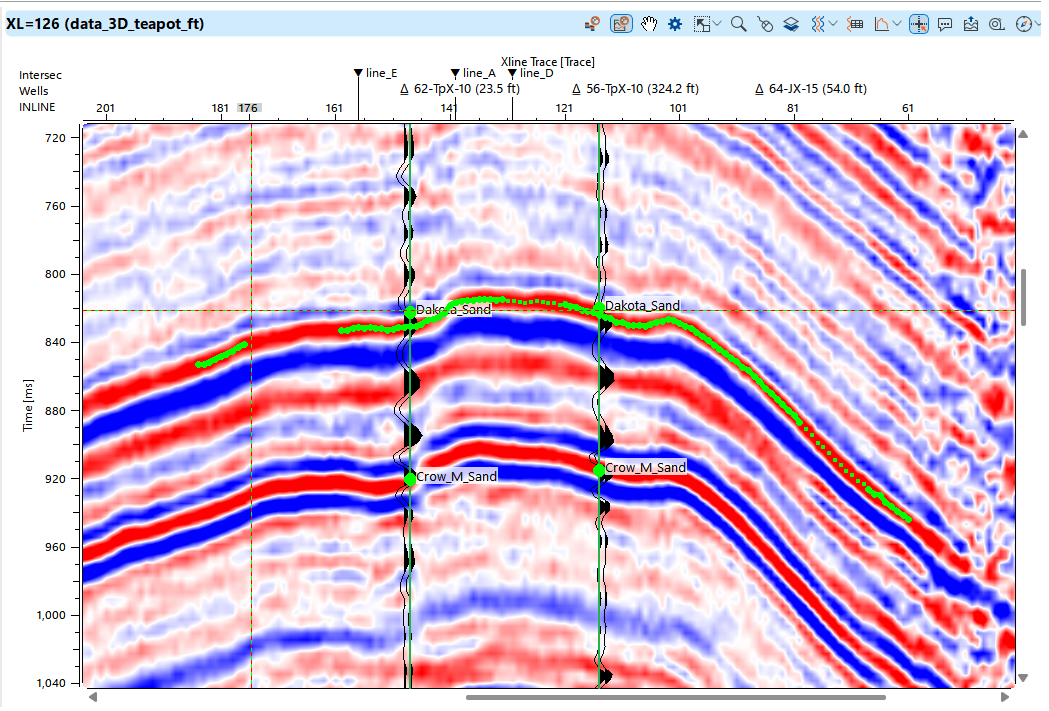
In the Tracking mode, when transitioning to another section, the Track Horizon function from Horizons Bar can be utilized. g-Space will automatically correlate the horizon on the newly opened section.
The user also has access to the autotracking function for the whole volume in the Horizons Bar.

2.Interpolation: Picks points at intervals and interpolates between them to define the horizon.
Notes
Interpolation mode is useful when seismic horizons are partially obscured, interrupted by faults, or have variable continuity. The user selects key points along the horizon, and the software interpolates between these points to create a complete pick. This approach balances manual input with automatic interpretation, allowing for more flexibility in challenging areas with less-defined reflectors.
3.Continuous: Enables continuous manual picking across the section, allowing the user to define the horizon in real-time. The process looks like drawing on a seismic image.
Notes
Continuous mode is fully manual and allows the interpreter to continuously pick the horizon across the section. This mode is helpful when there are significant geological complexities, such as in areas with faulting, folding, or high noise levels, where automated tracking or interpolation might not perform accurately. The interpreter retains full control over the horizon pick, ensuring precision in difficult regions.

Hot keys for seismic section views:
Up and Down move the active section up and down in the set scale
Ctrl+Left and Ctrl+Right move crosslines with a set step
Ctrl+Up and Ctrl+Down move inlines with a set step
Or Page Up and Page Down buttons move both inlines and crosslines in the active view
During the horizon picking process, the horizon surface is updated in real-time within the map view.

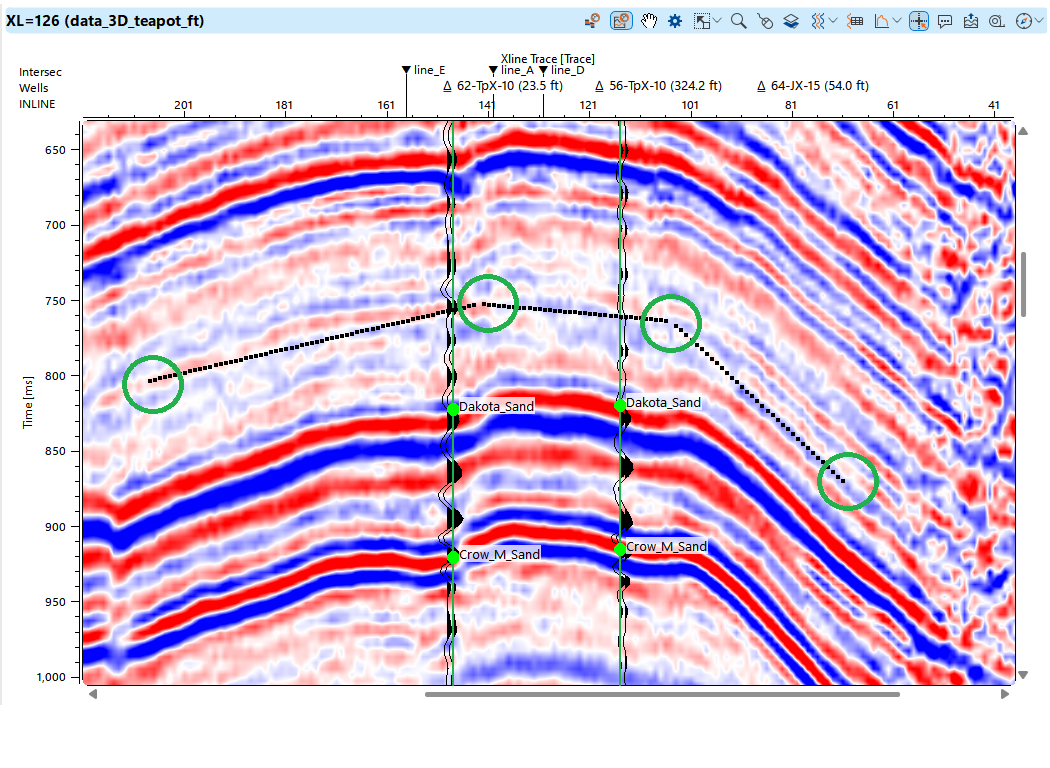
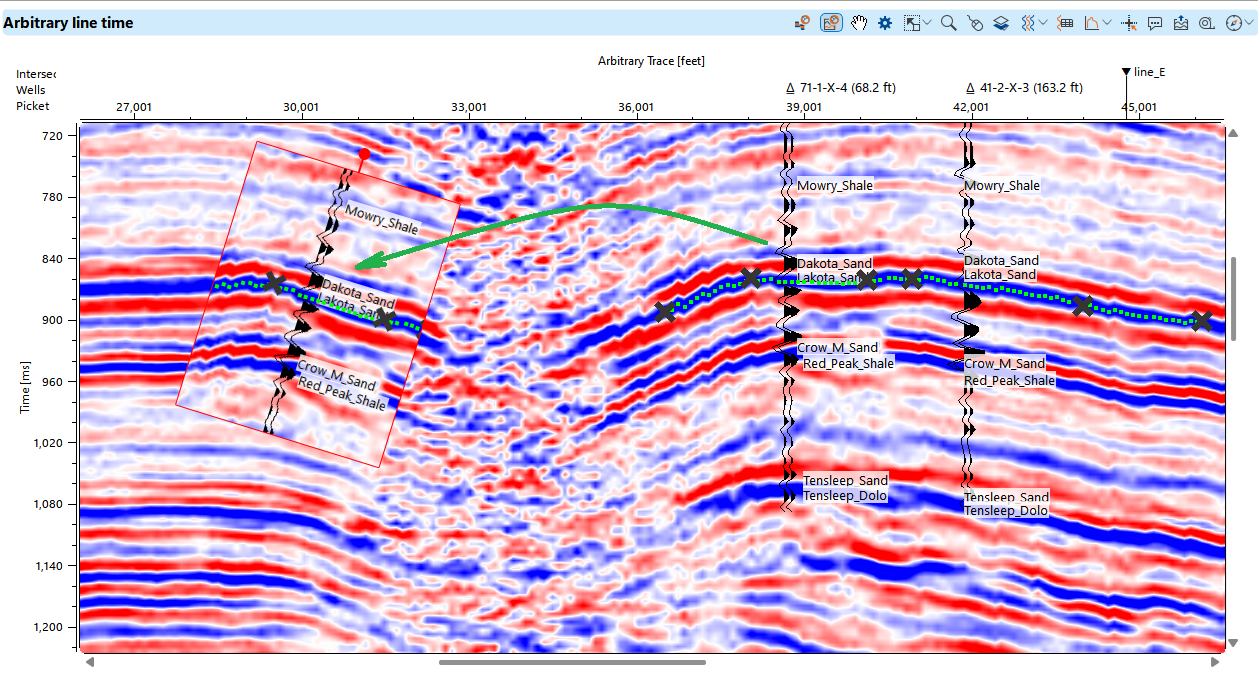
When interpreting seismic volume areas remote from wells, across fault blocks, or around geological features that disrupt reflecting horizons, the ghosted view tool in g-Space is particularly useful. This tool allows the user to take a screenshot of a specific interpretation, drag it to a new location, and overlay it on the current view, simplifying the horizon picking process.
Additionally, the tool enables rotation of the screenshot, making it adaptable to various structural alignments. This method is particularly effective in complex tectonic settings, ensuring more accurate seismic horizon correlation.
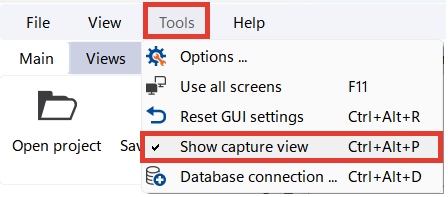
Open drop-down menu in Tools in Main bar and choose Show capture view or use hot keys Ctrl + Alt + P
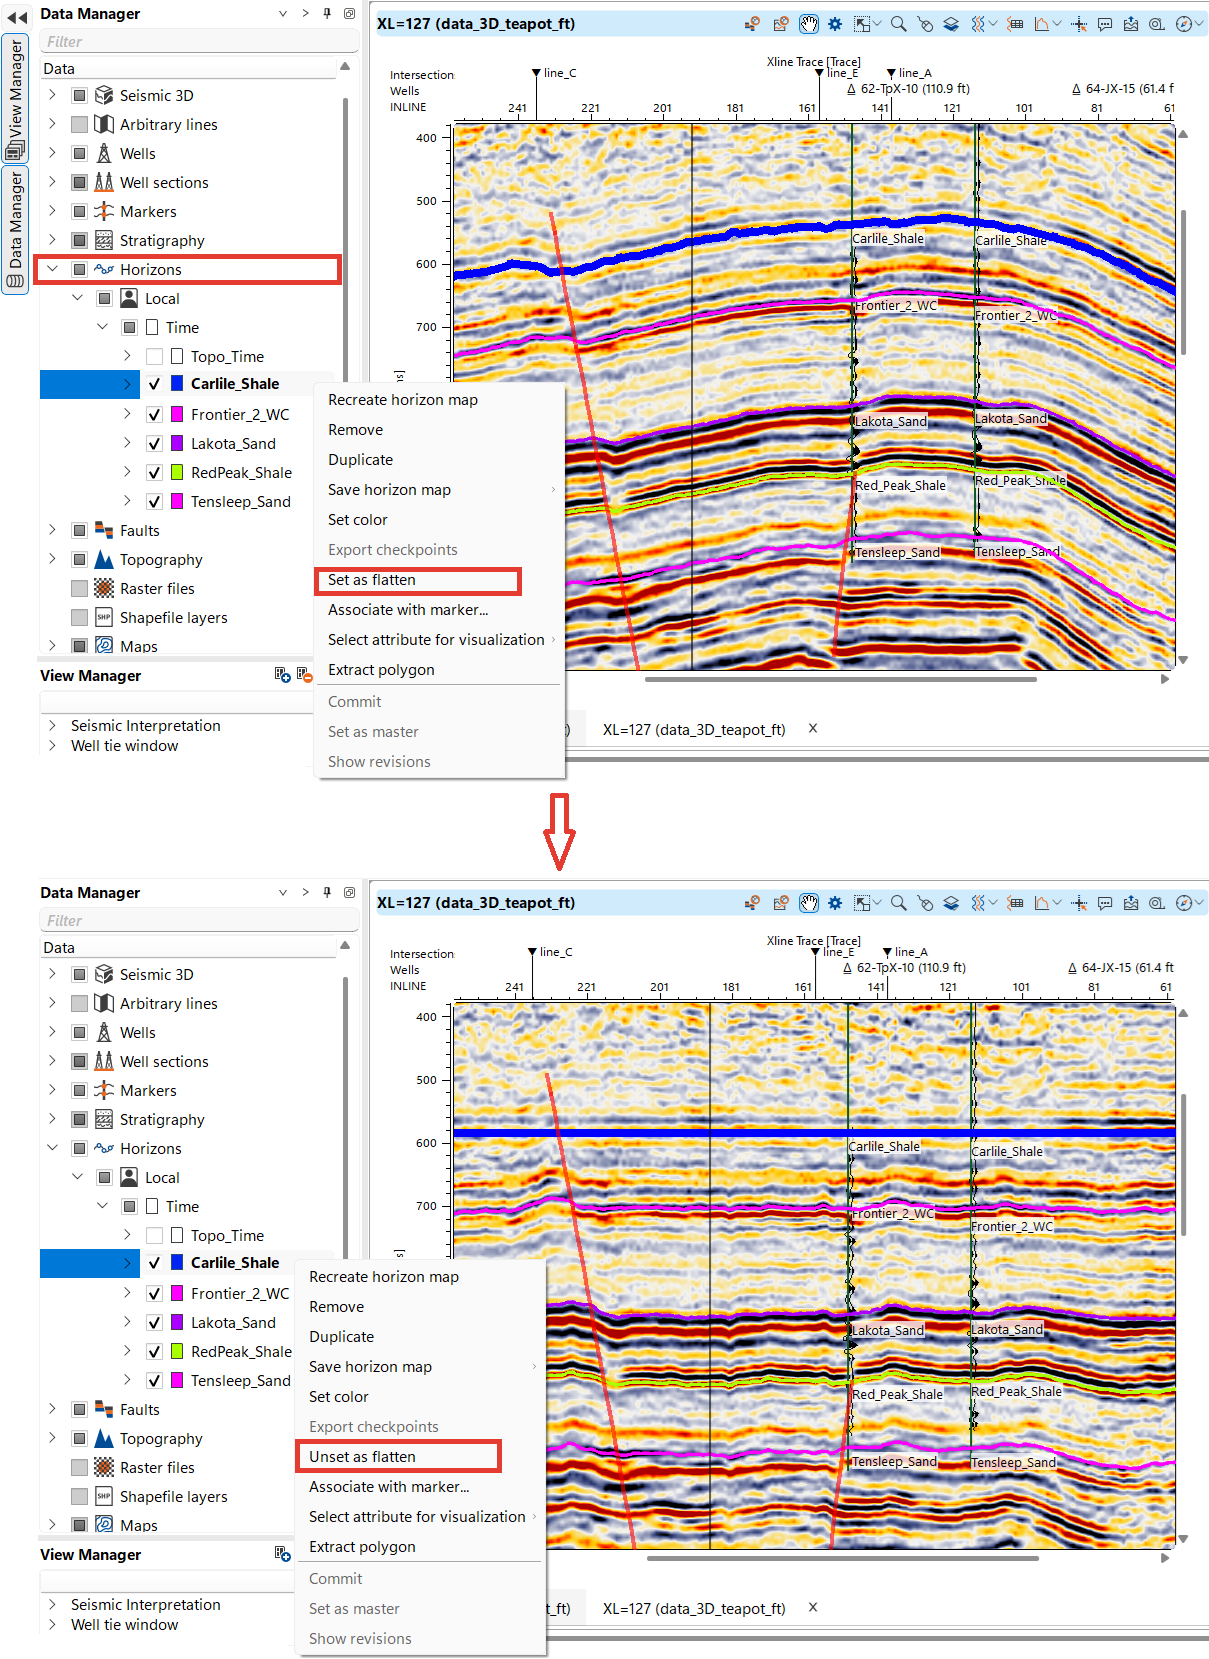
The Flatten Horizon tool can be very useful to effectively remove structural complexities and focus on stratigraphy.
To flatten a seismic section to a specific horizon, right-click on the horizon name and select Set as flatten from the drop-down menu. The seismic section will then be flattened to the selected horizon. To return to the normal view, repeat the steps and choose Unset as flatten.
The outcome of the interpretation consists of points, each associated with a specific set of attributes, Time in our case.

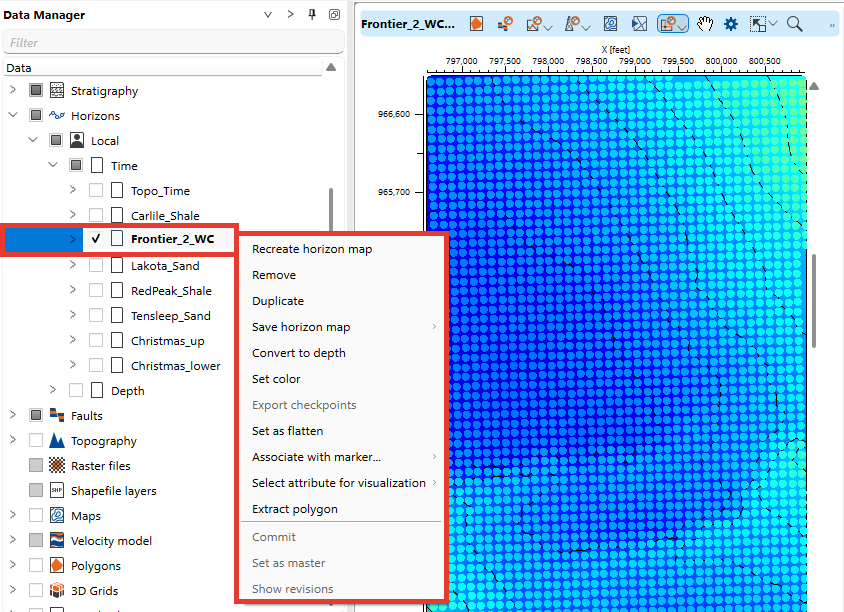
There is a drop down menu in Data manager for Horizons where user can create maps, flatten horizons, set colors, etc. At any point user can rebuild the map of the selected horizon.
For 3D visualization, g-Space offers a feature that allows time-domain data to be displayed within the 3D depth view using the current velocity model.
This is especially useful during interpretation, as it enables reviewing results in time without requiring full data conversion to the depth domain