Pine graph view
Pine graph view is a quality control tool designed specifically for evaluating and validating velocity models in geophysical analysis. This view provides a visual representation of velocity data across various depths or intervals, allowing users to assess the consistency and accuracy of the velocity model.
To create a Pine graph view go to the Views bar in the Ribbon bar, open the Graphs menu and click Pine graph:
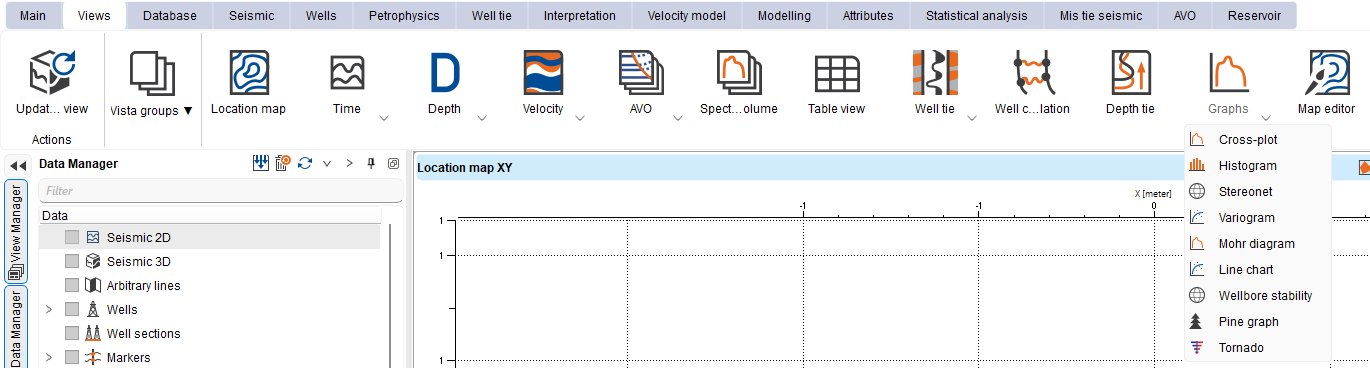
The newly created view will appear in the View manager in the active Workspase. User can place Pine graph view by dragging it to any workspace except pre-defined once (Seismic data and Well data).
Each point on this graph is a well marker. The x-axis shows the difference between velocity based depth and the actual marker depth. The y-axis shows the marker depth.
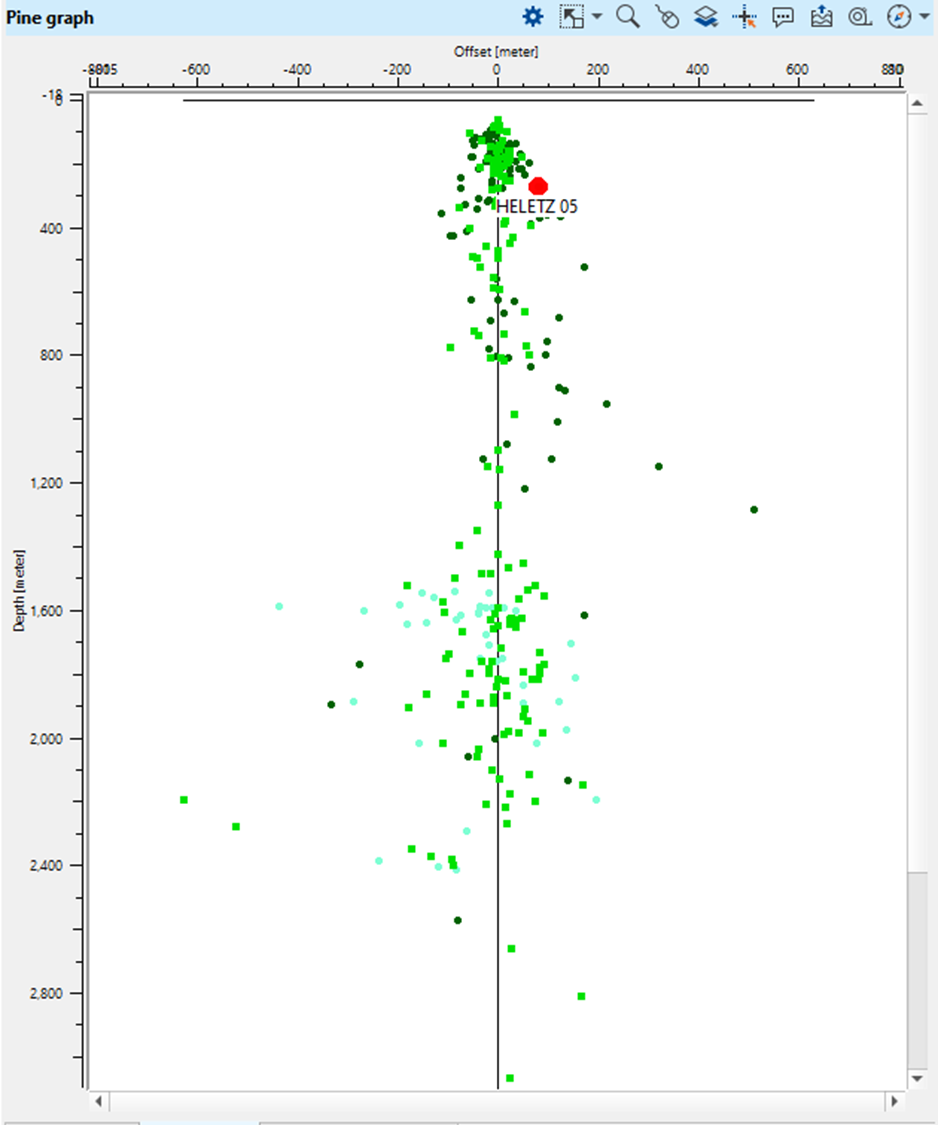
Right-click the graph to store it in the project: Save Pine graph to Data Manager... saves the graph as an object and Save Pine graph picture to Data Manager... saves a static picture of the current view. Both commands ask for a Name and place the new item in the Pine graph folder of the Statistics category of the Data manager. Saving the graph as an object requires an active velocity model: the saved object refers to that model, and Open makes it current again and redraws the graph. See Statistical analysis for the commands shared by all saved graphs.
To define the object visibility stile go to the Visual Settings by pressing  in the view functional panel or find it in the panel sets.
Functional panel allows user to perform the following actions:
open Visual Settings panel
 adjust view area to all visible objects
 adjust horizontal scale
 adjust vertical scale
 set/unset zoomable
 set control item
 add Object
 enable mouse tracker
 enable tool tip
 export picture
 ruler tool
 show compass
 show minimap
 show scale bar