LAS Well Log Viewing
This topic shows how to load LAS well logs in g-Viewer, compare wells in the correlation view and export the logs.
g-Viewer reads LAS 1.2 and 2.0 files (wrapped and unwrapped) and writes LAS 2.0. You can view the header and curves of each well, show the curves in tracks, compare several wells side by side and export the logs. Logs are not displayed on seismic sections; wells can be shown with seismic data in the 3D view (see LAS log and correlation views).
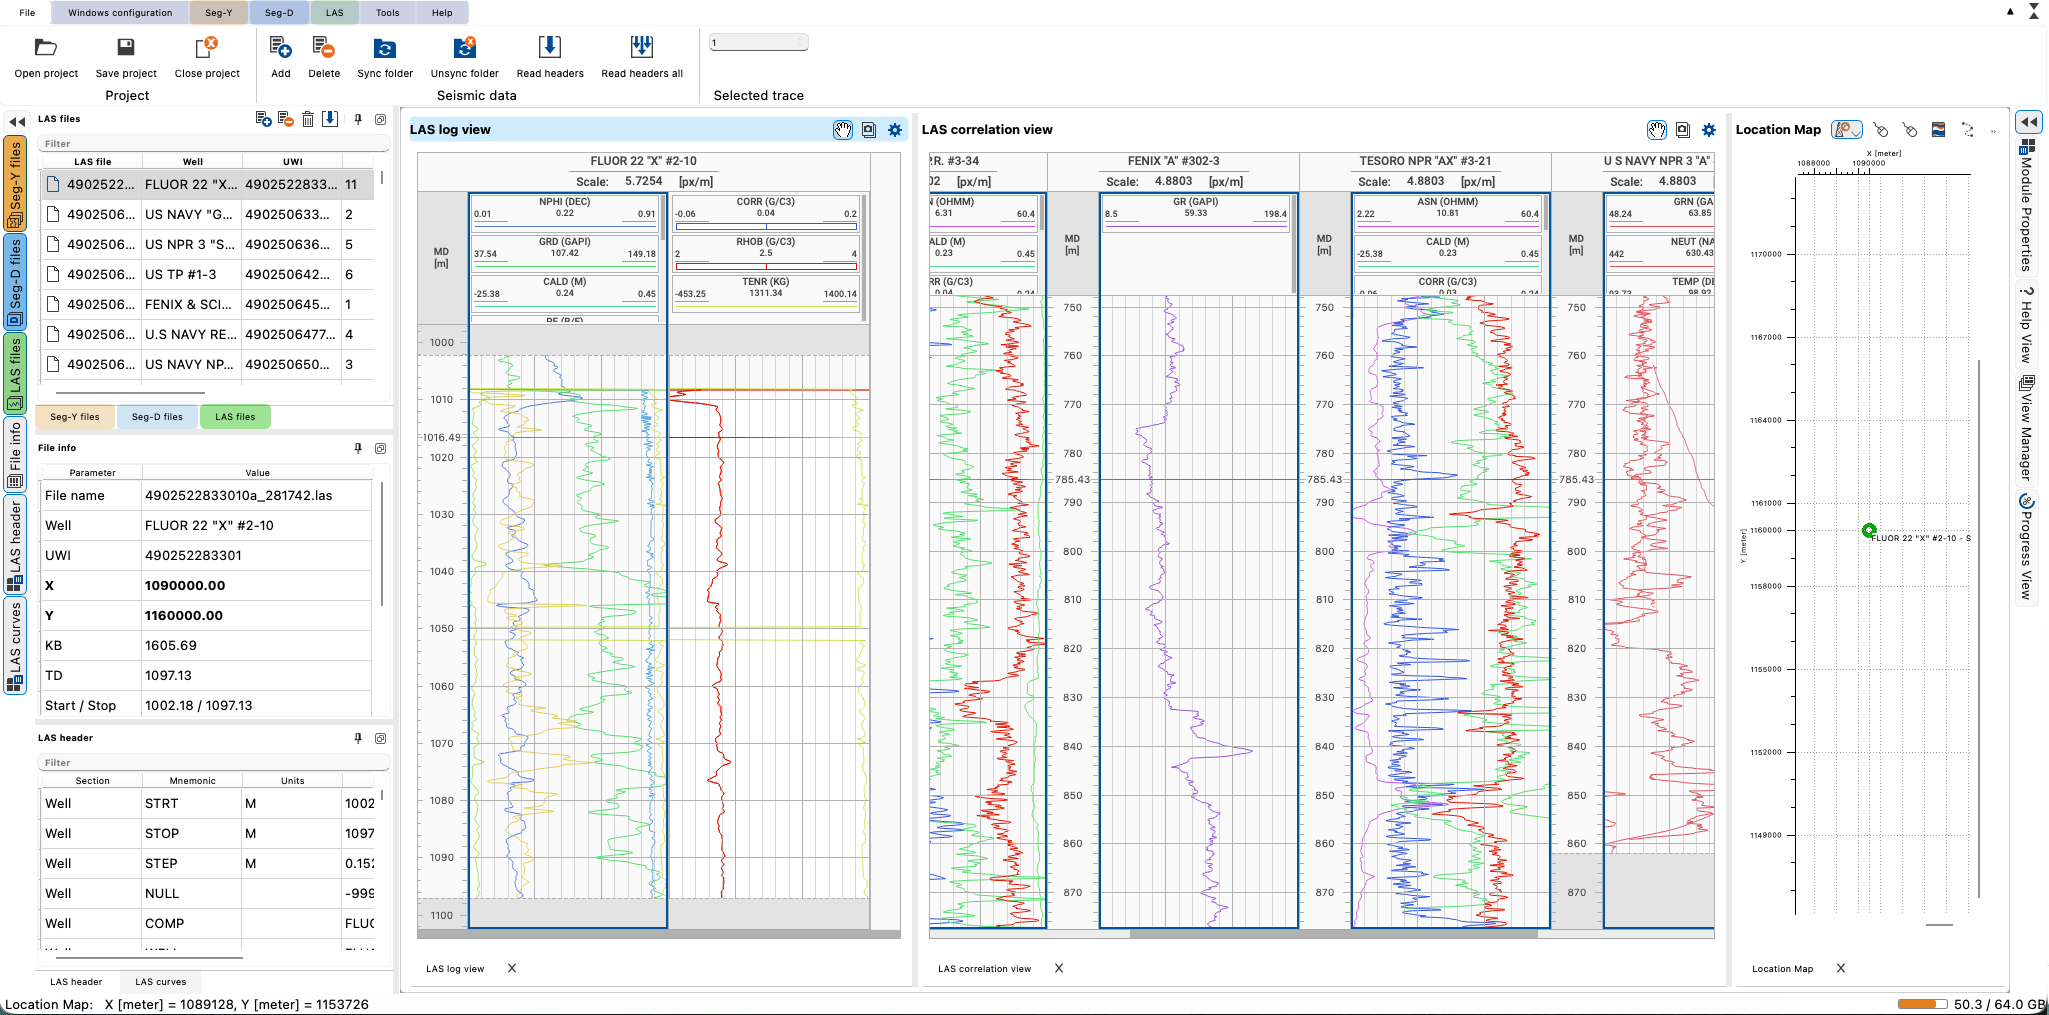
LAS files open in g-Viewer: the LAS files, File info and LAS header panels, the LAS log view of the selected well, the LAS correlation view with several wells and the Location Map:
Step-by-step
- Load the files: Load LAS files or Log loading wizard on the LAS tab, or drop *.las files onto g-Viewer.
- Click a file in the LAS files panel. g-Viewer switches to the LAS mode and shows the well in the LAS log view, its header in the LAS header panel and its curves in the LAS curves panel.
- If the wells have no coordinates, enter X and Y in File info or import them with Headers > Import. Use Show on map to check the position on the Location Map.
- Select the wells to compare and choose Add to LAS correlation view in the context menu.
- Optionally set Log mode = Curves and pick a curve to compare one curve across all wells.
- Use Colorize for consistent curve colours, and save the layout as a template.
Exporting
- Export LAS files > LAS format (*.las) or Excel format (*.xlsx) - the selected files (or the current one), one file each, into a folder you choose.
- Export LAS files > Resampled LAS - the curves of the current well resampled to one depth step.
- Headers > Export - the well headers to a TSV or text file.
- Export LAS / Export LAS to Excel in the LAS plug-in group of the Tools tab.
LAS settings
The LAS group in Module Properties holds Look for API within filename, Depth to time velocity (default 2895.6), Seismic datum, Curve step (3D), Curve for 3D well color, Curve for 3D well width and Well-log template.
See Also