Import markers steps:
Step 1: Locating the file
Go to Ribbon -> Wells bar and click on Import wells markers

Accepted file formats: *.marks2, *.txt and *.csv.
There are two options to load markers:
Option 1. Import well markers from MD format. Required columns:
•UWI, MD, Marker Name
Option 2. Import well markers from XY format. Required columns:
•UWI, X, Y, Marker Name
Optional columns such as TVD, Age, TVDSS and Type can also be mapped when present in the file.
g-Space will launch Import wells workspace with pre-set Views where you can load and visually check loaded data.
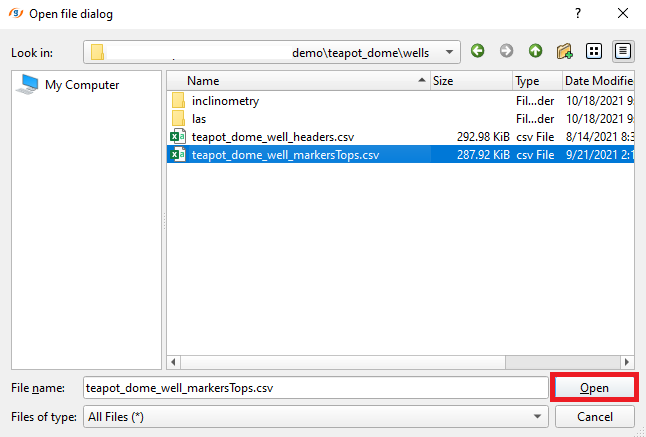
In the appeared dialog box locate the file and click open
Step 2: Setting up reading parameters
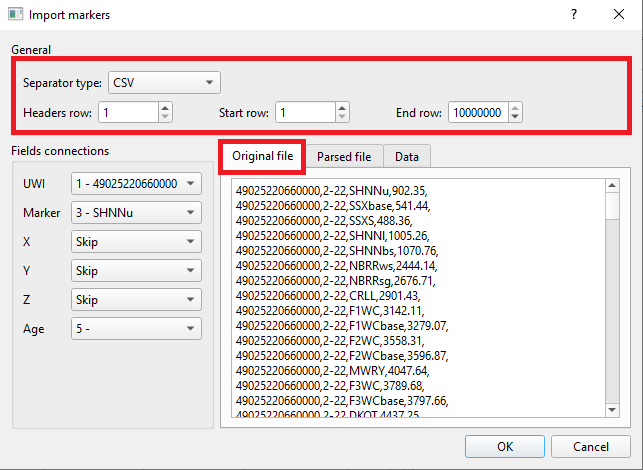
g-Space will open file preview dialog were you can set the loading parameters such as: Separator type, Headers row, Start row, End row.
In Original file tab you will see how files looks like and adjust loading parameters accordingly.
If you have chosen option 1 - loading with parameters MD, UWI the following file preview dialog will appear

Or if you've chosen option 2 - loading with parameters UWI, X, Y, Marker Name the following file preview dialog will appear
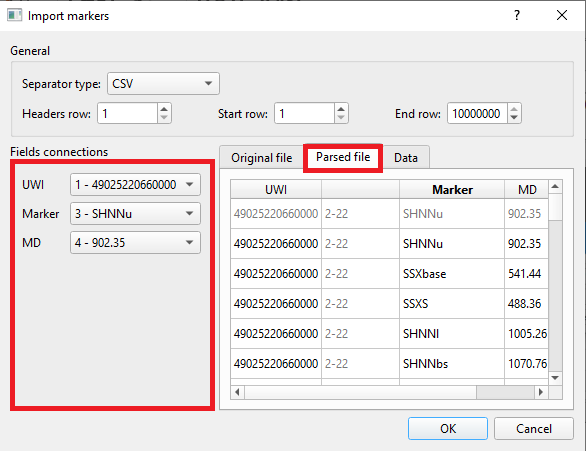
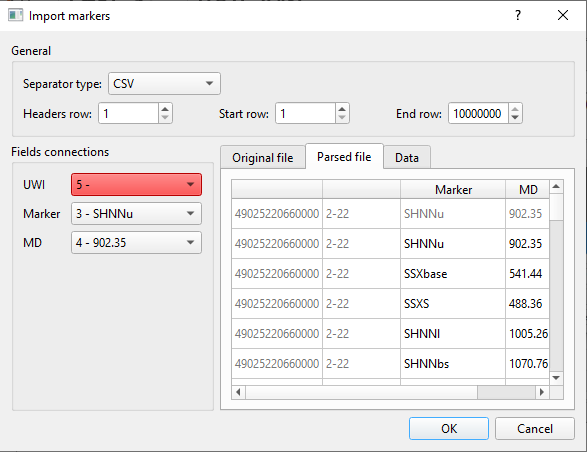
Step 3: Checking reading parameters
Click on Parsed file tab to check if you set reading parameters correctly and also you can decide which columns you want to add or skip
Option 1:
Option 2:
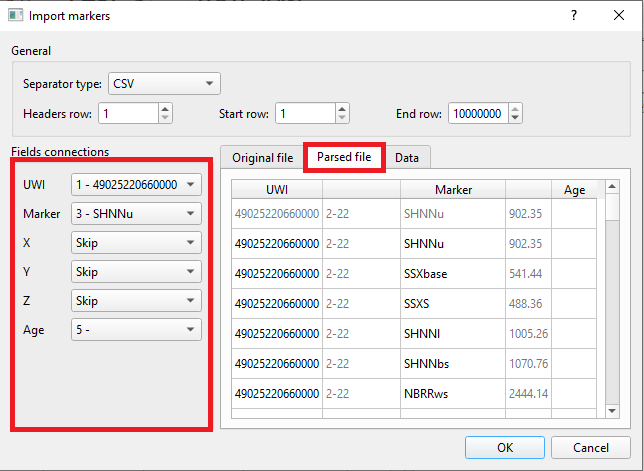
In the Field connections check the markers parameters. If you have files with additional information you can chose skip unnecessary columns from drop-down box
Note
If some of the fields are colored RED, it means that data doesn't have required type or reading parameters were set incorrectly
For more information about markers format supporting by g-Space refer to Well Data Formats
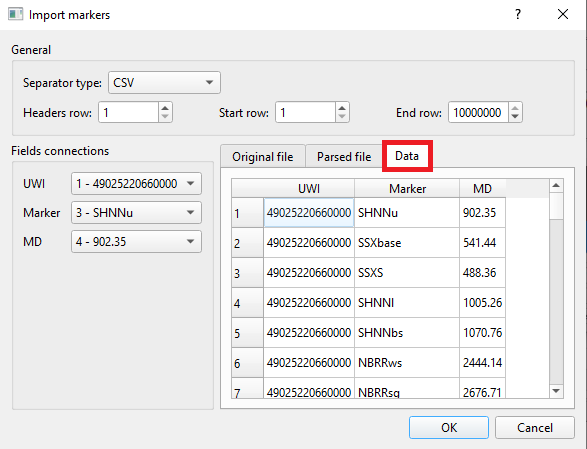
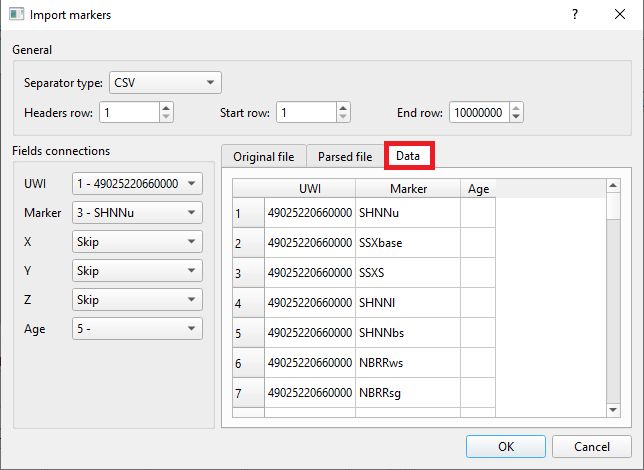
Step 4. Checking the loading settings
In Data tab you can see if all settings were done correctly and all necessary columns were included. After that click OK.
Option 1:
Option 2:
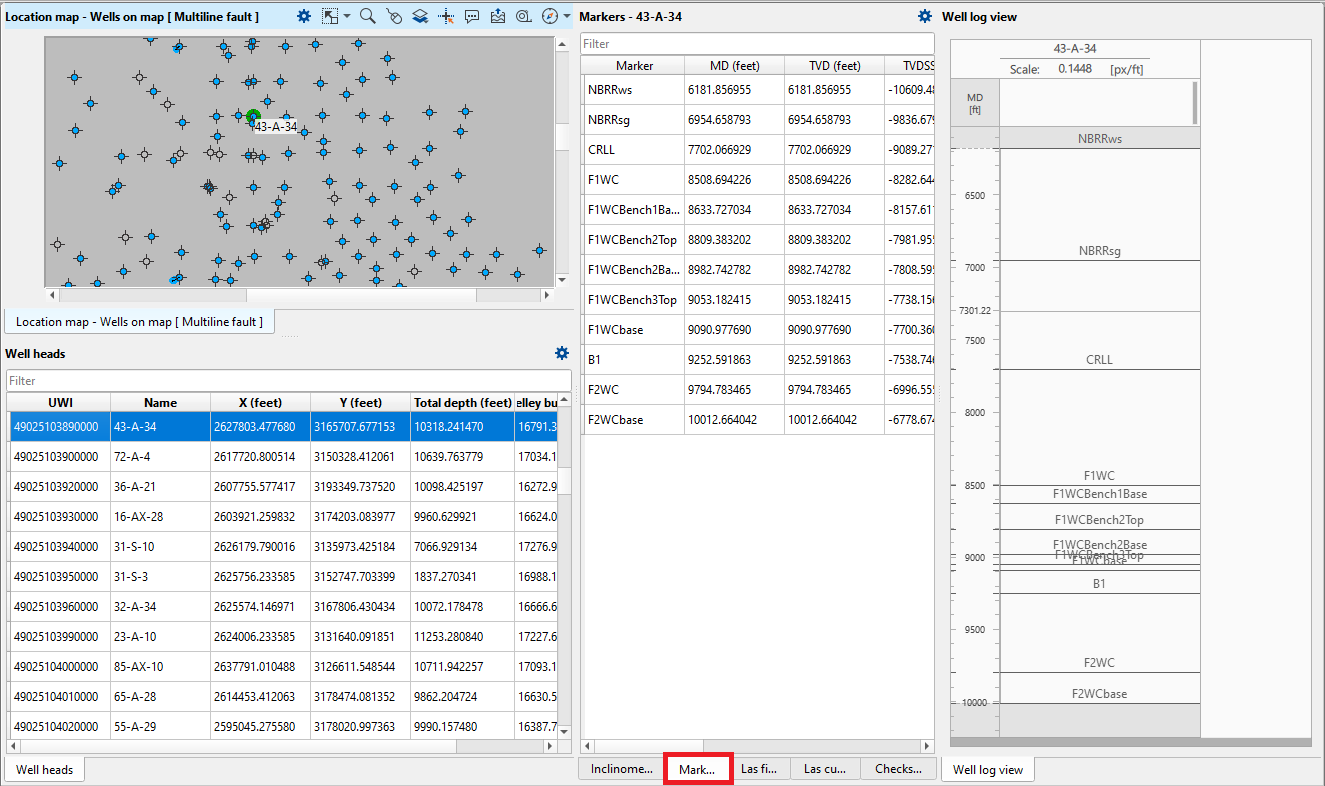
Step 5: Controlling loaded data
To check the data click on map view or in table below map - all loaded information will appear in the table Markers and you can check them on well log preview
For more information about markers format please refer to Well Data Formats