Seismic 3D
Seismic 3D - contains any type of seismic 3D data such as post-stack, pre-stack, velocity, attributes etc.
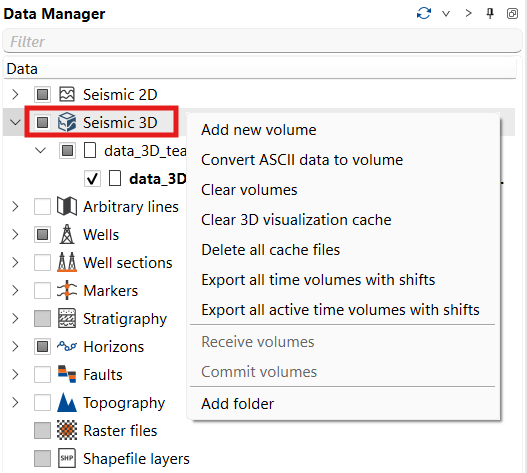
Right mouse button on the icon allows to:
- Add new volume
- Convert ASCII data to volume
- Clear volumes
- Clear 3D visualization cache
- Delete all cache files
- Export all time volumes with shifts
- Export all active time volumes with shifts
- Link missing seismic
- Sort by name
- Add folder
- Receive volumes
- Commit volumes
If the seismic files were moved to another folder, select Link missing seismic and choose the new folder in Select folder to search for missing seismic files. Select Include subfolders, which is cleared by default, to search the whole folder tree. Only the seismic files that are currently missing are relinked, matched by file name, and 2D lines, 3D volumes and pre-stack gathers are all covered in one run.
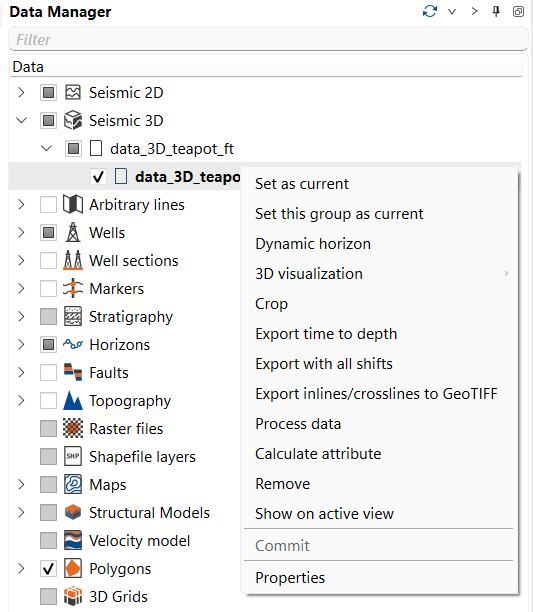
To crop a seismic volume, right-click it under Seismic 3D and select Crop.
- In Output filename, select the file for the cropped volume. It must be a different file from the volume you are cropping.
- Select the check box of each part of the crop you want to apply. When the wizard opens, the Inline, Crossline and Time (Depth for a depth volume) groups are already filled in with the full range of the selected volume and their check boxes are cleared.
- Set the Start, End and Step values of the parts you selected. Start and End accept only values inside the range the volume covers - a lower or higher value, whether typed or pasted, is corrected to the nearest allowed value, so a crop outside the data can no longer be requested. Step is not restricted.
- Set the remaining crop parameters, then select Run to crop the volume immediately, or Save to workflow to add a Crop 3D seismic volume task to the current workflow without running it; running the workflow later performs the crop with those parameters.
The cropped volume is added under Seismic 3D. Cropping again to the same output file replaces that entry with the new result.
If the output file is the same as the volume being cropped, the crop stops with Output file must differ from the seismic file being cropped and the source volume is left unchanged.
When you open the saved task from Workflows, its parameters are restored - stored Start and End values that lie outside the range of the current volume are adjusted into it; select Save to update the task.
To extract geobodies from a seismic volume, right-click it under Seismic 3D and select Extract geobodies... to open the Extract geobodies wizard. Set the Cutoff values, the optional Inline range, Crossline range and Time range (Depth range for a depth volume) and the Bodies settings, then select Save to workflow to add an Extract geobodies task to the current workflow without running it; running the workflow later extracts the bodies from the same volume with those parameters. Select Run to extract them immediately - the new bodies are added under Geo-bodies. When you open the saved task from Workflows, its parameters are restored; select Save to update the task.
When the wizard opens, the Cutoff thresholds are already filled in with values derived from the amplitudes of the selected volume, so the fields start from a range that suits that data. Changing Mode recalculates them: Threshold / low is placed near the high end of the amplitude range for Above and Between and near the low end for Below, while High threshold stays at the upper end of the range. These values are a starting point - overwrite them with the thresholds that describe the bodies you are looking for before you run the extraction or save the task.
The extraction reads and labels only the part of the volume selected by Inline range and Crossline range, so restricting those ranges lowers the memory a run needs, and restricting Time range (Depth range for a depth volume) reduces the labelled part further. A stricter Cutoff on its own does not, because the selected part of the volume is still read and labelled in full.
Before reading, and again once the volume has been labelled, the run compares the memory it needs with the memory that is currently free and stops with a message naming both amounts instead of using up all the memory. When it stops before reading, nothing is added under Geo-bodies. A run also stops when the cutoff selects one very large connected region, or when memory runs low while the meshes are built; in that last case the bodies already created stay in the project and the remaining ones are not built.
These messages suggest the same remedies - a stricter cutoff threshold, a higher Min voxels per body, or a smaller Inline range, Crossline range or Time range. An Inline range or Crossline range that contains no traces stops the run with a message of its own.