Lithology
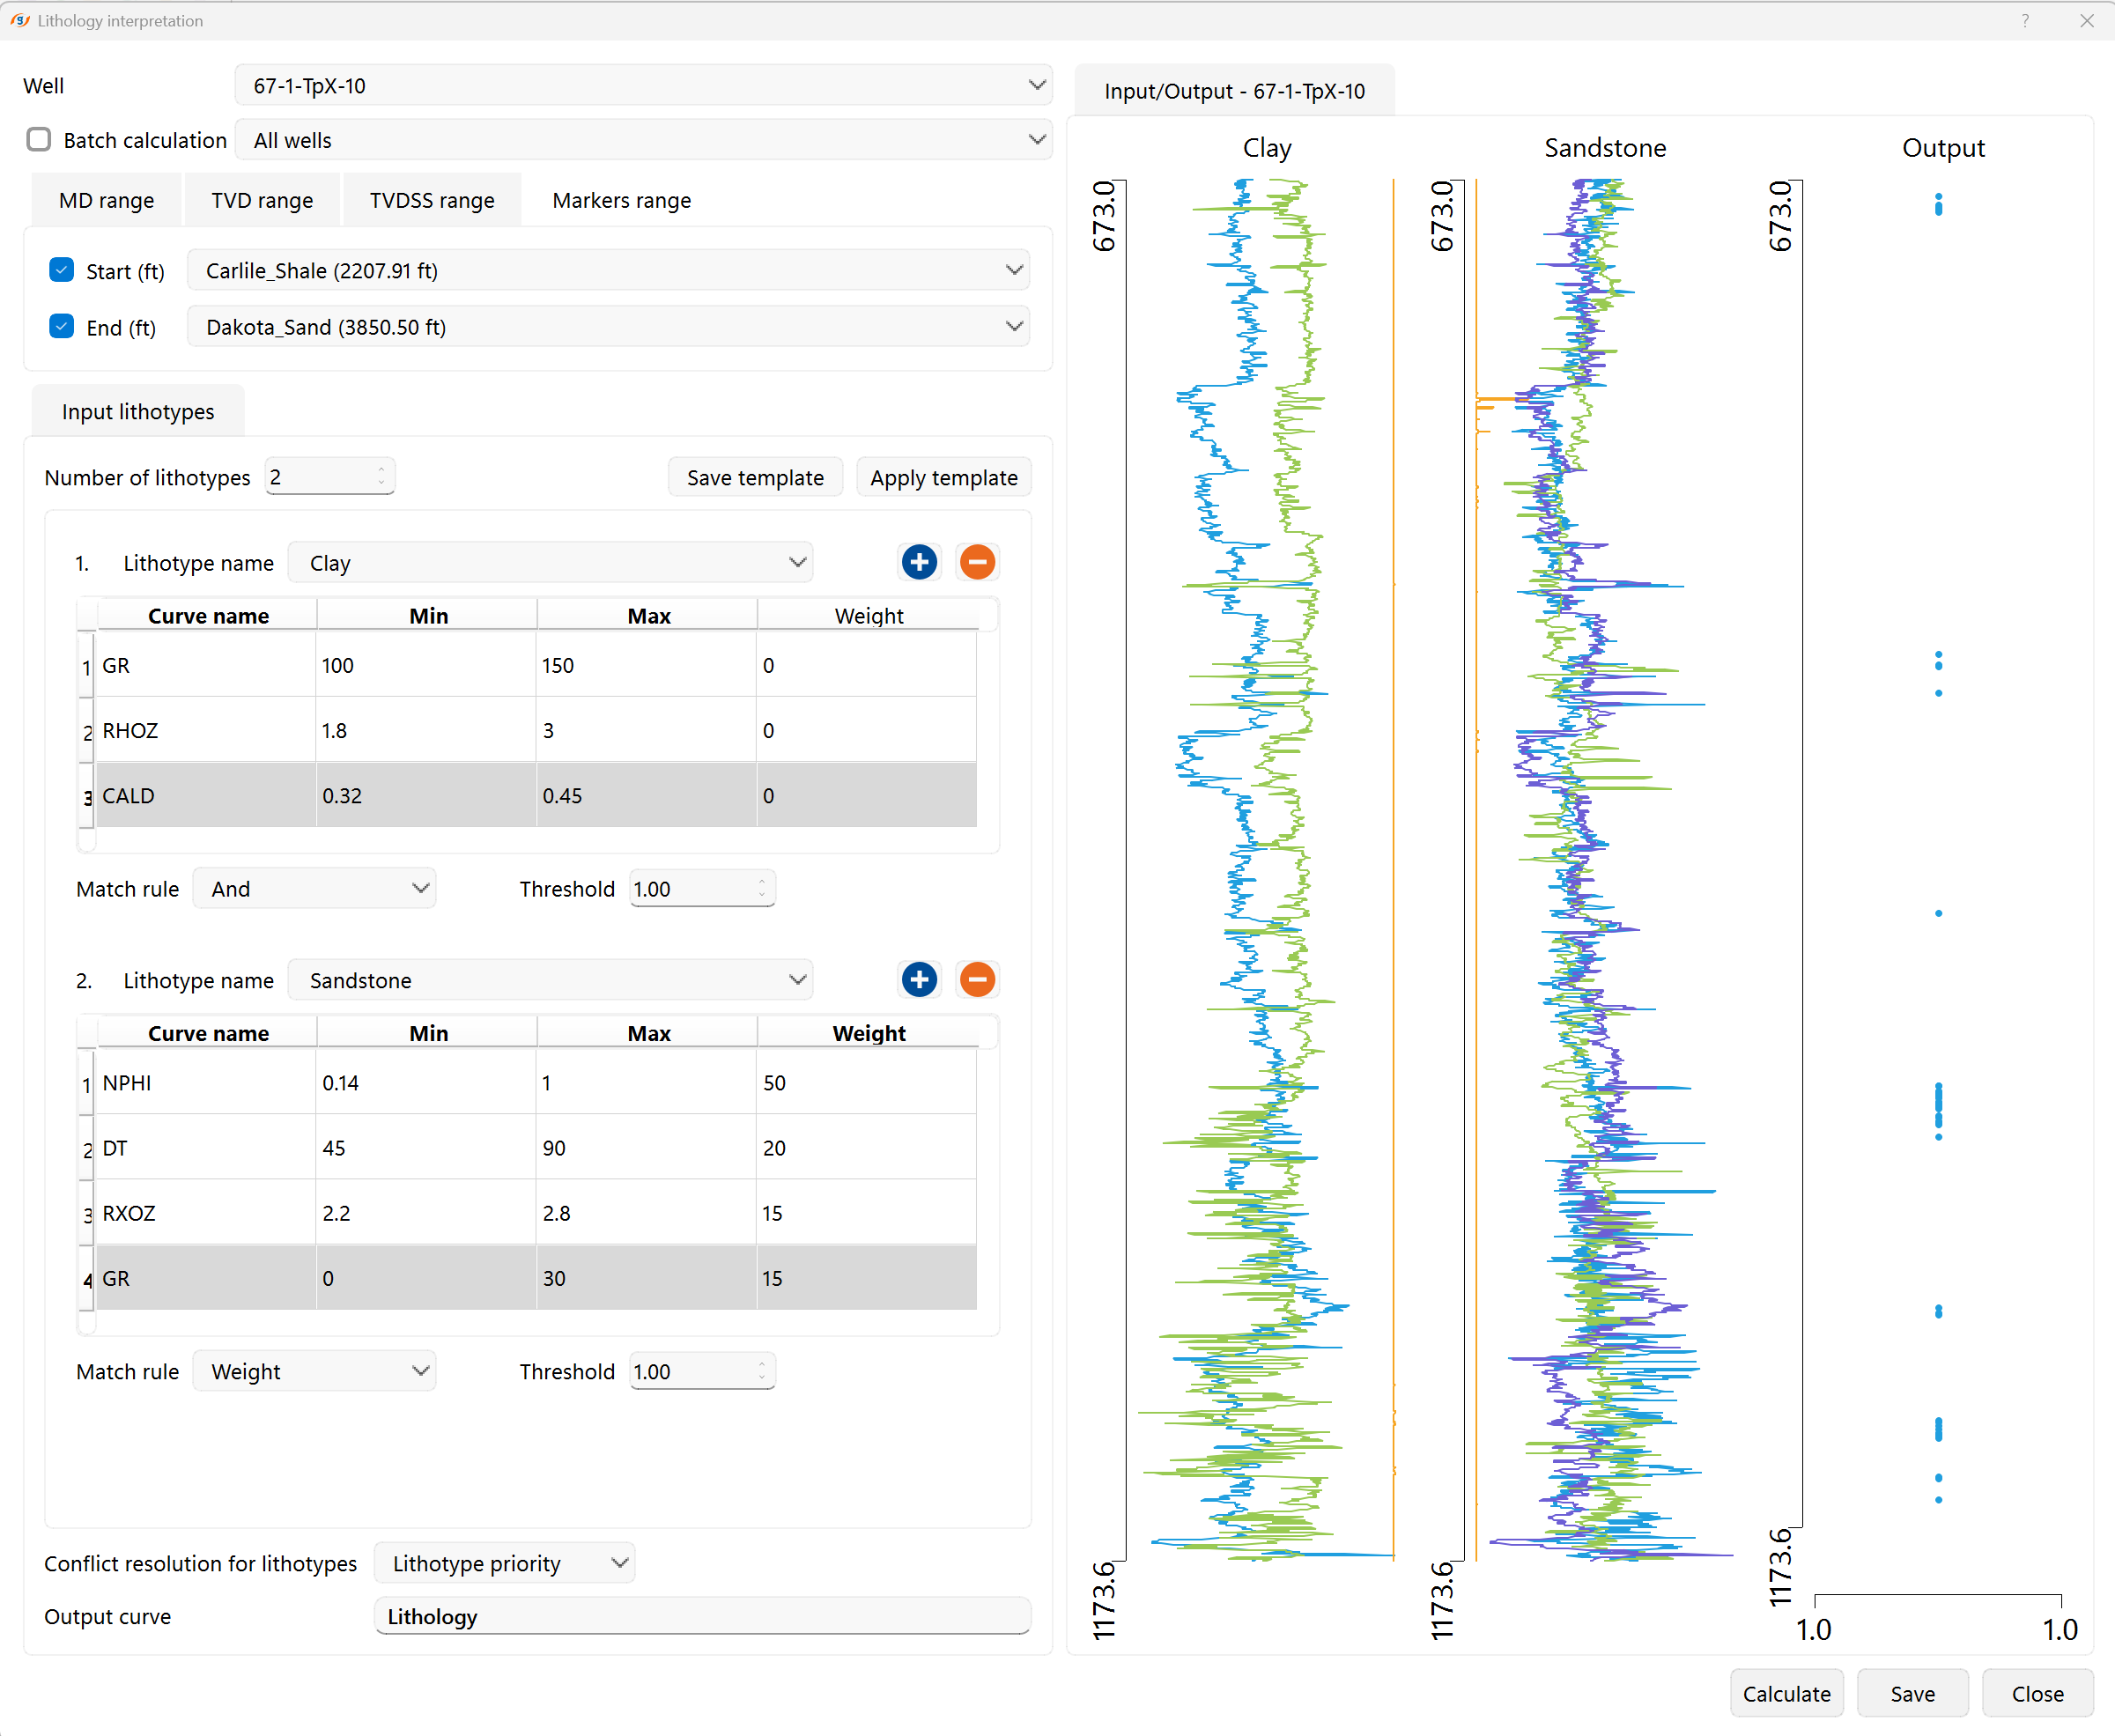
The Lithology interpretation tool assigns a lithotype code to each sample in the selected interval of a well by comparing the input well logs against user-defined value ranges. The result is a single lithology curve where each sample carries the code of the dominant lithotype (for example sand, shale, limestone).
The tool can be applied to a single well or in batch mode, allowing users to process all wells or selected wells from the Data Manager.
Open the Petrophysics ribbon bar and click Lithology in the Lithology group. Select the target well (or enable Batch calculation to process a well group), then define lithotypes and run the calculation.

Input Parameters
- Well selection: Choose one well or enable Batch calculation to process multiple wells or a well group from the Data Manager.
- Depth filter: Define the interpretation interval using MD range, TVD range, TVDSS range, Markers range or Zones range. The interval area opens compact, showing only the fields of the tab in front of it; drag the horizontal border below it to make the area taller when a long marker or zone list needs more room, and back down to give the released space to the Input lithotypes block below. The height you set is restored the next time you open the wizard. On the Zones range tab, choose one or more zones from a zone set. If more than one eligible zone set is available, choose it from Zone set; use Search zone to filter the list and Select all to select or clear the visible rows. The selection applies only while this tab is active. The selected lithotypes, thresholds, match rules and conflict resolution are applied inside the union of the valid selected intervals; output stays undefined elsewhere, and the preview shades each valid interval in its zone color. In batch mode, boundaries are resolved separately for each well. A missing marker dataset or boundary, an inverted interval, or an interval without log samples is skipped for that well and named in the report while other valid zones and wells continue.
- Number of lithotypes: Defines how many lithotype rows appear in the Input lithotypes list.
- Lithotype name: Select the lithotype label from the predefined lithology map.
- Input curves: All available curves from the current project can be selected for lithology identification.
- Curve thresholds: Define minimum and/or maximum values for each selected curve.
- Match rule: Defines how input curves are evaluated for a lithotype.
- Threshold: Used only in Weight mode. Defines the minimum accumulated score required to assign the lithotype.
- Conflict resolution for lithotypes: Defines how overlapping lithotype matches are handled.
- Output curve: Name of the resulting lithology curve. Default is Lithology.
Templates and history
The wizard stores previously used lithotype definitions so they can be reapplied without re-entry:
- Save template — stores the current lithotype list under a user-supplied name for reuse in other projects or wells.
- Apply template — loads a saved template or a recent entry from the wizard's history into the current session.
Running and saving to Workflow
The wizard has a standard row of buttons along the bottom of the dialog:
- Save to workflow — adds the wizard, together with all of its current settings (selected well or batch selection, active depth filter, selected zone set and zones, lithotype definitions with their input curves, thresholds and match rules, conflict resolution mode and output curve name), to the project Workflow as a task that can be re-run later.
- Run — performs the interpretation with the current settings and updates the preview (this button replaces the former Calculate button).
- Save — stores the resulting lithology curve in the well.
- Close — closes the wizard.
When a saved task is reopened from the Workflow panel, the wizard restores its stored settings so they can be reviewed, edited and saved back to the task. For a task saved from Zones range, the tab opens automatically when at least one saved zone is still available, with all available saved zones selected; unavailable zones are removed from the setup and reported. In this edit-from-workflow mode the bottom row shows Save and Cancel instead.
Match Rules
AND
All selected curves must satisfy their conditions for the lithotype to be assigned.
Algorithm
- Evaluate all selected curves.
- Compare curve values against Min/Max thresholds.
- If all curves match:
- If at least one curve fails:
OR
At least one selected curve must satisfy its condition for the lithotype to be assigned.
Algorithm
- Evaluate all selected curves.
- If any curve matches:
- If no curves match:
Method Priority
Curves are evaluated in user-defined order. The first matching curve defines the lithotype.
Algorithm
- Evaluate curves from top to bottom.
- If the current curve matches:
- If the curve fails:
- Missing curves are skipped.
- If no curves match:
Curve availability behavior
|
Curve availability |
Behavior |
|
All curves available |
Evaluate in order |
|
Some curves missing |
Skip missing curves |
|
All curves missing |
Lithotype becomes Undefined |
Weight
Each curve contributes a partial score toward lithotype identification.
Core conditions
- All weights must sum to 1.0.
- Only matched curves contribute their weights.
- The final score is compared against the Threshold value.
Algorithm
- Evaluate all selected curves.
- Add weights of matched curves.
- Calculate the total score.
- Compare the score against Threshold.
- If score ≥ Threshold:
- If score < Threshold:
|
Curve |
Weight |
Matched |
|
GR |
0.2 |
Yes |
|
Vshale |
0.3 |
No |
|
Porosity |
0.5 |
Yes |
Conflict Resolution for Lithotypes
When several lithotypes match the same depth sample, the wizard resolves the conflict using one of the following modes.
Lithotype priority
The lithotype higher in the lithotype list has higher priority.
Algorithm
- Evaluate all lithotypes.
- If multiple lithotypes match:
Undefined
If multiple lithotypes match:
- the sample is written as Undefined.
This mode is useful for manual review and interpretation refinement.
Displaying lithology in the Well Correlation view
In the Well correlation view, right-click the curve header, open Curve Settings and set the Curve Type to Lithology. The curve menu then offers a Lithology Map action for assigning a color and fill pattern to each lithology class (for example clay, shale, sandstone, limestone, dolomite). See Working with Palettes for details.
See Also